

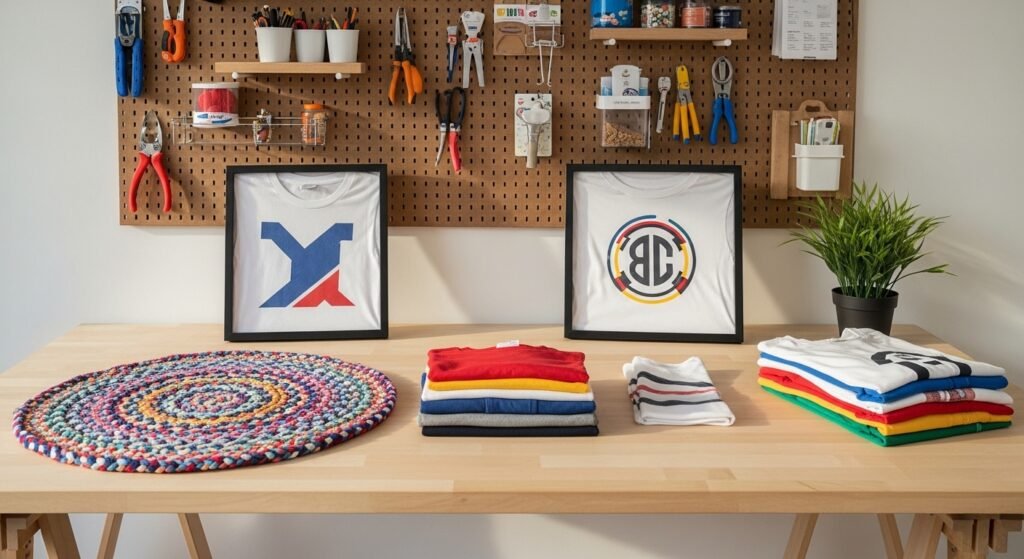
My friend walked into my apartment last month and said "this looks like a real adult lives here." Highest compliment I have ever received. I did not buy a single new sofa. I spent afternoons turning a pile of old tees into pillows, rugs, and gifts, and the space finally felt put together. These projects are the ones I actually make when I have an hour and a heap of shirts.
These projects lean casual-boho with a practical streak. Most projects are under $20, with a few small splurges for tools or quality thread. They work for bedrooms, living rooms, kid spaces, and a lot of the pet stuff lives in the mudroom or entry.
No-Sew Side Panel Insert To Fix Tight Tees
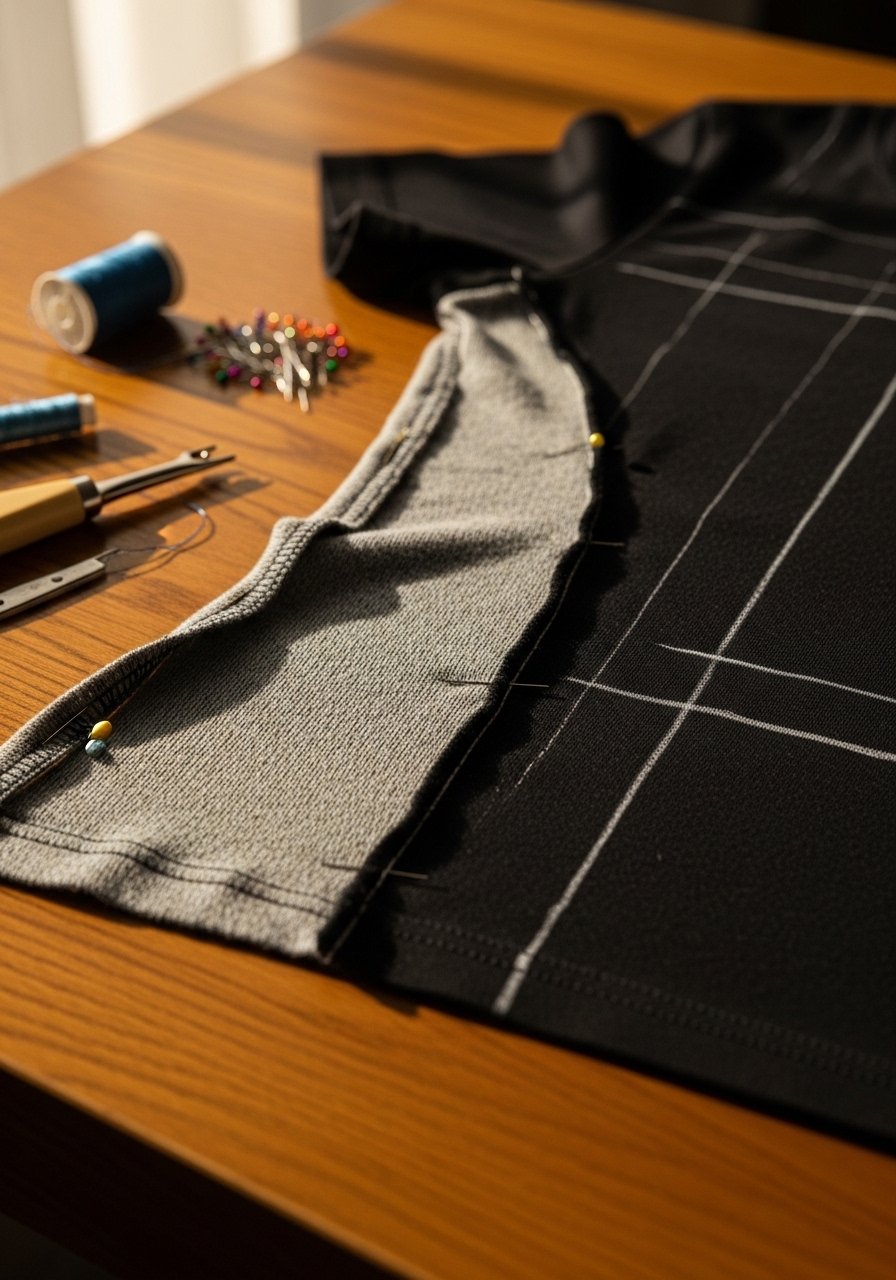
Most people try to shrink a shirt or force it over their head and then toss it. Cut the side seams fully from hem to underarm, then insert a 9.5-inch wide panel pieced from scraps. Turn the tee inside out before pinning new panels right sides together so seams stay hidden. For no-sew, use iron-on hem tape twice along the seam edge to lock it in place. I used iron-on hem tape when I rescued a concert tee and now it hangs like a lived-in favorite. Common mistake, mark with chalk first so you do not cut the wrong side. Iron-on hem tape is the tool I reach for.
Layered Boho Sleeves For a Fitted Tee
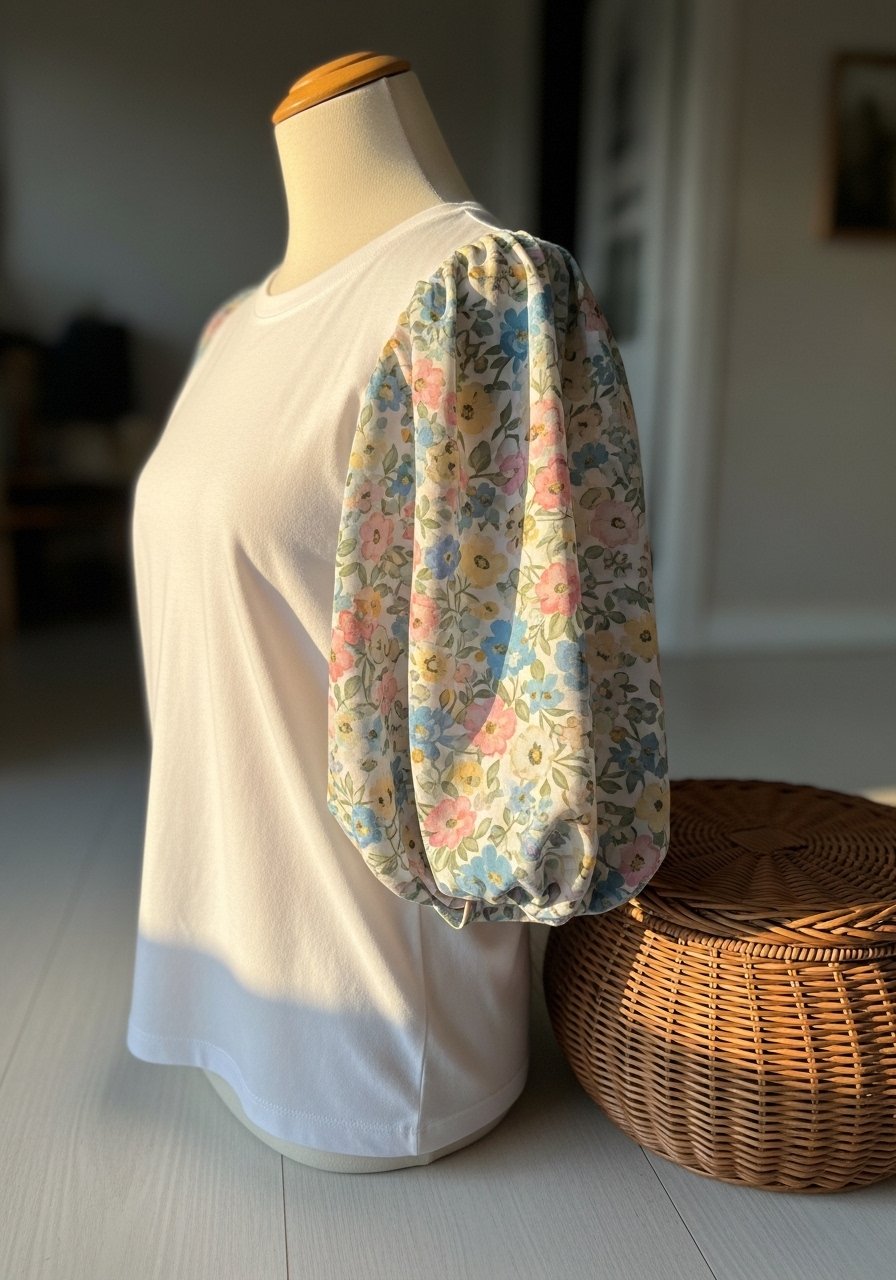
There is something about fluttering sleeves that makes a tight tee look intentional instead of stretched out. Measure the sleeve length to match the t-shirt armhole exactly before sewing on new fabric, that keeps the drape even and prevents sagging. I cut rayon strips and used a ballpoint needle so the knit did not skip stitches. Drapey fabrics like rayon or linen blends work best. This is a low-cost fix, usually free if you raid your stash. The mistake I see most is sewing sleeve panels in without matching the curve; the sleeve will bunch. If you want to skip sewing, use fabric glue for knits on the seam allowance, but test on a scrap first.
Braided Dog Bandana From a Stretchy Tee
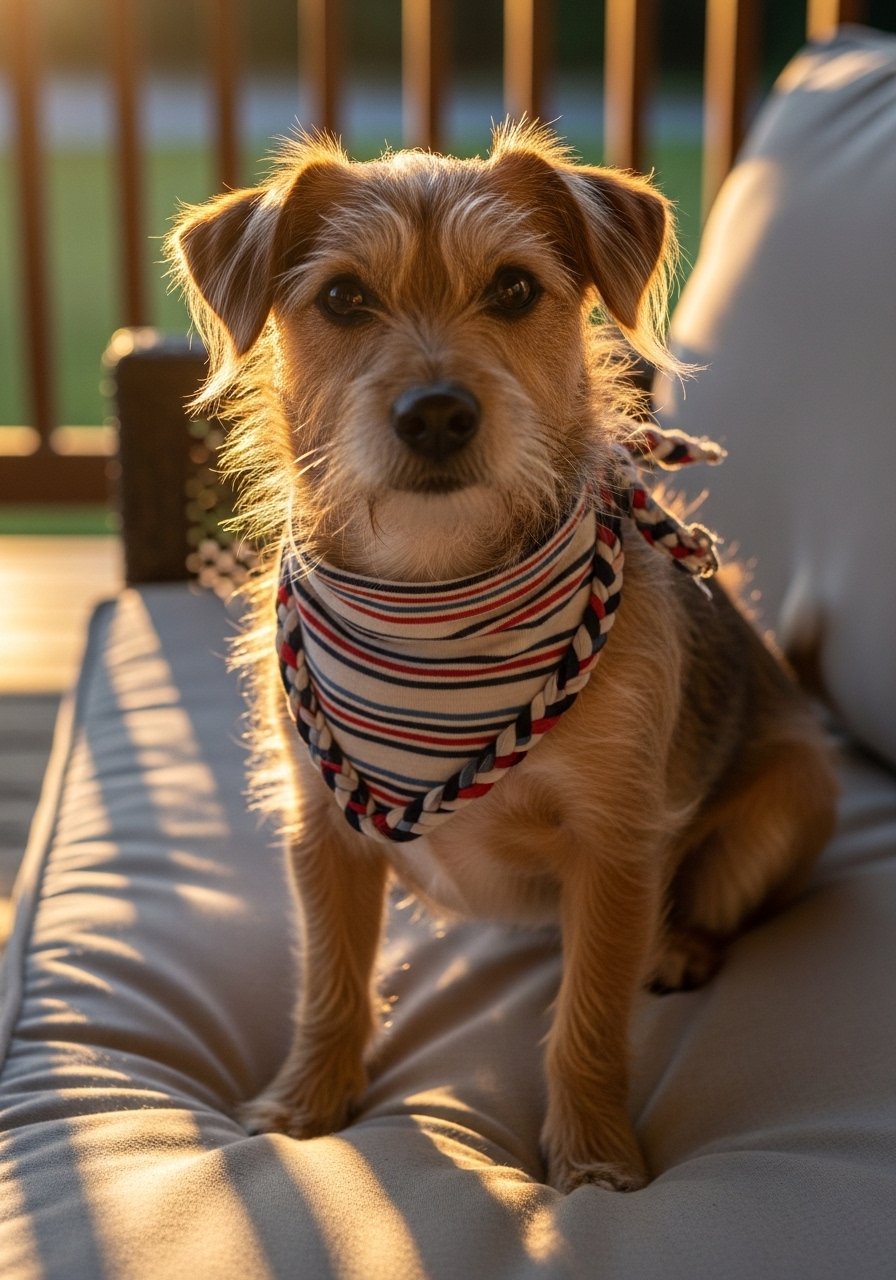
My dog loses bandanas constantly so I started making ones from stretchier tees that stay put. Cut the hem up into 2-inch strips and braid three at a time into a wide band. Braiding strips 2-3 inches wide builds enough density without bulk, so it sits flat and washes well. Most no-sew fixes wrap in 15 minutes flat, and this is one of them. Common mistake, do not braid too loosely or it will come undone. For extra hold, stitch the ends with a couple of hand stitches using an embroidery needle. I keep a small hand-sewing kit in the mudroom.
Durable Puppy Toy From Sleeve Braids

When my niece's puppy shredded store toys in a day, I braided sleeve strips into a tight 18-inch knot that survived weeks of chewing. Start with sleeve strips cut lengthwise, braid three or five strips in odd numbers to pack tighter, then knot and double knot the ends. The tip that most lists miss, knot the braid into a loop and stitch through the knot for reinforcement. Use sturdy t-shirt cotton for this. No spending necessary, but a heavy-duty thread pack helps if you add a couple of stitches for strength.
No-Sew Patches For Kids’ Jackets
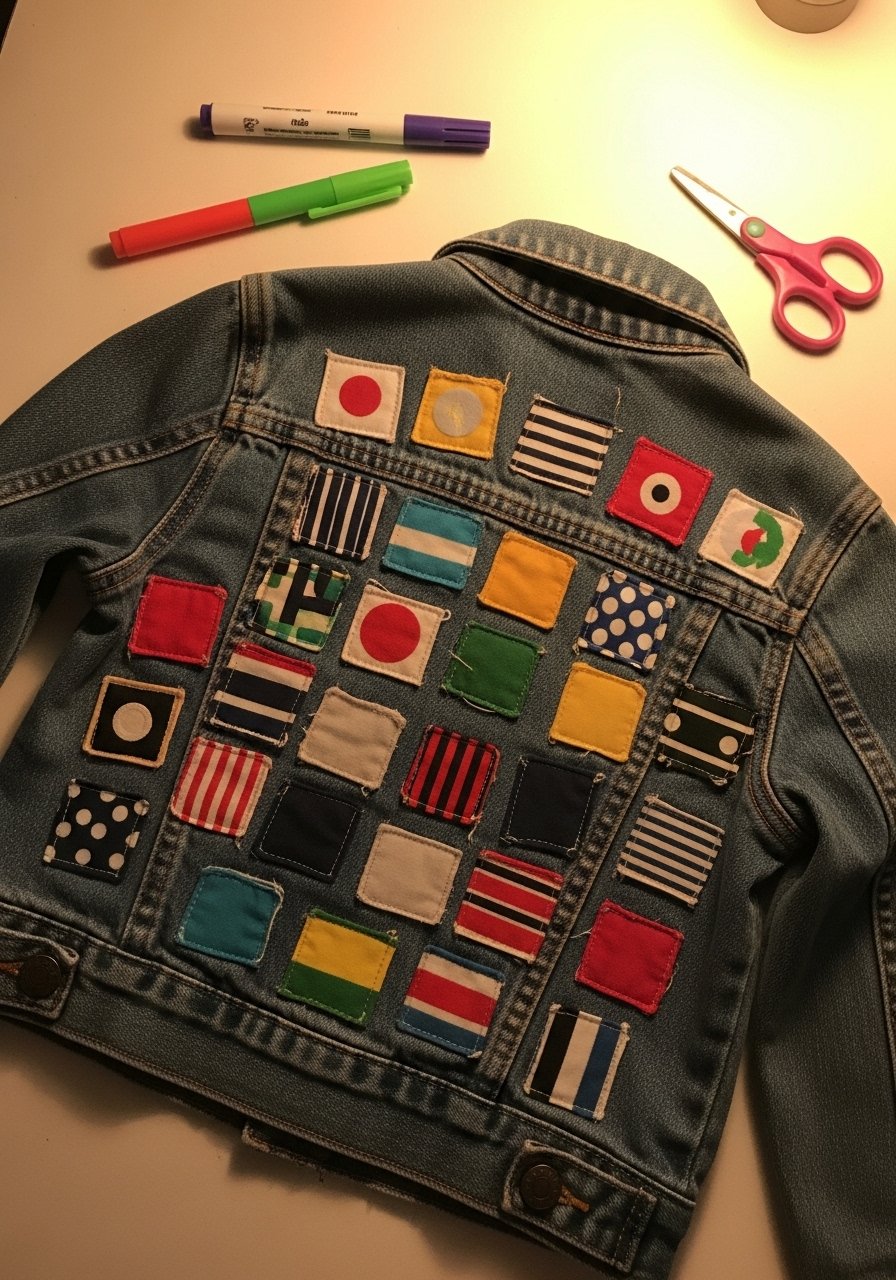
Kids rip sleeves, knees, and even brand new jackets. I cut 3×3-inch squares from old tees and fuse them with iron-on adhesive in fun mixes. No-sew patches stick through laundry if you layer the fabric and press firmly. A common mistake is skipping a pre-wash; pre-wash scraps to avoid future shrinking problems. Use patterned scraps for contrast and odd-number groupings like three or five patches so they look deliberate. I use iron-on adhesive sheets when I repair playground casualties.
Vacation Tee Pillow That Hides Souvenirs
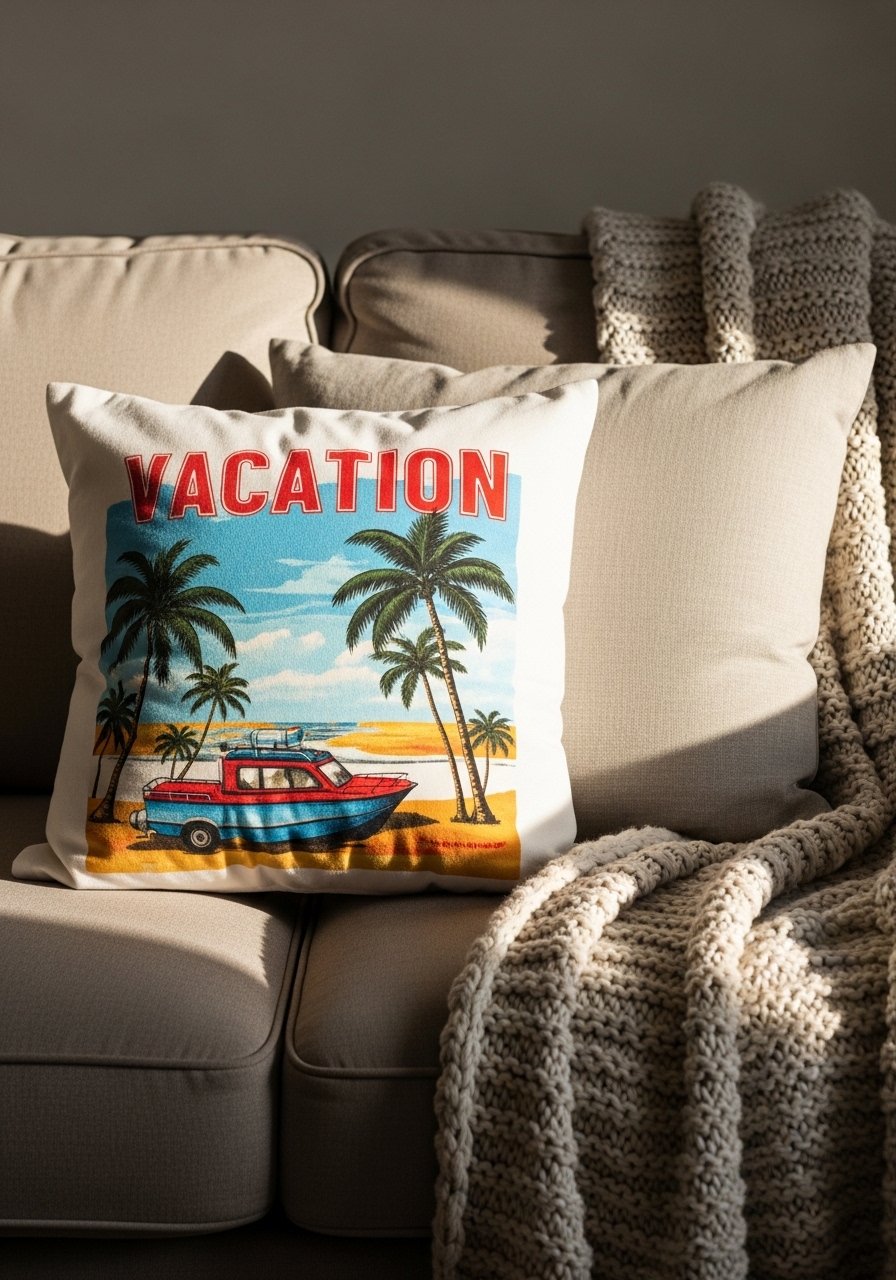
I turned a favorite band shirt into an 18×18 pillow cover and suddenly the tee stopped living in the back of a drawer. Cut the shirt flat so the graphic sits centered on one side, fold and sew three sides, then insert an 18-inch pillow form. If you want no-sew, use a fabric glue strip along the inner fold, then slip in a down-alternative fill. A real detail most tutorials skip, measure from shoulder seam to hem so the graphic sits at eye level on the couch. Grab a simple 18-inch pillow form if you do not want to stuff with scraps.
T-Shirt Rug Braided Into a Bath Mat
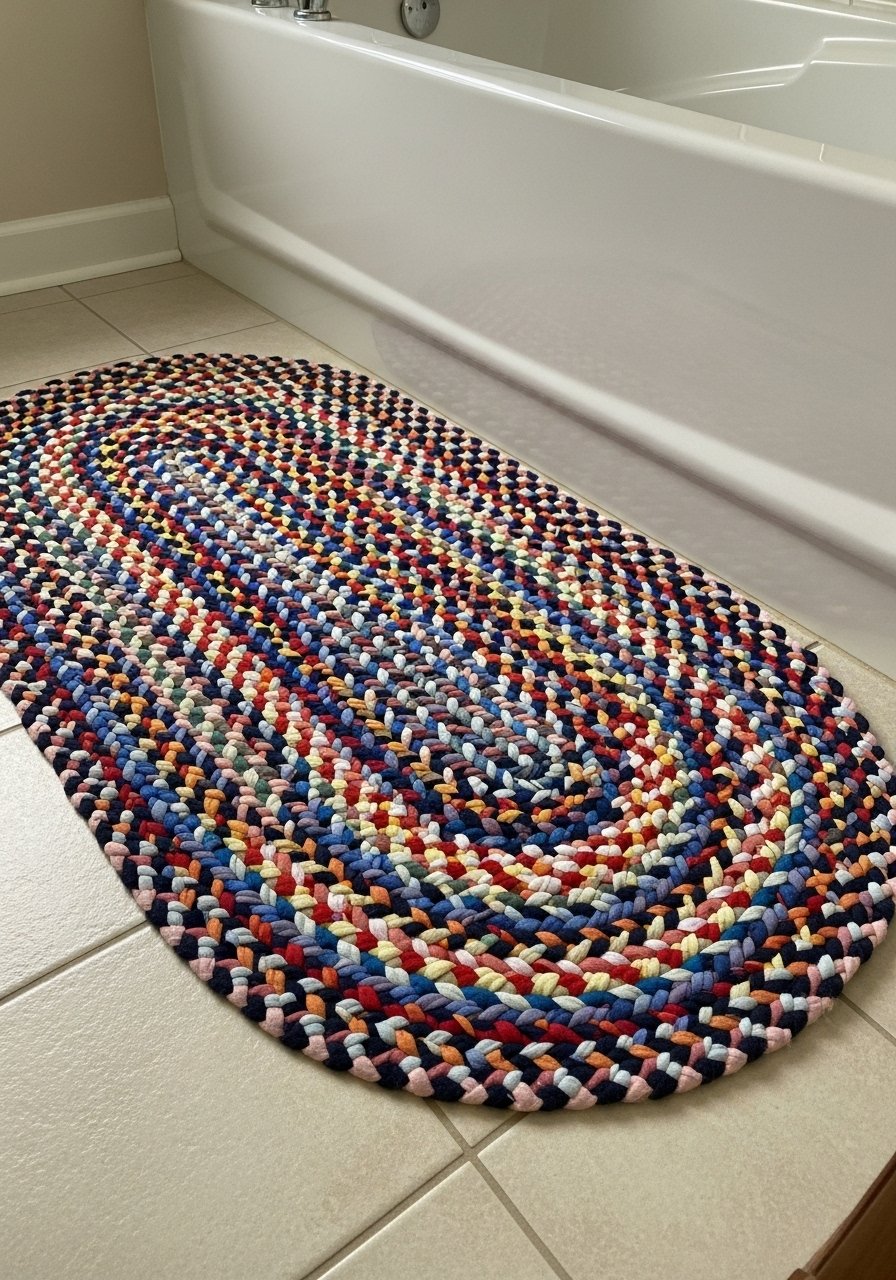
You can squeeze new life from almost every inch of an old tee, which is why I braid dozens into a bath mat. Cut tees into 2-inch strips, braid them in odd-number groups, then coil and whip-stitch the braid into an oval. It takes a few shirts for a small mat and a couple hours total. A common error is using strips that are too narrow; stick to 2-3 inches for durability. If you want a tougher edge, stitch through both braid layers with heavy-duty thread. I use a sewing awl for the final whip-stitch.
Bohemian Skirt From Two Tees
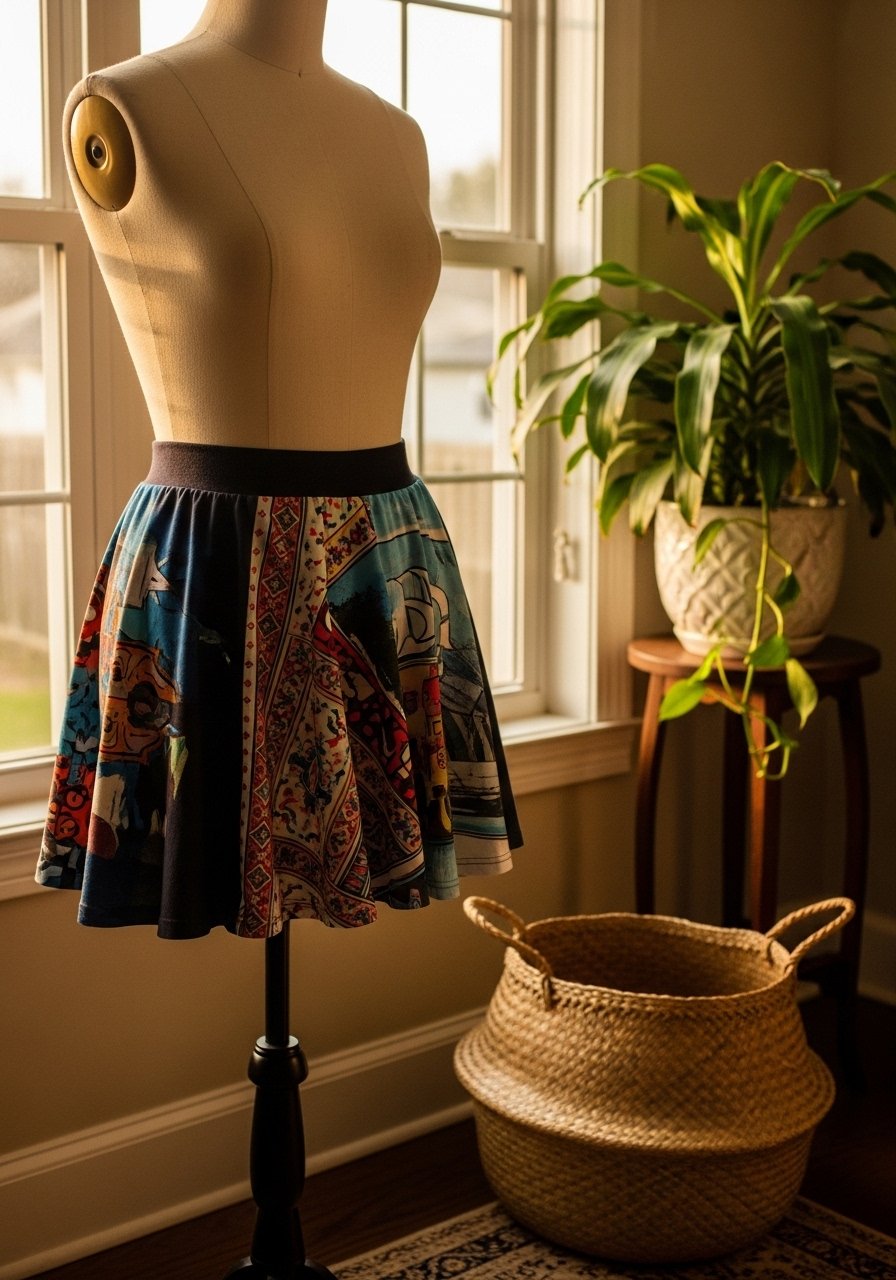
I made a twirly festival skirt by cropping one tee for a fitted waistband and using the body of another as the skirt. Cut one shirt into a 3-inch-wide waistband tube, insert elastic, and sew to the gathered body. Crop one to the desired length first so you avoid an awkward hem. Measure your waist and cut elastic 1 inch shorter for a snug fit. The trick people miss is finishing the inside seam by folding raw edges inward for comfort. You can use a pack of 1-inch elastic to get the waist right.
Furoshiki Gift Wrap From an Oversized Tee
I started wrapping presents with oversized tees when I ran out of wrapping paper and never looked back. Cut a square slightly larger than your gift and hem with no-sew tape if you like, then use furoshiki knots to secure the package. This is quick and works for books, bottles, or boxes. A common mistake, do not use a square that is too small or knots will pop. Most no-sew fixes wrap in 15 minutes flat and this fits that bill. Keep a roll of no-sew hem tape in the gift drawer.
Stuffed Snake Toy From a Kid’s Tee
My son slept with a stuffed snake made from his outgrown tees for years. Cut a tapered body 4 inches wide at the thickest part, sew two mirror pieces right sides together leaving an opening, then stuff with polyfill. A detail most people miss, taper the head and tail deliberately so it looks like a real creature. Use a ballpoint needle to avoid skipped stitches on knits. If you are making it without a machine, stitch the seam twice by hand for durability. I use polyfill stuffing when I need a soft but full toy.
T-Shirt Socks From Ankle Cuts

When winter comes I often lose socks. I cut the hem band off a stretched tee, trace my foot on the tube, and sew a rounded toe to make a pair of soft house socks. Stretchy cotton works best and you should pre-wash fabric so it does not shrink oddly. Common mistake, leaving toes too square makes them uncomfortable. Use double-stitched seams and a ballpoint needle. For a no-sew version, fold and knot at the toe, but expect less durability. I keep a stretch stitch sewing kit for fixes like this.
Garden Flag From a Logo Tee
One tee with a great logo becomes a cheerful garden flag. Cut to the desired rectangle, hem edges with no-sew tape, and stitch a dowel sleeve at the top. I use a short dowel and a metal stake for quick porch updates. A frequent mistake is leaving raw edges unhemmed which fray in wind. For outdoor use, fuse the hem twice with adhesive and consider an outdoor fabric spray. I link to a set of wooden dowels I use for small flags.
Tank Top Conversion For Hot Days
I cut off sleeves and rework the neckline on a crew tee into a tank top I actually wear to the farmers market. Fold the hem under and use a few hand stitches at the shoulder to keep the new armhole from stretching. Small detail, measure the new armhole against an old tank you like before cutting. If you are nervous, cut conservatively and go back for a second trim. A seam ripper and small scissors make the job less scary.
Lace-Trim Tee Hem For Better Dressiness
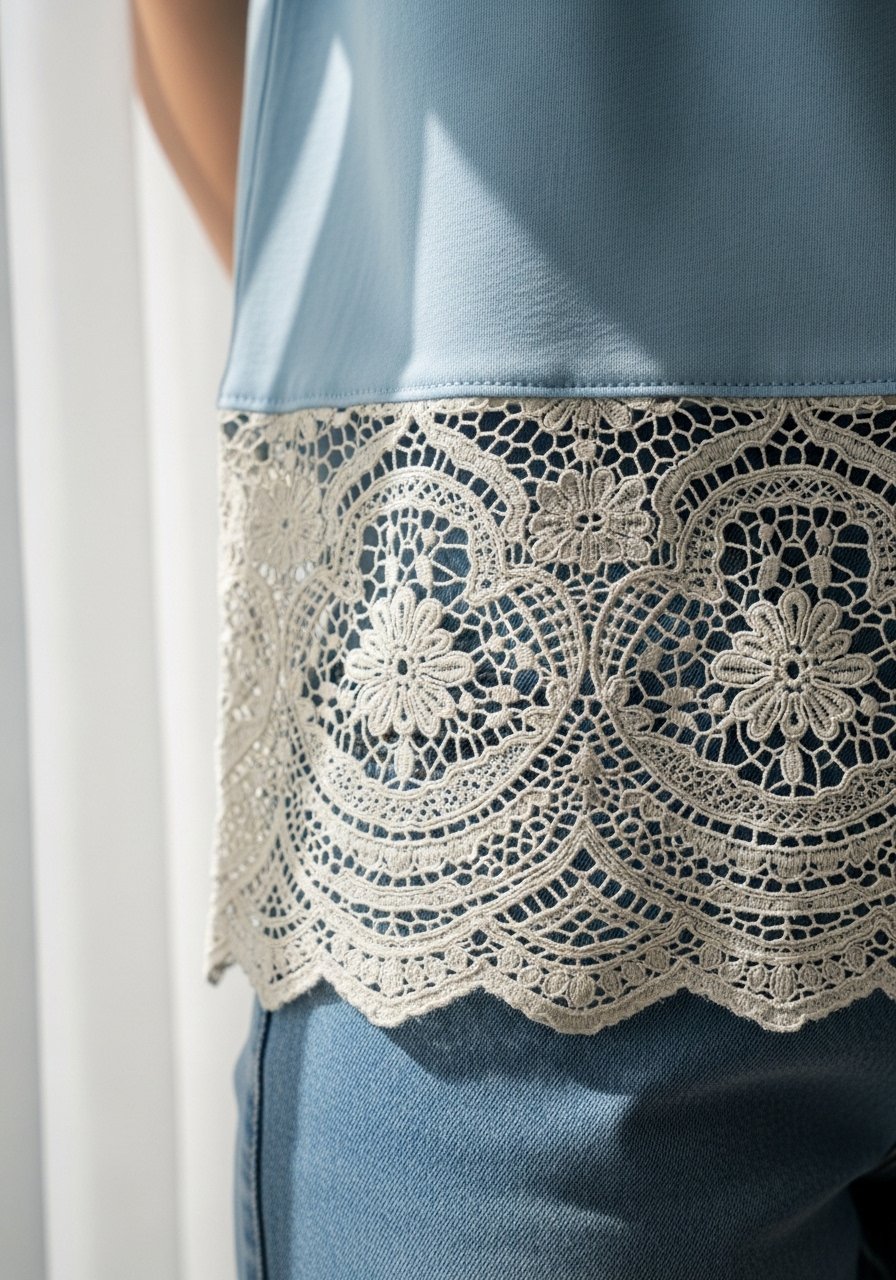
A cheap tee becomes date-night ready when you add a lace hem panel. Cut a 2-3 inch strip of lace and attach it to the inside hem so it peeks out. Use a ballpoint needle and match the stretch so the tee hangs naturally. The missed tip, stabilize the top of the lace with a narrow strip of interfacing or it will ripple. This is a low-budget update and looks expensive layered under a blazer. I keep a pack of narrow lace trim in my craft box.
Market Tote From Two Tees

I turn two tees into a no-sew market tote by cutting the necks into handles and tying the bottom together, then reinforcing with fabric glue. It holds produce and is machine washable. The detail people skip, double knot the bottom with an inner knot and an outer knot so it does not come undone in wash. For heavier loads, stitch the handle bases by hand. If you want a more finished look, add a strip of ribbon across the inside for support. I use fabric glue for reinforcement on the inside seams.
Headbands And Scrunchies From Neckbands
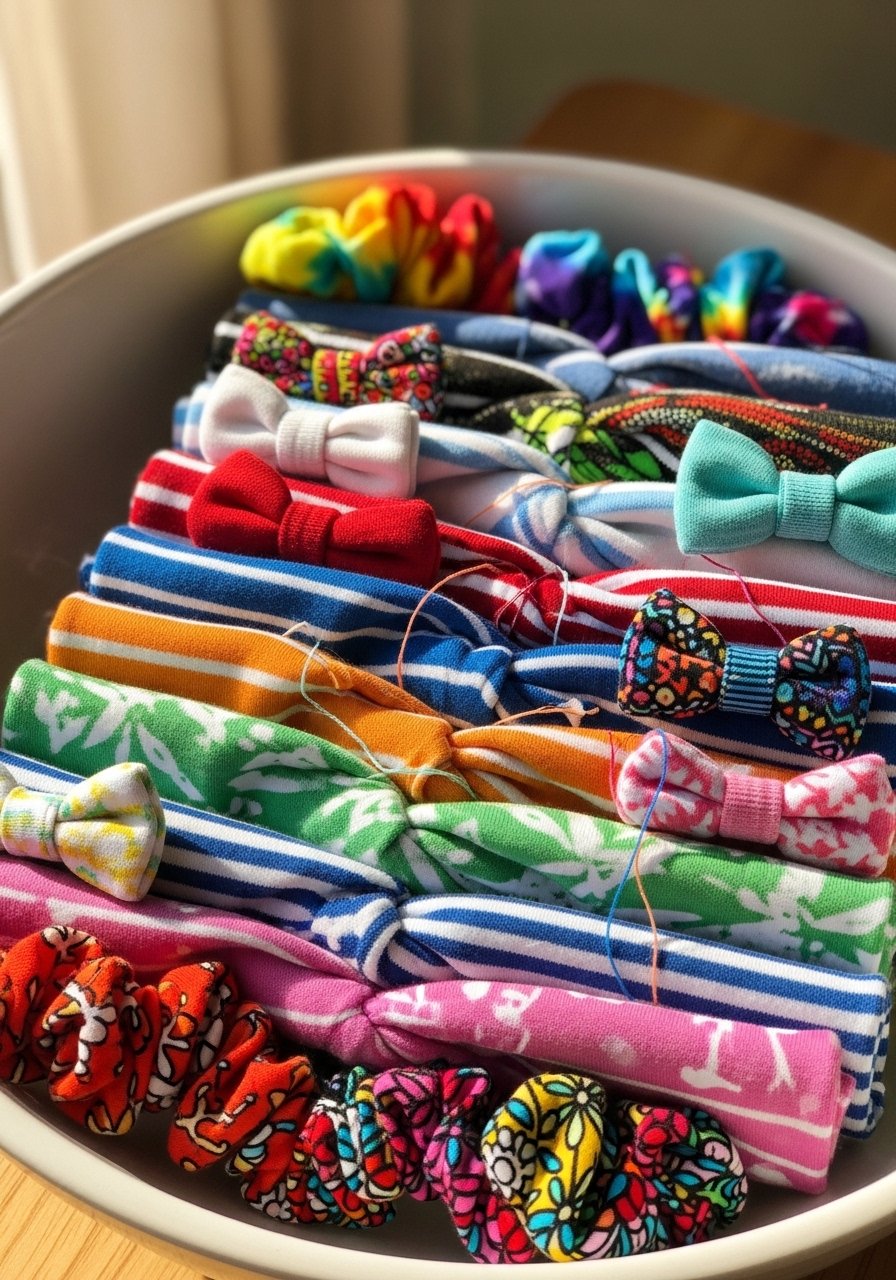
Neckbands are perfect for hair accessories. Cut rings from the collar area and fold or braid into headbands, or slide elastic inside for scrunchies. A quick trick, cut collars with a 1-inch overlap and stitch twice so they do not roll. This is great for kids crafts or last-minute presents. I stash a small elastic pack for scrunchie tops in my drawer when I am making sets.
Wine Bottle Wraps And Napkin Rings From Scraps
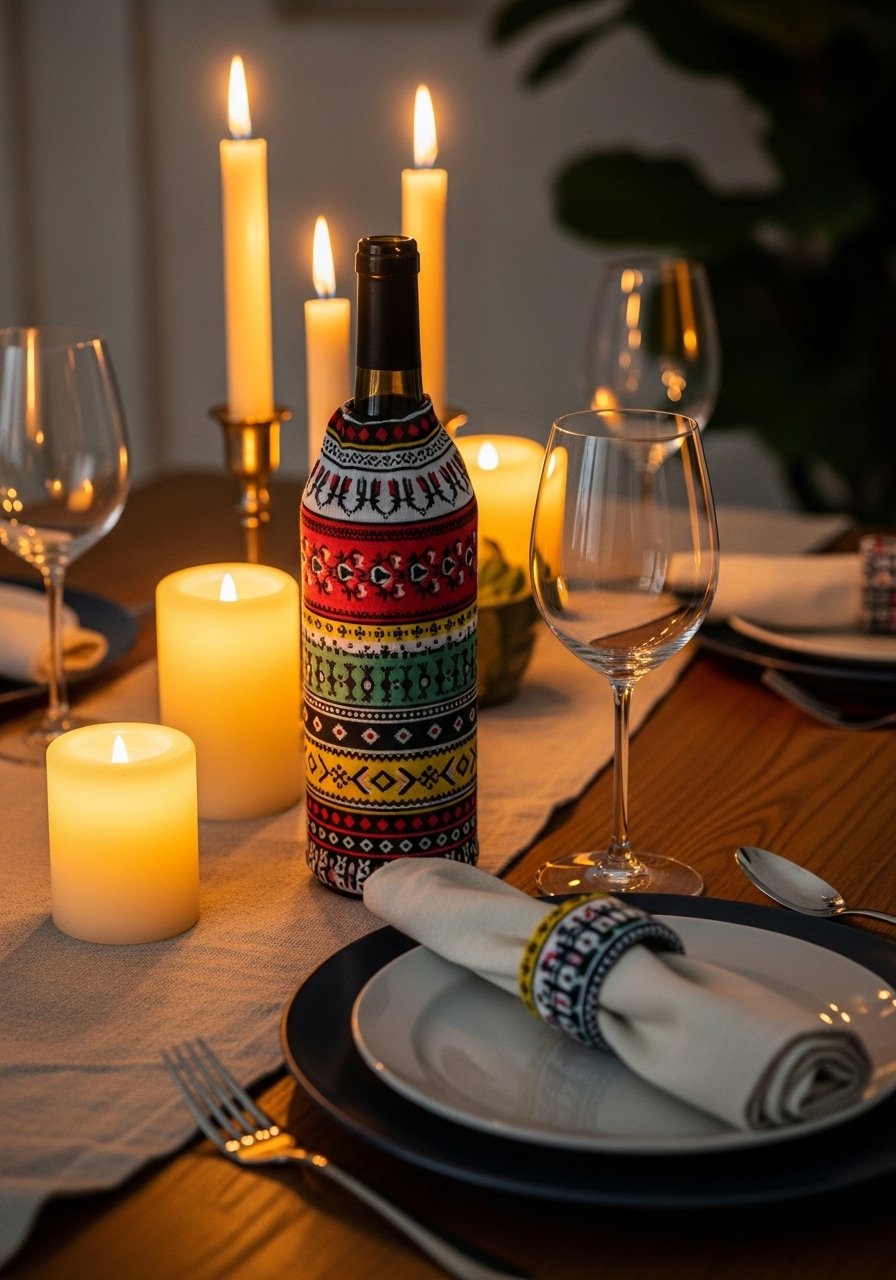
For casual dinner parties, I wrap wine bottles in shirt strips and make napkin rings from braided scraps. It looks intentional and saves paper. Fold strips to the desired width, then knot or glue the ends. The detail I always do, add a small printed patch to the bottle wrap so guests know which vintage it is. Keep a mini hot glue gun for quick assembly.
Little Dresses From Oversized Tees For Kids
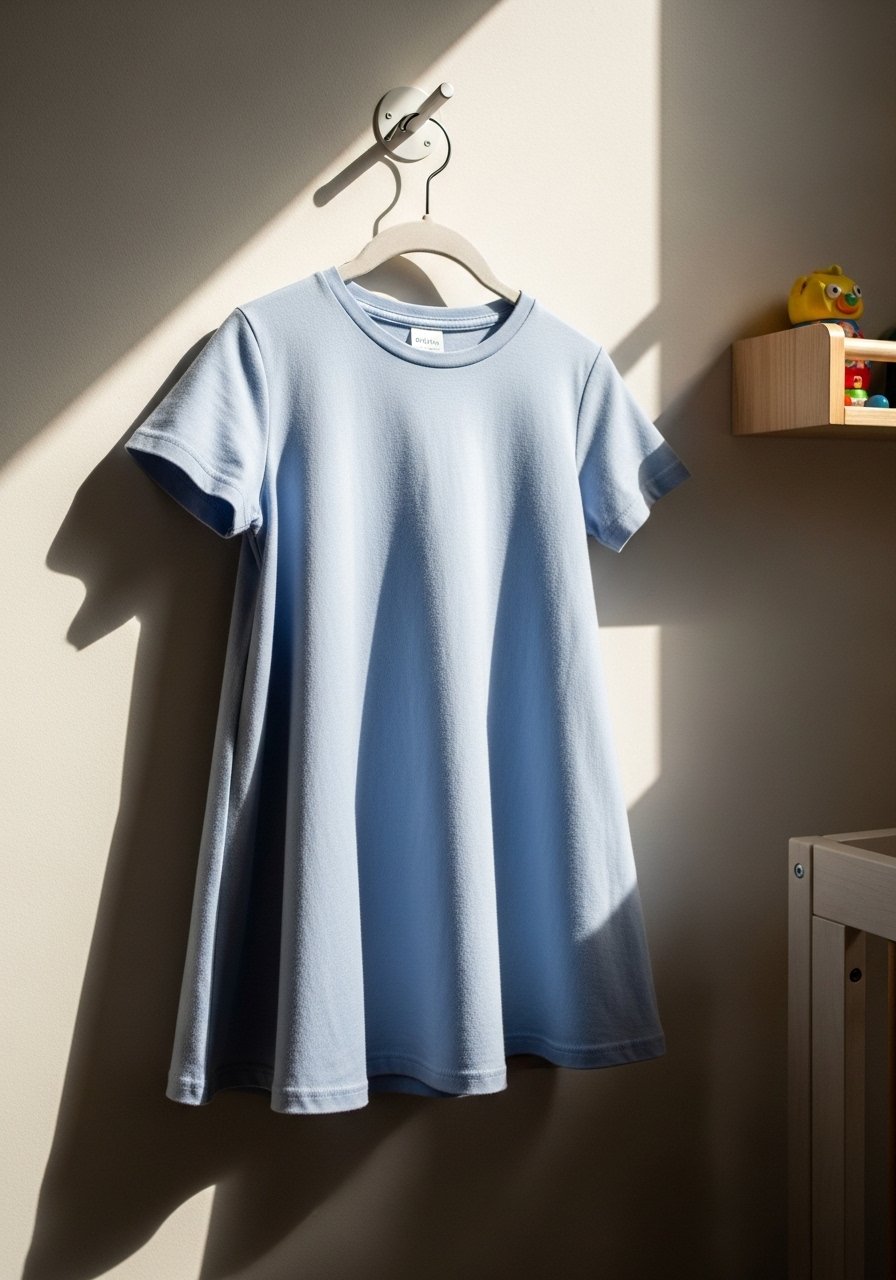
I made a whole summer wardrobe for a niece from adult tees. Cut the side seams and add shoulder straps from the sleeve bands, then hem to length. The trick most miss is tapering the side seams slightly for shape. Kids grow fast so a couple inches of extra hem lets you lengthen later. I finish seams inside with a small zigzag stitch and use a child-size dress pattern when I want a cleaner finish.
Cut-And-Knot Fringe Scarf For Layering
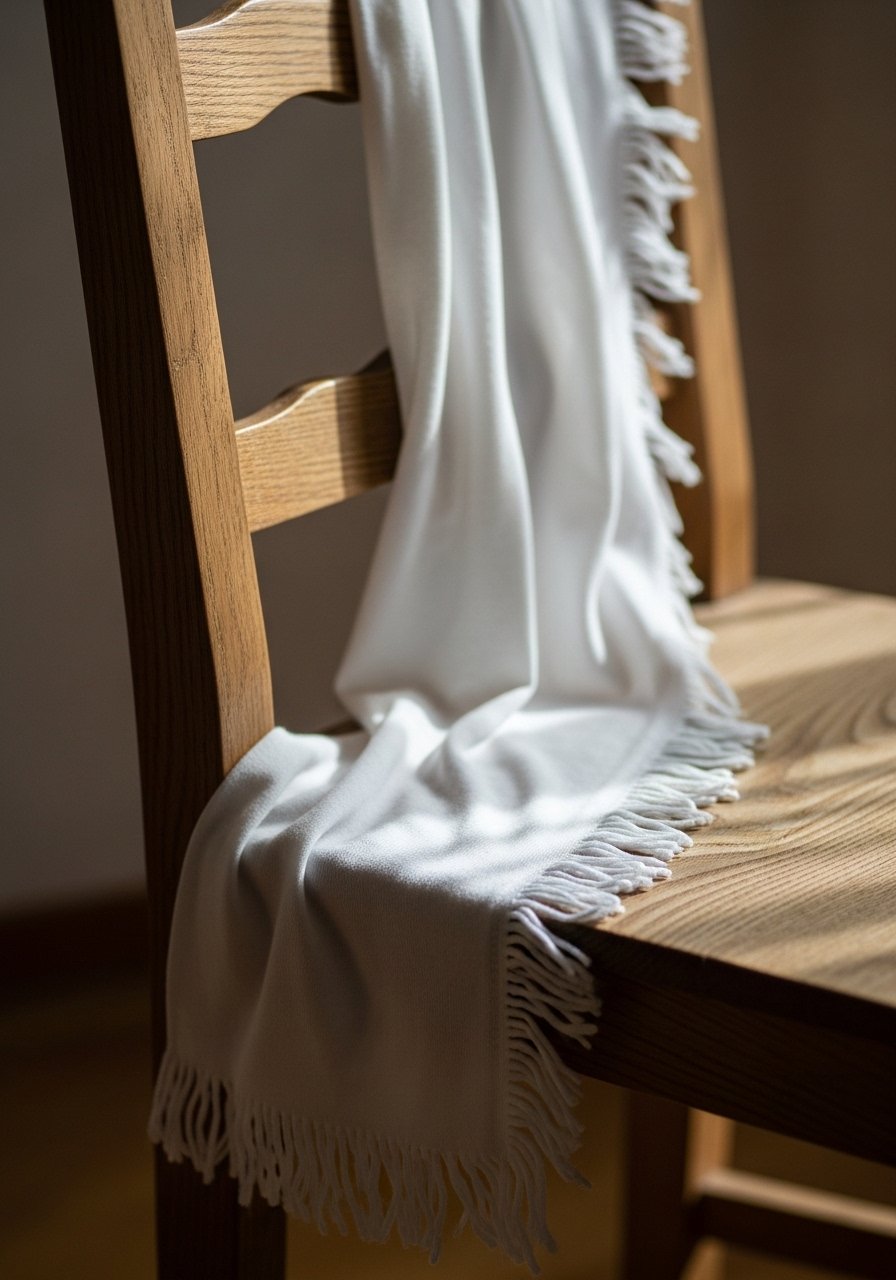
Cut long vertical strips into the body of a large tee and tie the strips in loose knots to create a textured fringe scarf. It adds movement when layered over a sweater or light jacket. A real-life note, leave 3-4 inches of uncut fabric at the top so the scarf does not come apart. Most people cut too close to the neckline and lose stability. I keep a rotary cutter and mat for long cuts like this.
Zipper Pouch From Ribbing And A Zipper
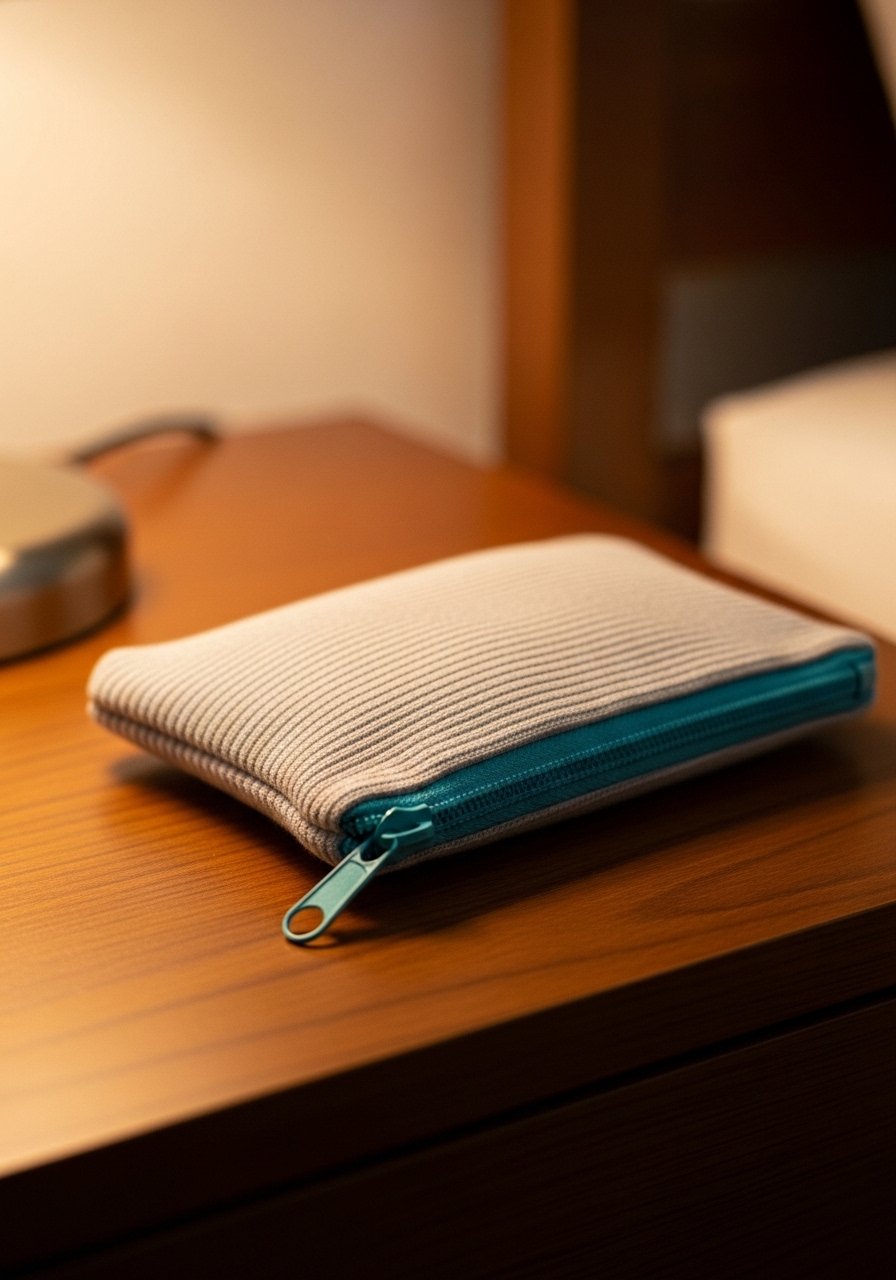
I make coin pouches from ribbed tee sections and a 6-inch zipper. Cut two equal rectangles, sew the zipper between them and finish the sides. Turn right side out and press. A tiny detail many tutorials skip, fold the raw zipper ends inside the seam by 1/4 inch before stitching so it looks neat. This is a low-cost gift that uses almost no fabric. Keep a pack of 6-inch zippers on hand for small pouches.
Your Decor Shopping List
Textiles
- Honestly the best $20 I have spent, 18-inch pillow forms for quick tee pillows
- Polyfill stuffing (~$6) for toys and cushions
Tools
- Iron-on hem tape (~$8) for no-sew side panel fixes
- No-sew hem tape for flags and wraps
- Ballpoint sewing needles pack for knit fabrics
- Rotary cutter and mat for long straight cuts
Sewing Extras
- One-inch elastic band for skirts and waistlines
- Six-inch zippers for pouches
- Heavy-duty thread pack for rugs and toys
- Fabric glue for knits when you want a no-sew finish
Most items are similar at Target or HomeGoods if you want to see them in person.
Shopping Tips
White oak looks fresher than dark wood this season. White oak floating shelves make a small wall display of framed tee art feel current.
Grab iron-on adhesive sheets for quick patches. They hold through washes when layered properly.
For curtains, buy length not pattern. 96-inch linen panels will puddle or kiss the floor and give height.
I like to keep a mini hot glue gun for non-sew projects. It is quick for napkin rings and bottle wraps.
Buy a rotary cutter and mat if you plan to make rugs or long strips. It saves time and gives cleaner edges.
If you want pet-durable items, get a sewing awl for final whip-stitches on chew toys.
Frequently Asked Questions
Q: How do I stop tees from stretching when I refashion them?
A: Pre-wash everything, then finish raw edges. Use a ballpoint needle and stabilize necklines with a narrow strip of interfacing. For no-sew, fuse hems twice with hem tape. Pre-wash avoids uneven shrinking later and keeps new shapes.
Q: Can I make these projects without a sewing machine?
A: Yes. Most no-sew fixes wrap in 15 minutes flat and hand stitches are fine for small reinforcements. Keep fabric glue, hem tape, and a good set of hand-sewing needles on hand for durability.
Q: What should I do if I cut a shirt wrong?
A: Mark with chalk before cutting and cut conservatively. If you did cut too much, use a patch or turn the piece into a pouch or pillow. A small strip of lace or fabric can disguise an awkward edge.
Q: Which tees are best for rugs and toys?
A: Use thicker cotton tees for rugs and durable cotton blends for chew toys. Braiding strips at 2-3 inches works best. I recommend heavy-duty thread for the final whip-stitch.
Q: How many tees do I need for a small braided rug?
A: For a small bath mat expect three to five tees depending on size. Braid in odd-number groups and coil, then whip-stitch with heavy thread for durability.
Q: Will no-sew patches hold up in the wash?
A: They will if you pre-wash fabrics and press adhesive firmly. Layering a second patch over the adhesive and pressing twice helps. Use iron-on adhesive sheets for the best hold.
Q: Can I mix printed tees with boho layers without it looking messy?
A: Yes, but stick to a limited palette and odd-number groupings like three patches or five braids. Pair one bold print with two neutrals and the result looks intentional rather than chaotic.
