


My living room had nice furniture and decent lighting but it still felt like a waiting room. Took me embarrassingly long to figure out it was missing texture. Every surface was smooth, every color was flat, and nothing invited you to actually sit down.
These ideas lean modern farmhouse with a few practical industrial touches. Most projects run under $50, with a couple of builds around $100 for lumber or specialty tools. They work in garages, pantries, craft rooms, and any place where bins are sitting on the floor and making everything look chaotic.
Cozy Fabric Bins For The Sewing Room
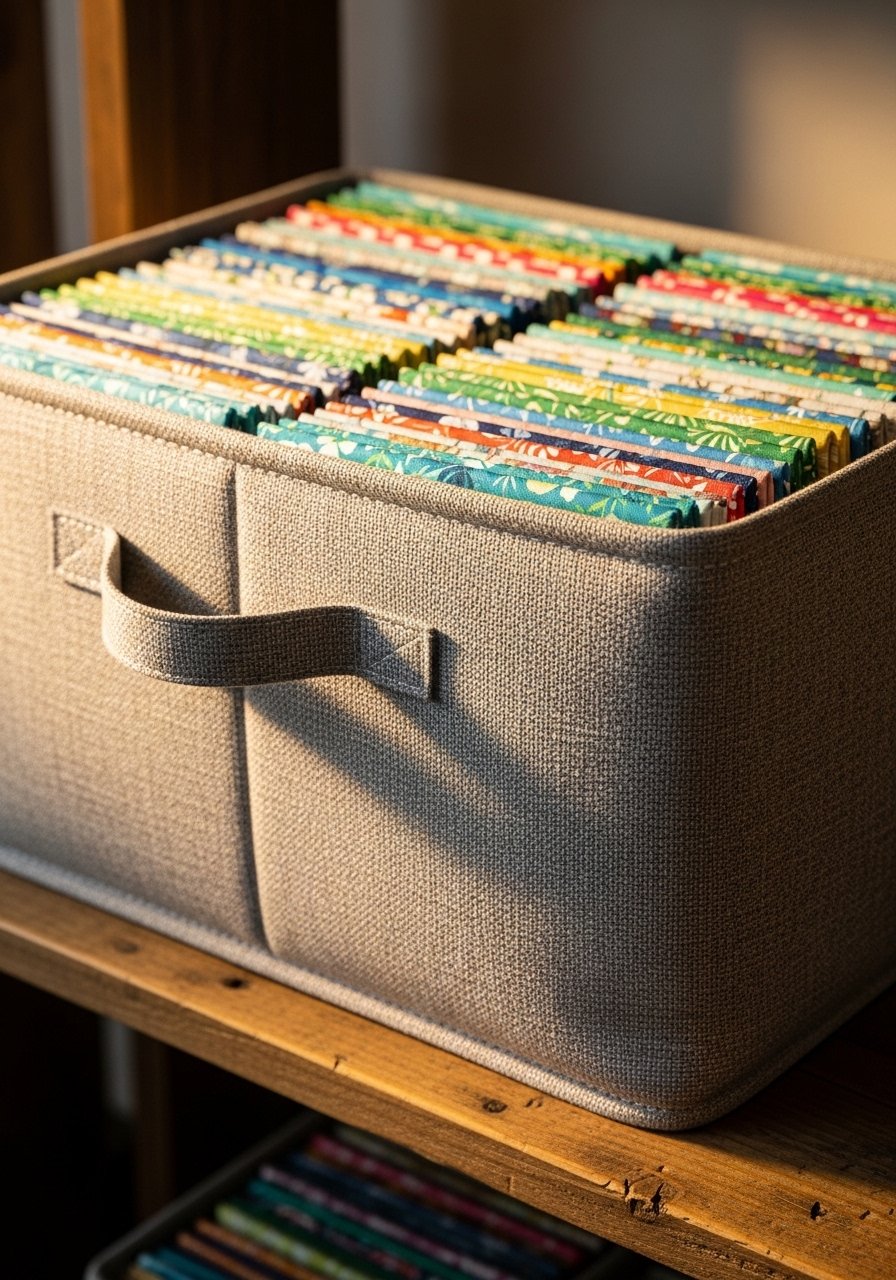
The soft-sided fabric bin is the project I use when I want something pretty that still holds bolts of fabric. I line the sides with 9-inch fusible squares to keep the box from sagging, fold the top back a half inch for a clean edge, and triple stitch the handles so they never rip when full. I used cotton canvas and a yard of webbing, and the whole thing cost about $20 to $30. If you want a ready supply, I like this sturdy cotton canvas I found on Amazon, it handled machine washing without losing shape Heavy Cotton Canvas By The Yard. Common mistake, I used to skip the fusible squares and the bins went floppy after a month. Pair these with the wrapped clear totes idea later for living room storage that reads intentional, not like a craft spill.
Open Plywood Scrap Bins For The Workshop

I built these from leftover 1/2-inch plywood and cut the fronts at 45 degrees so they slide into shelves smoothly. The trick that saves time is batch cutting six fronts at once and spacing cleats 1.5 inches apart on the runners for small hardware so nothing falls through. These look like shop fixtures but cost next to nothing if you already have scraps. My biggest mistake the first time was using thin plywood; that warped in the summer. Use a thicker board or seal it if your shop gets humid. For screws and fasteners I keep a set of small clear parts jars inside each bin instead of tossing everything loose. Most folks with garages have totes just piled up.
Wrapped Clear Bins For The Living Room
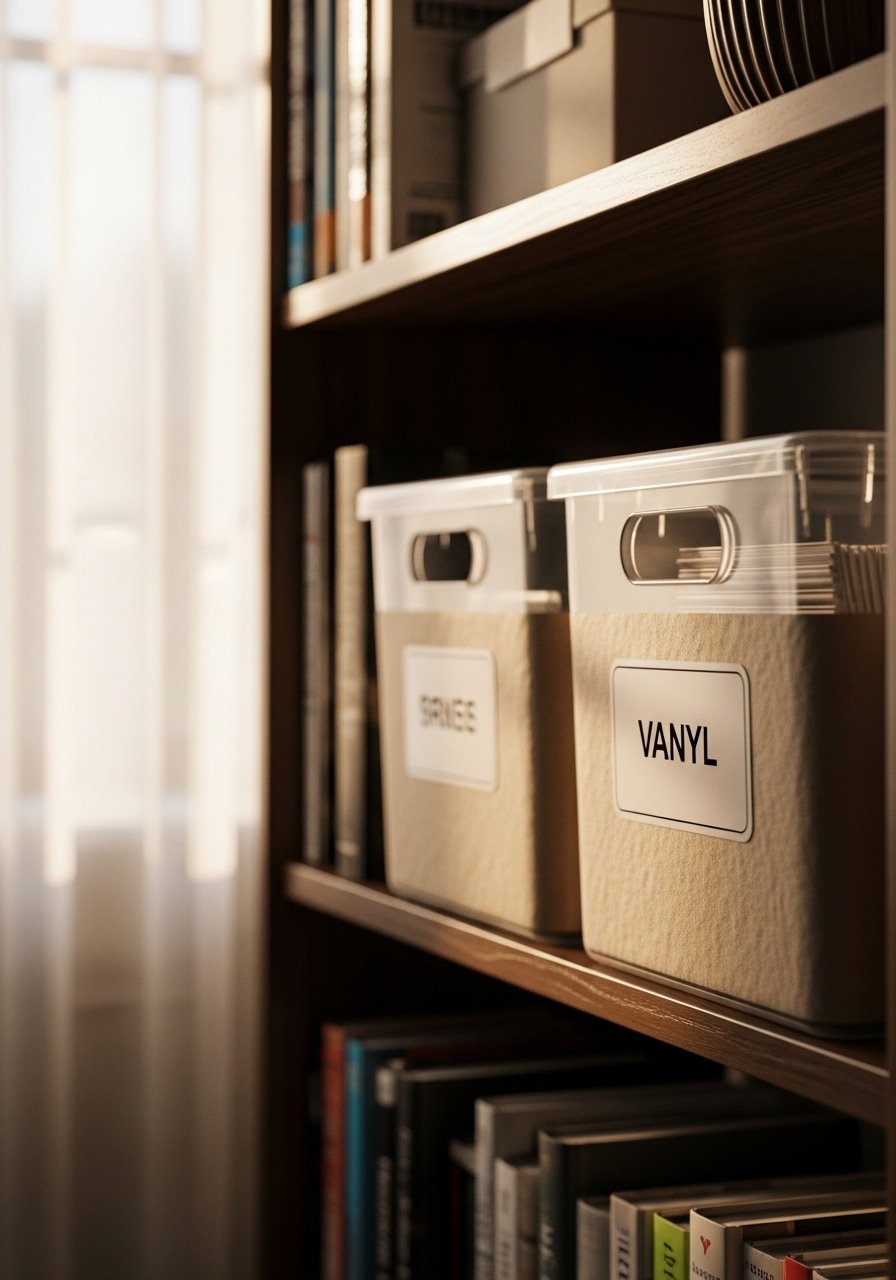
Plain clear bins can look cheap on open shelves. I wrap Sterilite-style clear totes with contact paper or wide wrapping paper, cut neatly around handles, and add vinyl labels all facing forward. It costs about $10 to $25 per bin depending on adhesive paper choice. I used this clear tote as my baseline, and wrapping makes them shelf-worthy 27-Gallon Clear Storage Tote. A common slip-up is slapping on a label at random angles. Keep every label lined up at the same height and your shelf will look purposefully edited. This works great next to fabric bins for a mixed-texture display.
Vertical Acrylic Stacker For Tight Bathroom Niches
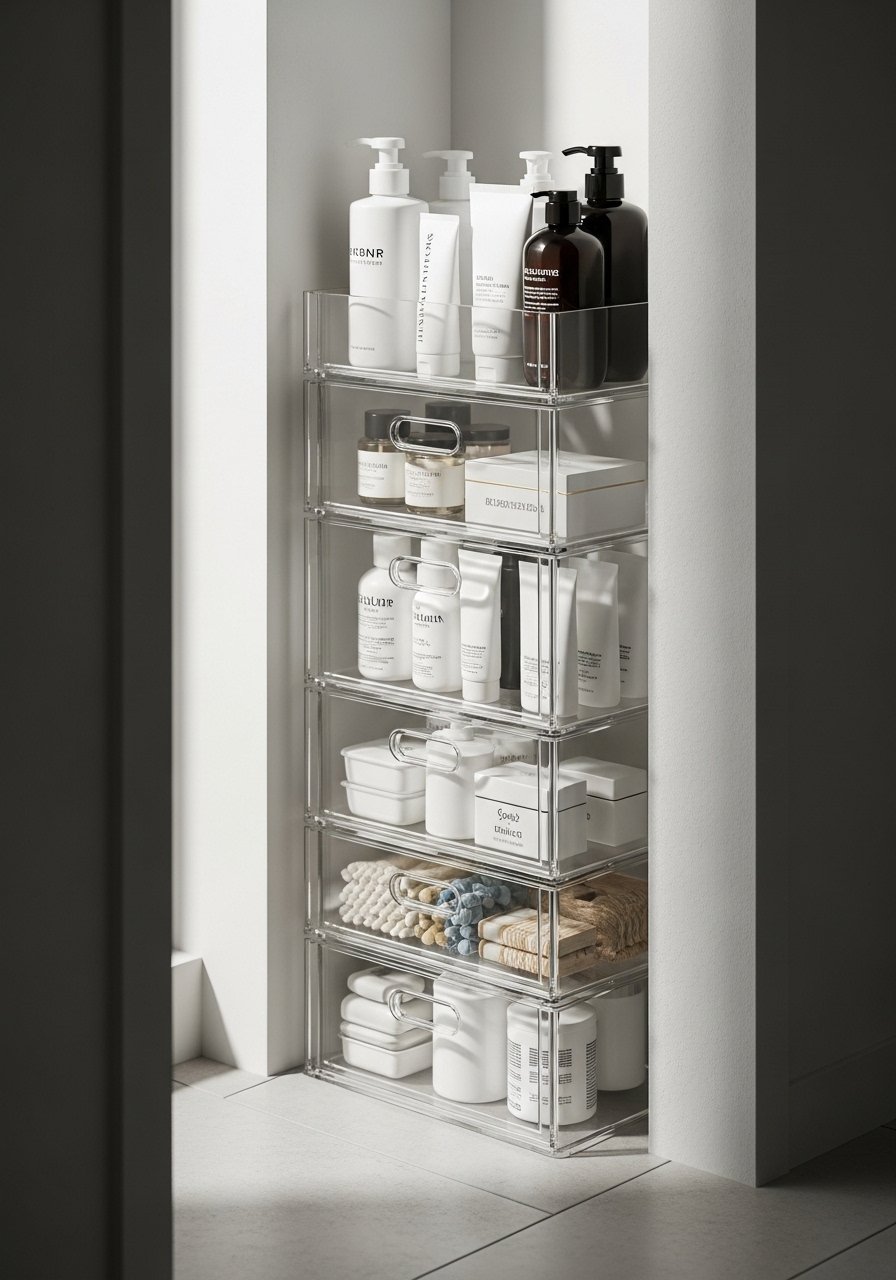
When a bathroom has zero floor space, stacking clear acrylic bins vertically saved my sanity. I measured the niche and cut simple 2×4 frames so the runners sit for five levels of 27-gallon totes, with runners spaced to accommodate the tote height. I left 1.5 inches clearance so lids don’t catch. Budget is $20 to $50 if you buy totes on sale. I keep labels in vinyl and group like products together to stop everything from tumbling when I pull a bin. People watch rack builds nonstop lately. Renter-friendly version: use heavy-duty freestanding shelves and non-marking rubber feet.
Wire Shelf Lid Organizer For The Kitchen

Lids everywhere drove me nuts until I bent a dollar store wire shelf into a U shape and placed it inside a plastic bin. The wire legs become grooves, and lids slide in without toppling. It cost me under $5 to try. Mistake to avoid, do not cram different brands of lids together or they will wedge and jam. Instead, group lids by diameter, small behind large, and label the grooves with a tiny piece of vinyl. I bent the wire shelf near the middle and turned up the legs for stability. Dollar bin flips are everywhere now, but this tiny trick actually saves time when you are grabbing a lunch container.
Tote Rack Wall Frame For The Garage
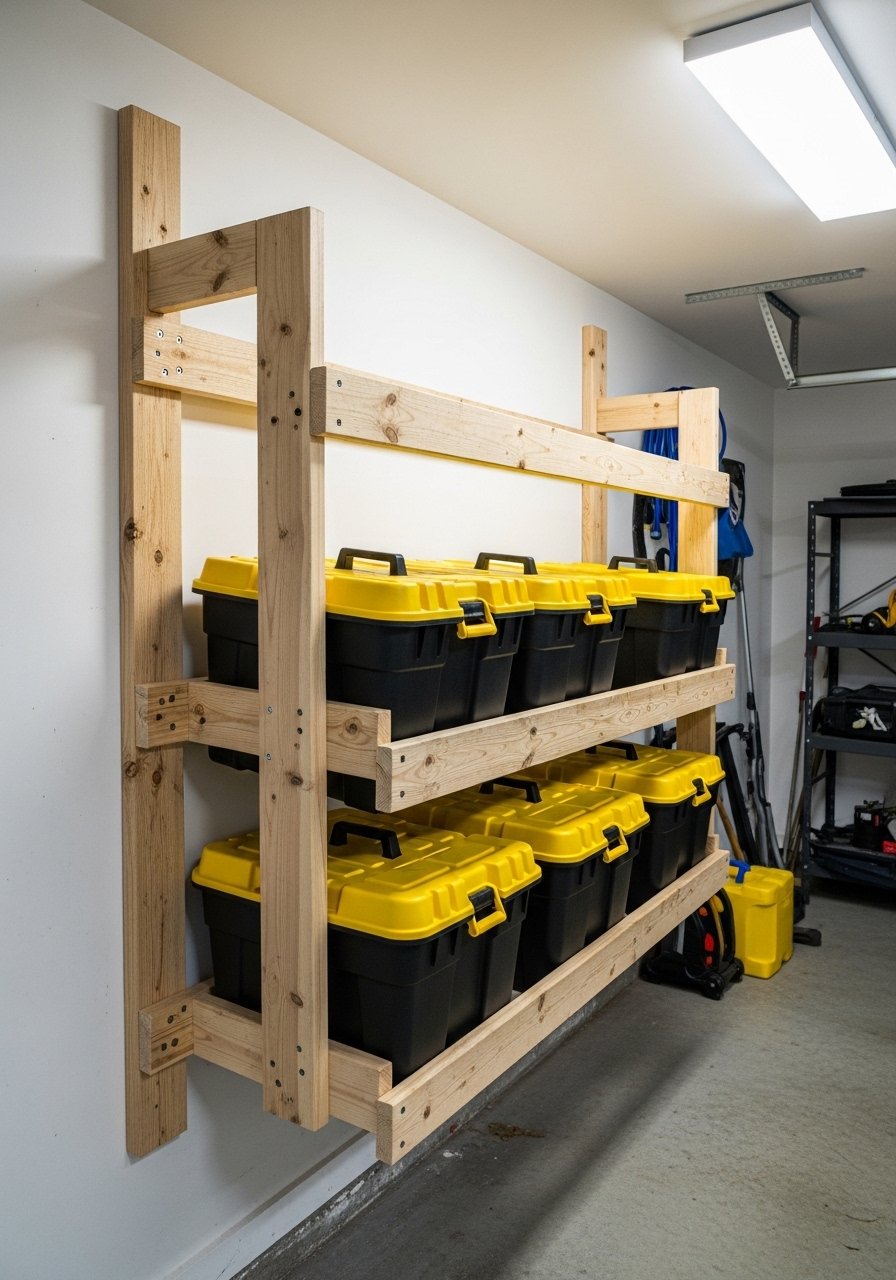
This is the rack I built after tossing totes on the floor for years. I ripped 2x4s and screwed them into studs, spacing runners for 27-gallon totes so they slide in and out without tipping. Measure twice. My frame holds five totes vertically and the whole thing cost about $40 to $60 in lumber. Big mistake would be not screwing into studs and trusting anchors alone. If you are renting, use a freestanding version or command-strip style hooks that hold less weight. For hardware, I used standard deck screws and a Torx driver which speeds assembly. Most folks with garages have totes just piled up, so a rack like this clears the floor and makes items accessible.
Drawer Spice Tray Hack For Messy Kitchen Drawers

A tiny dollar store wire shelf, flipped upside down and glued down with dots, keeps spice jars from sliding. I used clear glue dots in a grid and pressed the shelf into place. The tray stops rattles and makes sure labels face forward. This cost under $5 and took five minutes. Typical mistake is not cleaning the drawer surface before adhering, so the dots fail. Keep tall jars at the back and short ones in front so everything is readable at a glance. This pairs well with wrapped clear bins on your counter for overflow spices.
Sliding Tote System For Basement Storage
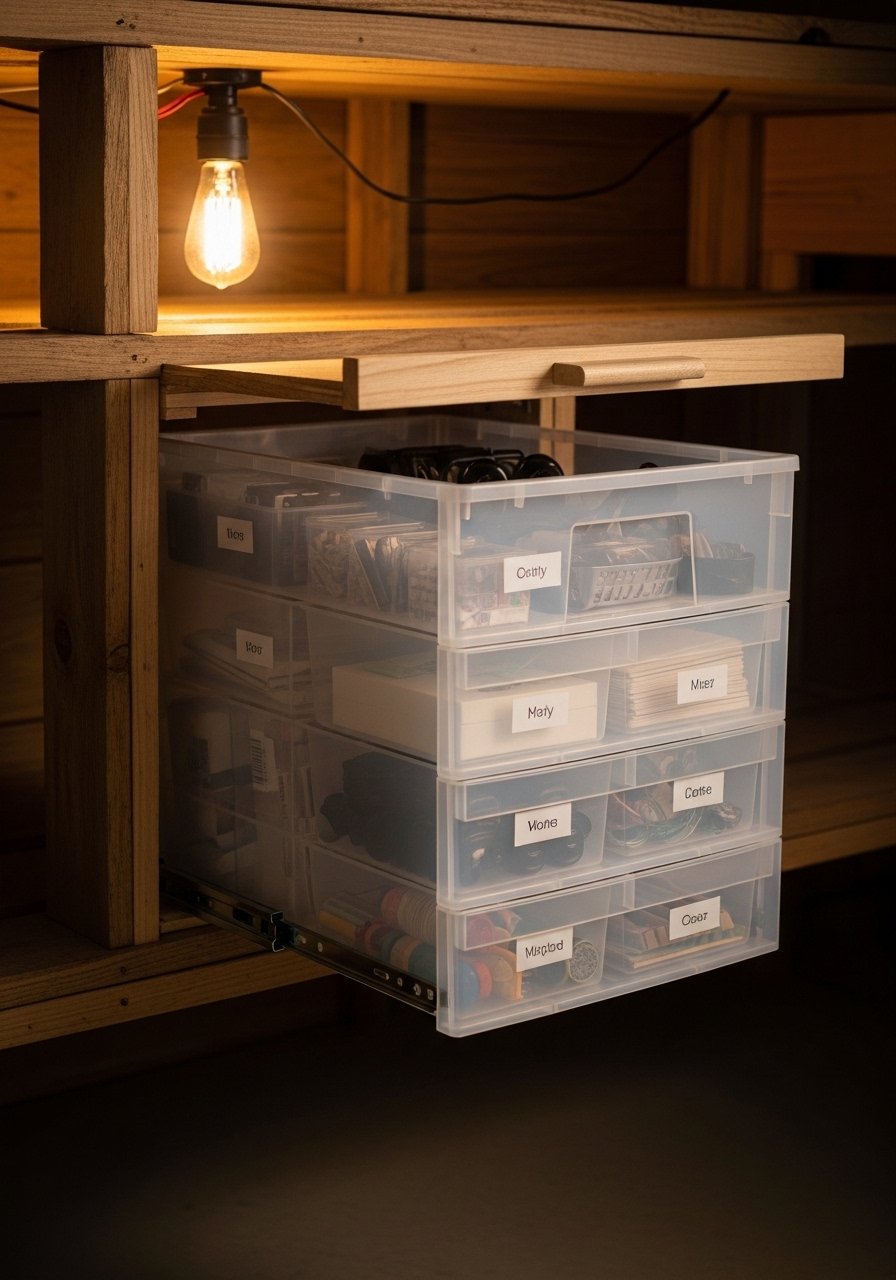
If you need access to heavy totes in a deep shelf, a sliding system is life-changing. I built a frame with 2×4 runners and used 2.5-inch deck screws to secure the runners. The trick is to make runners flush and test with a full tote before screwing everything down. Budget runs $40 to $80 depending on lumber. A common mistake is using thin screws that strip under load. I spaced runners using a scrap spacer board so they were exactly 1.5 inches apart where needed for tote grooves. This setup makes basement access quick and keeps smaller bins nested inside large ones to stop small parts from mixing.
Dollar Store Pantry Baskets For Everyday Cabinets
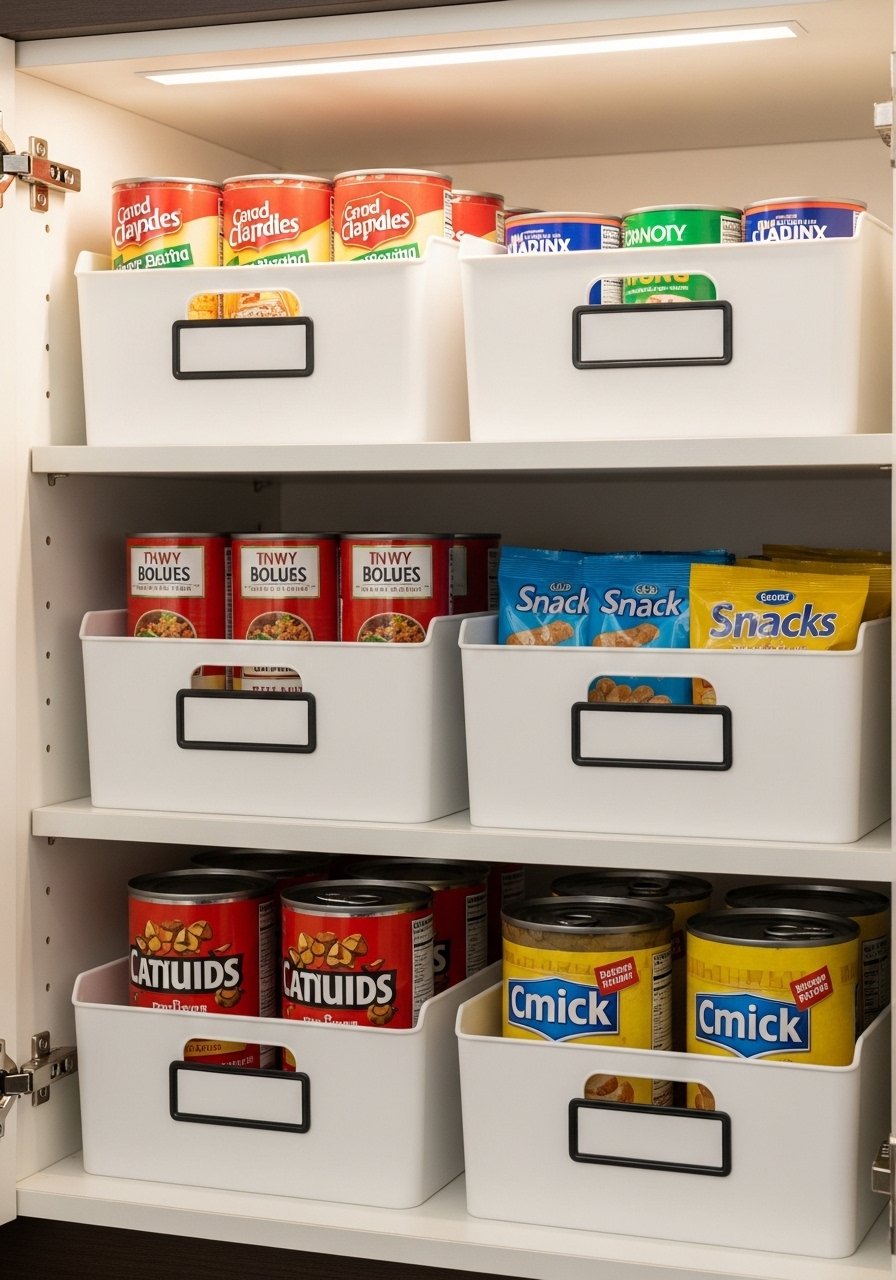
Pantries do not need fancy containers. I use Dollar Tree book bins to group cans, snack packs, and single-serve boxes so the door closes easily. Cost is $1 to $3 per bin. The visual result is a calm shelf that shuts without cramming. Common mistake, stacking tall items in front of short ones so you cannot see what is behind. Instead, put tall boxes behind short items and keep labels all facing the same way. For durability, reinforce the bottom with a scrap of cardboard glued in place. Pair this with the drawer spice tray hack for a pantry that actually functions.
Rope-Wrapped Jar Lazy Susan For The Countertop

I wrapped old mason jars in rope and set them on a lazy Susan to corral spices and small tools. It makes a tidy, boho-friendly cluster for the countertop and hides cheap labels. The lazy Susan was about $12 and a ball of rope cost $8 to $15. A small thing that matters, wind the rope tightly and glue at each coil so the finish does not fray. Mistake I made was using thin rope that felt flimsy. Swap in thicker jute if you need a more finished look. This pairs with the rack or wrapped bins when you want countertop utility that reads styled.
Clear Bin Label System For Busy Families
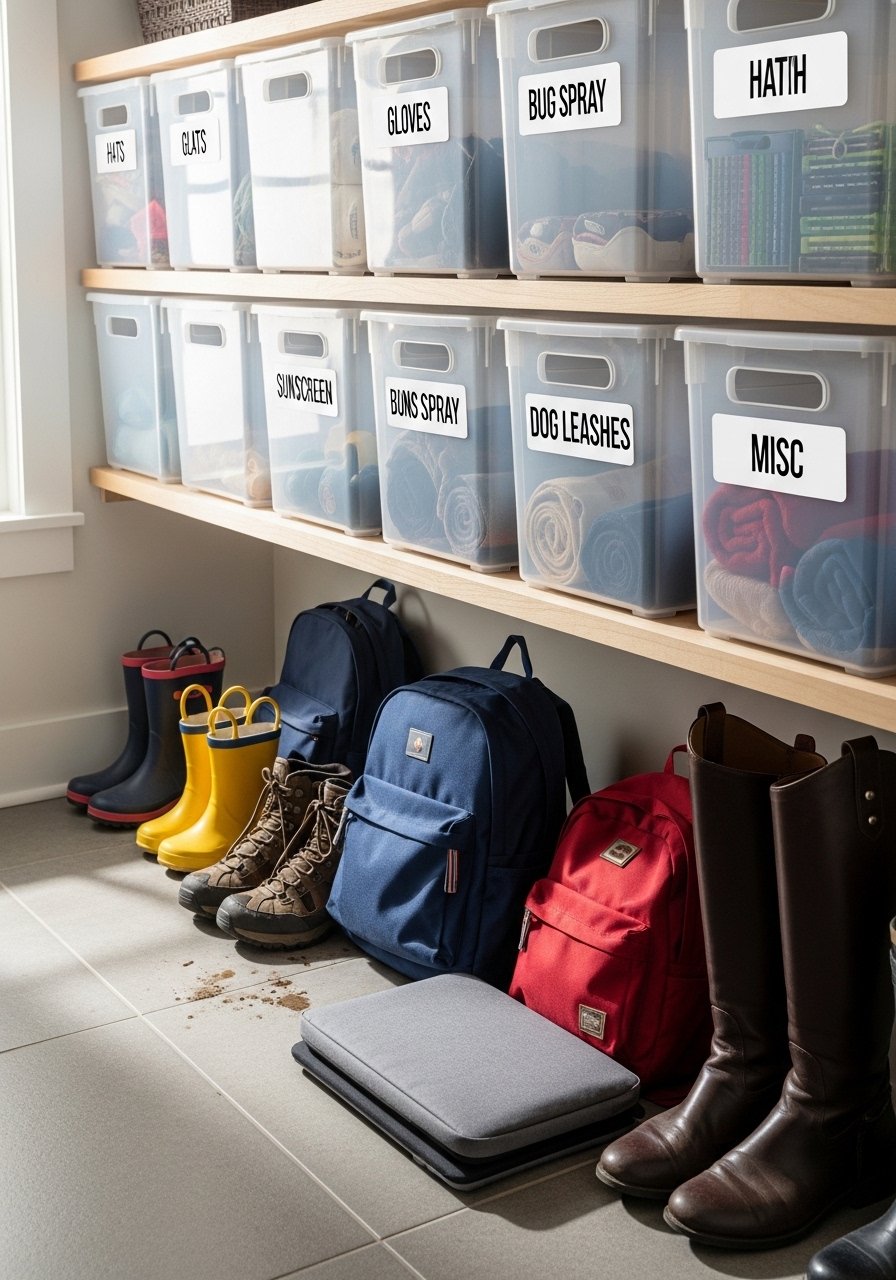
Labels are half the battle. I put vinyl labels on every clear bin and line them up at the same height so kids know where to put soccer gear and shoes. The rule I stick to is label-facing forward and group tall behind short so nothing hides. Cost for a roll of vinyl is under $10 and it lasts forever. A mistake is handwriting labels in different styles which looks messy. I use a consistent typeface and color for each category so the system is readable at a glance. This also keeps dogs from sniffing into snack bins when combined with bins that have clip-on lids.
Plywood Fronts For Custom Closet Shelves
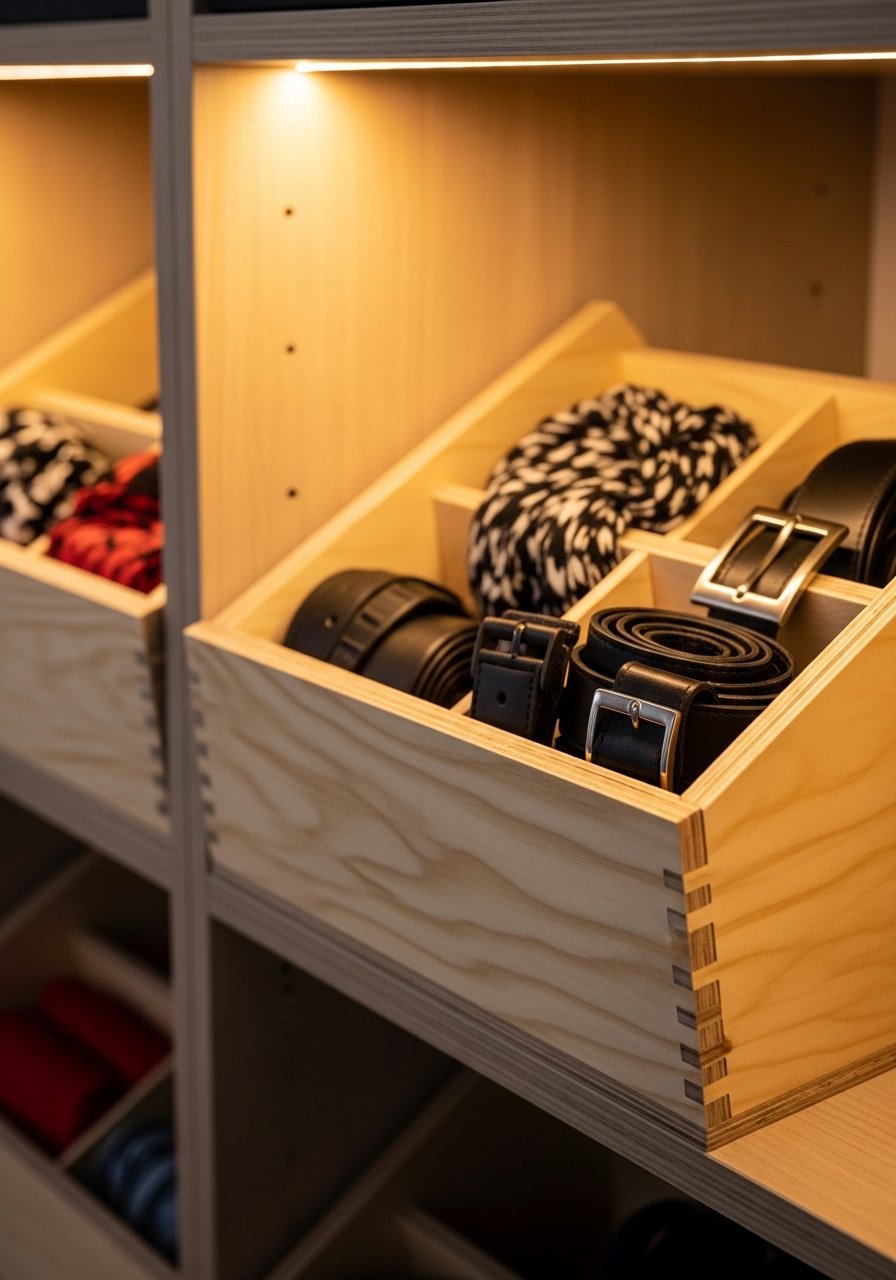
I made shallow open-front bins from a single 4×8 sheet of plywood and used 45-degree angled fronts for easy reach. Cutting the fronts at angle means less digging in and a cleaner profile on the shelf. One sheet of 1/2-inch plywood makes multiple bins if you plan the cuts. Budget is often under $20 if you have scrap. Watch out for humidity; in my garage the fronts warped after a year, so seal with clear polyurethane if needed. I leave a 1.5-inch cleat on the back for support and space the runners to match my shelf depth. These look great paired with the clear bin label system for a closet that actually gets used.
Your Decor Shopping List
- Linen and Canvas Textiles: Honestly the best $40 I have spent. Heavy Cotton Canvas By The Yard in natural for fabric bins and liners.
- Plastic Totes: For the vertical stacker and wrapped bins, use a consistent size. 27-Gallon Clear Storage Tote (~$10 each).
- Rope and Twine: Found these while looking for something else. Natural Jute Rope 3mm for wrapping jars and handles.
- Hardware Fasteners: For rack builds, use good screws. Torx Deck Screw Assortment in 2.5-inch length.
- Vinyl Label Kit: For all clear bins. Printable Vinyl Label Sheets in matte white.
- Lazy Susan: For countertop clusters. 12-Inch Lazy Susan Turntable in wood.
- Plywood Sheet: One 4×8 sheet of 1/2-inch plywood will make many open-front bins. 1/2-Inch Plywood Sheet pick birch for smoother cuts.
- Glue Dots Pack: For drawer trays and quick fixes. Clear Adhesive Glue Dots small size, 200 pack.
Shopping Tips
Measure the tote first. Take the width and height of the tote lip and plan runners accordingly. 27-Gallon Clear Storage Tote is a common size to design around.
Heavy Cotton Canvas By The Yard is worth buying in a wider width so you have fewer seams when making fabric bins.
Grab Torx Deck Screw Assortment for rack builds. The right screw head saves time and prevents stripping.
If you rent, use command-style heavy hooks and a freestanding shelf. 12-Inch Lazy Susan Turntable works on freestanding islands as a no-drill option.
Frequently Asked Questions
Q: Can I make these bin racks without screwing into studs?
A: Yes, but you need a lower weight limit. For renters I recommend freestanding frames or wide command-style hooks that have a documented weight rating. Avoid trusting anchors for heavy totes.
Q: How do I stop small parts from mixing inside large bins?
A: Nest smaller bins inside larger ones and use dividers. I keep a half dozen small parts jars in each plywood front bin, and I space cleats 1.5 inches apart so nothing tumbles when I pull the bin.
Q: Will wrapping clear totes make them look cheap again after a few months?
A: If you use contact paper or vinyl and wrap neatly with sealed edges, they hold up well. I wipe mine down monthly and replace paper only if it peels. Labels facing the same direction keep the look tidy.
Q: What is the best way to store lids so they do not scatter?
A: Bend a wire shelf to form grooves inside a shallow bin. The legs create slots and lids slide in by size. Clean the bin first and test with the lids you actually own because different brands stack differently.
Q: Are fabric bins washable?
A: Most canvas and cotton bins tolerate a gentle machine wash if you remove any fusible inserts first. I recommend spot cleaning for lined bins and hand washing handles to prevent fraying.
Q: How do I protect plywood fronts from garage humidity?
A: Seal the wood with a clear polyurethane or use marine-grade plywood for humid spaces. I learned this the hard way when unsealed fronts bowed in summer.
