

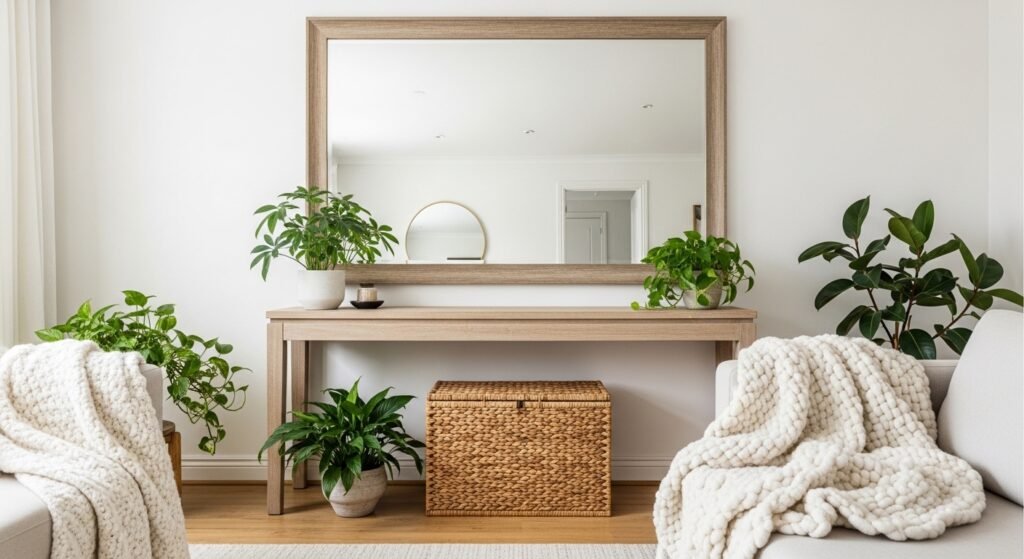
My living room had nice furniture and decent lighting but it still felt like a waiting room. Took me embarrassingly long to figure out it was missing texture around eye level. I ended up framing a plain mirror and suddenly guests lingered at the console instead of walking past.
These ideas lean modern farmhouse with a few boho and minimalist takes. Most projects land under $50, with a couple that can climb to $100 if you splurge on materials. They work for bathrooms, entryways, bedrooms, or anywhere a builder-grade mirror needs personality.
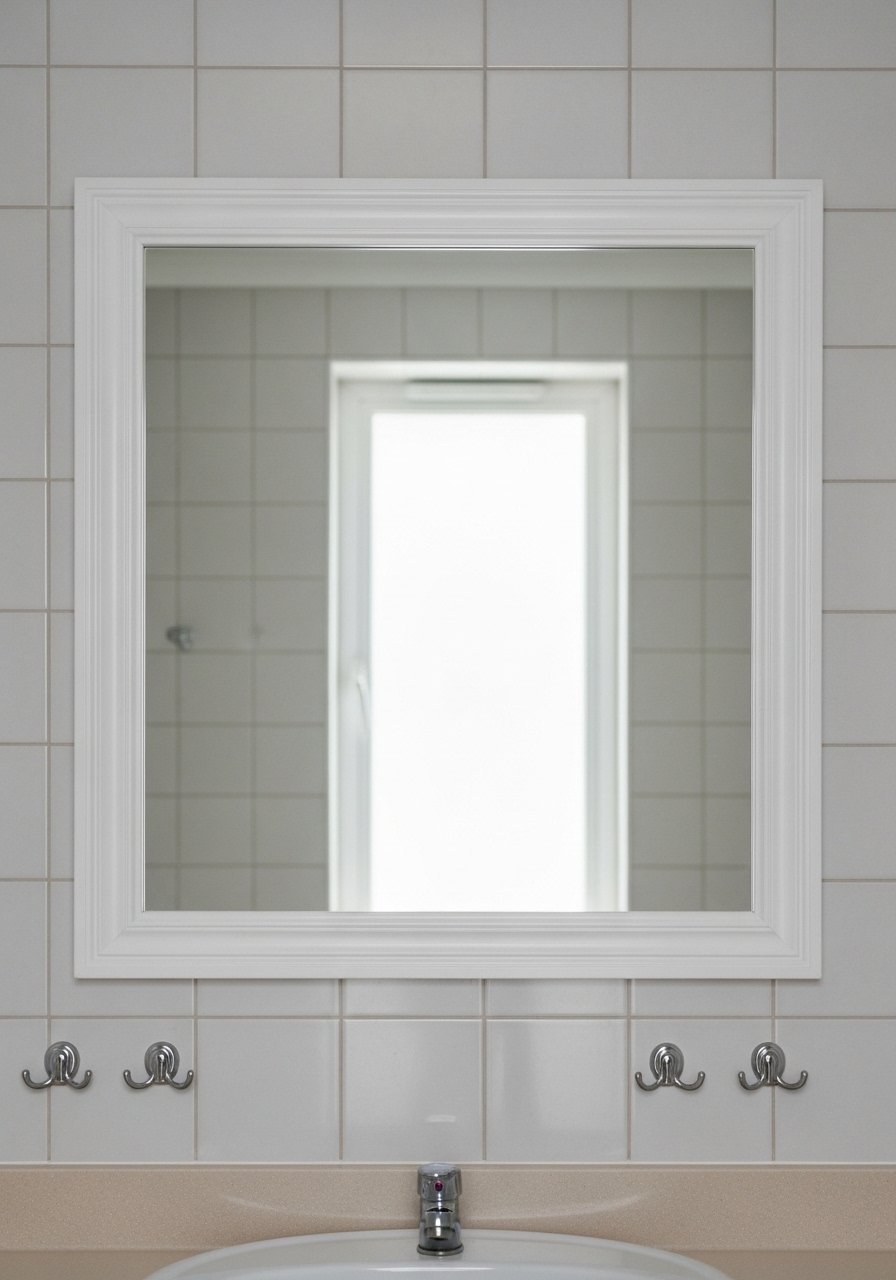
Rustic Stick-On Wood Frame For Bathroom

My first attempt at a stick-on frame fixed a builder-grade vanity mirror that felt cold. The trick is 1×2 pine cut to fit and mitered at exactly 45 degrees for clean corners. Keep the frame 2 to 4 inches wide for mirrors under 30×40 inches so it does not overwhelm the sink. Paint both sides of the boards before attaching to avoid raw wood showing in reflections. Use command strips every 4-6 inches around the frame for renter-friendly hanging. I used a small can of Minwax weathered oak and 1×2 pine boards on Amazon to match the warm tone.
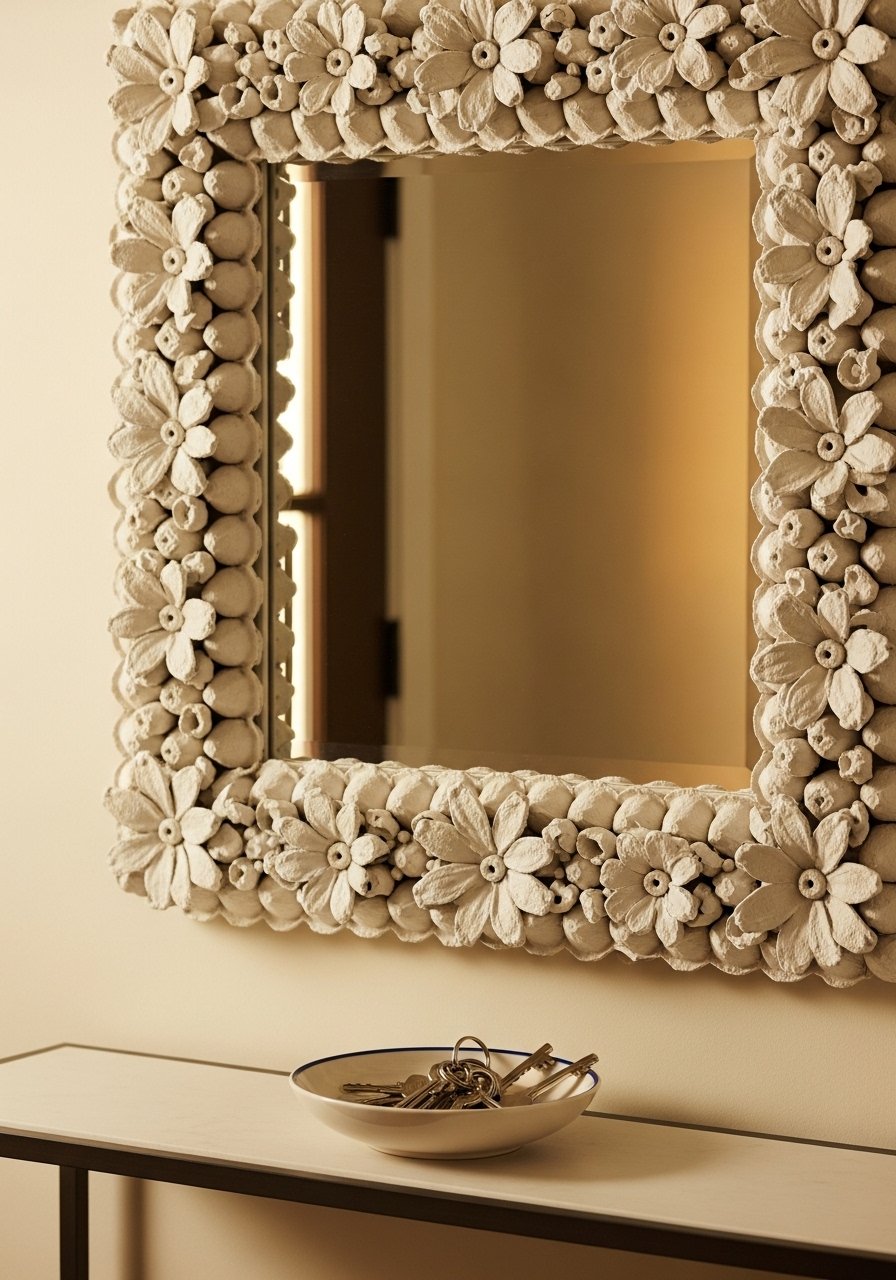
Cardboard Flower Frame For Boho Entry
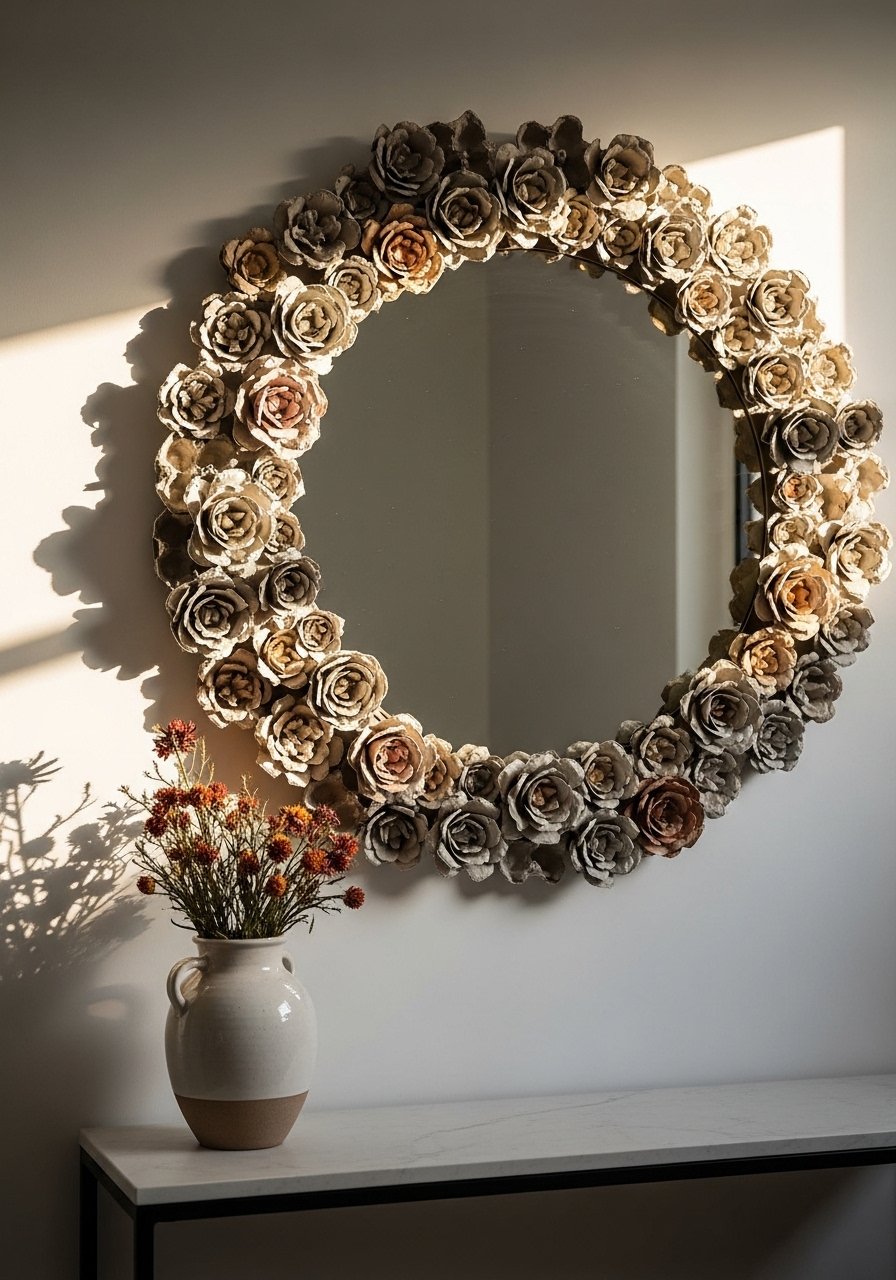
This one started as a freebie from my recycling bin. Cut cardboard into a 2 to 3 inch base, then make petals from egg cartons and hot glue them on. Dye petals with craft acrylics for an ombre effect that reads custom. Foam core behind the whole piece keeps it flat on the wall. Glue gun embellishments dry fast and hold well, but use a little wood glue where petals meet the base for longer life. Most folks nail a frame refresh for under fifty bucks. I linked the glue gun I like here mini hot glue gun kit.
Mitered Polystyrene Molding For Transitional Bath
If you want a wood look without the weight, polystyrene molding is your friend. Cut molding at 45 degrees so joints fit flush, then use adhesive foam tape to stick it to the mirror edge. Paint both sides of the molding pieces before attaching to prevent any raw edges showing in reflections. This is a renter-friendly swap that looks surprisingly high end. A common mistake is using molding that is too deep. Keep depth subtle so the mirror does not sit proud. Try polystyrene decorative molding for a lightweight option.
Dollar Tree Mosaic Accent For Round Mirrors
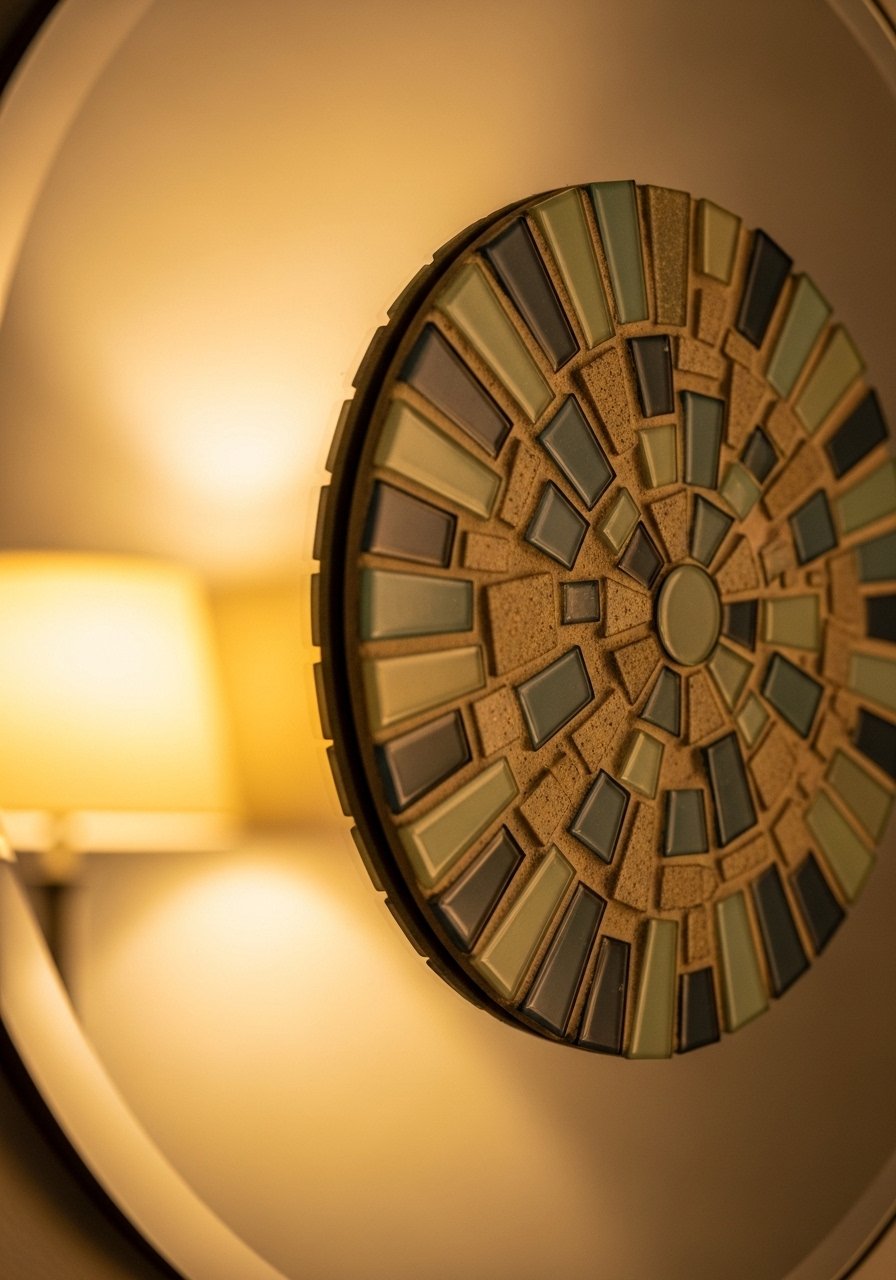
I glued broken tile shards into the center of a cheap Dollar Tree round mirror to nail a Pottery Barn look for pocket change. Use a bit of grout or clear epoxy between pieces so they stay put. This works especially well on smaller mirrors that need a focal point. One detail people skip is spacing the tile slightly off center to mimic artisan work. For supply runs, pick up a small tile sample pack and clear epoxy adhesive. Mirror flips are blowing up video searches this year.
Foam Core Backing For Gallery Cluster
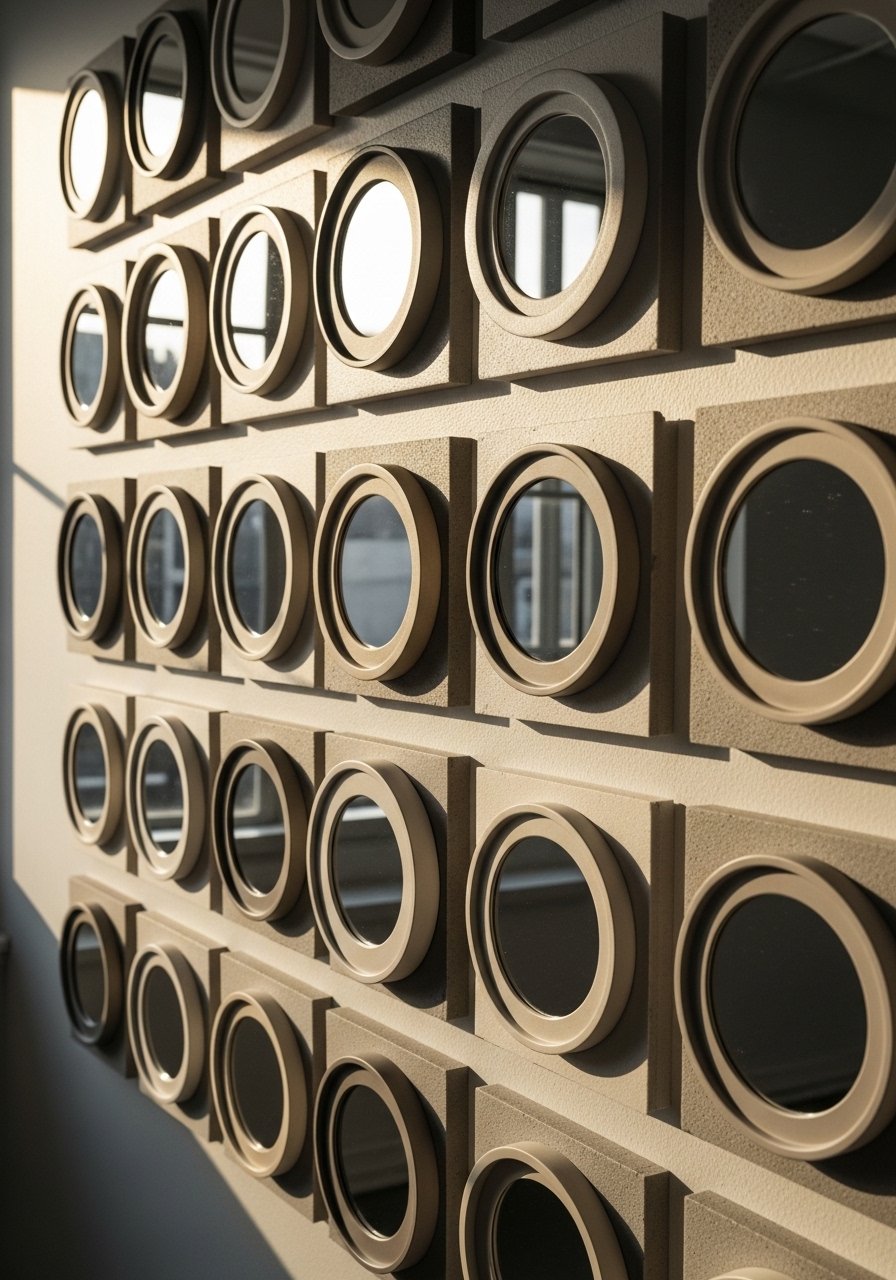
I wanted a gallery of round and square mirrors but did not want them to rattle or hang oddly. Mount each small mirror onto foam core board cut to match, then glue a lightweight frame around the edge. Foam core makes every piece hang flat and prevents the cheap frames from bending. Command strips on the back keep the whole cluster renter-safe. A tiny hack I use is to back the mirrors with a 1 inch foam layer for depth, it looks like framed art from the street. Over half of renters stick to no-damage tricks.
Dyed Wooden Bead Border For Kid Room
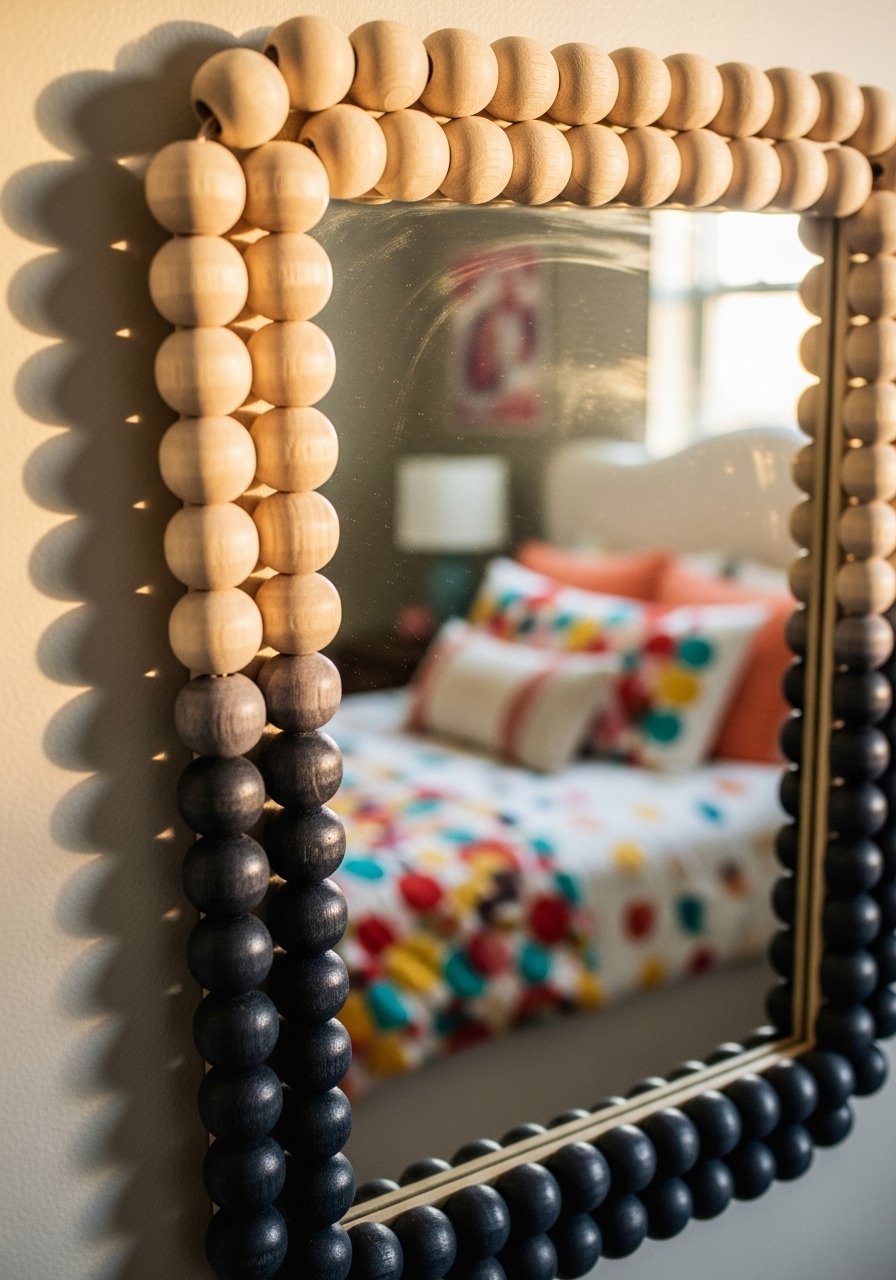
My niece wanted a bright mirror for her room and beads did the job. String wooden beads, dye them in acrylic for a slow ombre, and glue them around a cheap craft mirror edge. If you want the beads to sit tight, glue them to a thin plywood strip first and then attach that to the mirror. A common mistake is picking beads that are too large for small mirrors. Use 8 to 12 mm beads for a balanced scale. I grabbed a bag of beads and instant glue here wooden-beads-craft-bulk.
Distressed Pine With Corner Brackets For Industrial Bath
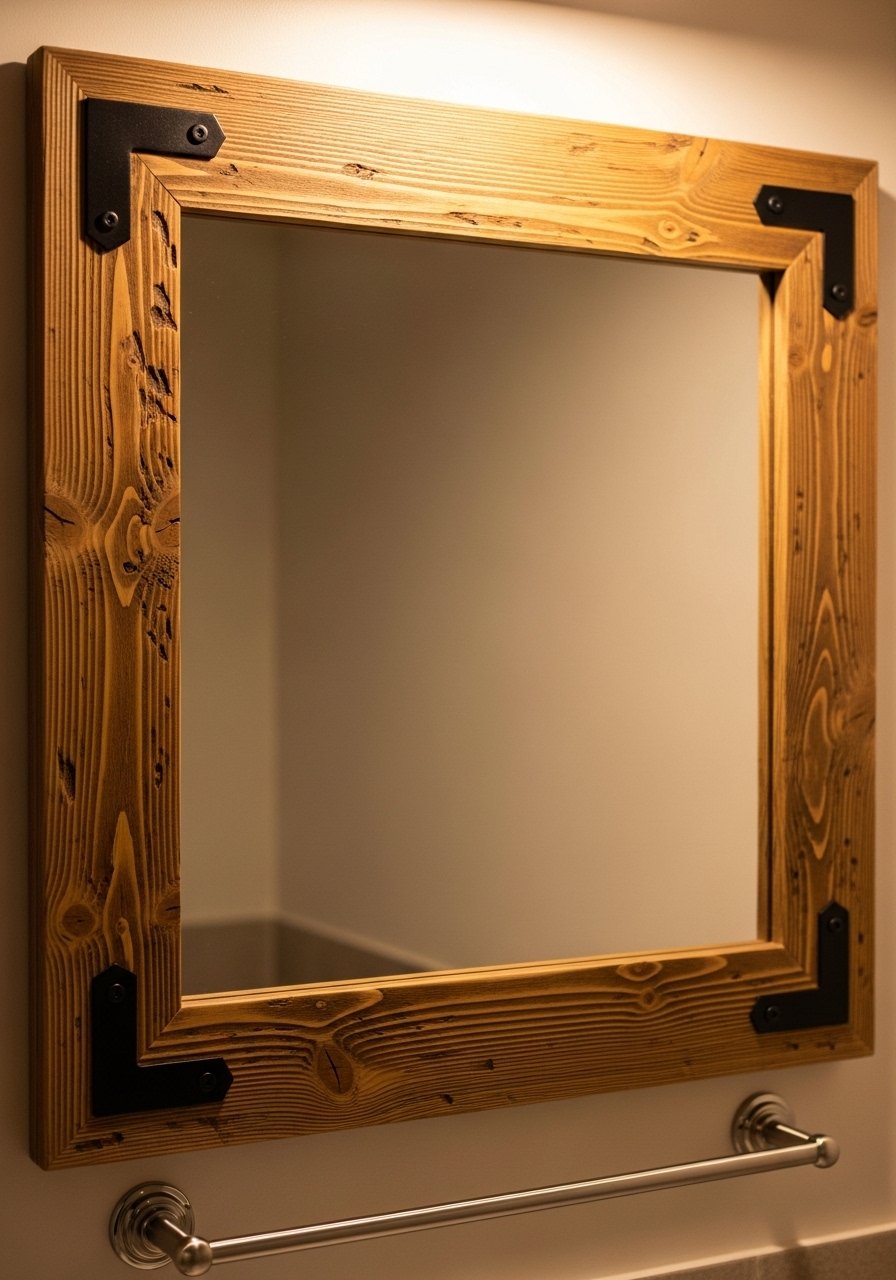
There was a gap between the plain mirror and the rest of my industrial bathroom. Cutting pine slats, staining one coat, and adding spray-painted black corner brackets fixed that. Distress the stain with light sanding on corners only. The brackets add a manufactured weight that hides any imperfect cuts. Use wood glue on joints and clamp for an hour so nothing shifts. People forget to paint the inside edges of the wood, and the mirror will reflect any raw color. Try black-metal-corner-brackets.
Foam Ring Sunburst For Scandinavian Living Room
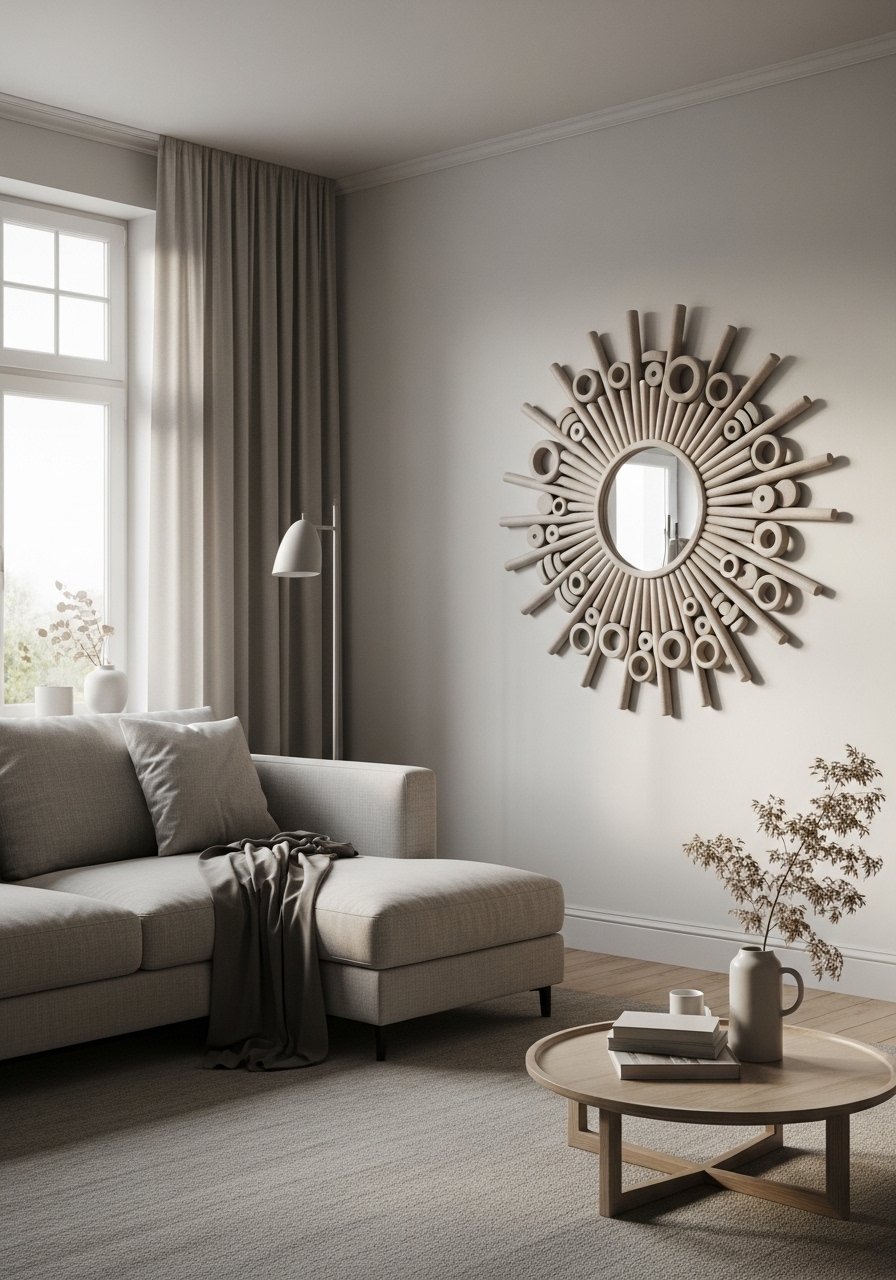
I wanted a Scandinavian vibe without the sawdust. Cut foam circles in graduating sizes, glue them in layers around a small round mirror, and paint in a warm white or soft gray. Foam is light so you can use tiny command strips. One pro tip is to offset the rings slightly so the shadowing reads like real depth. A mistake I see is making the outer rings too close together which flattens the effect. For supplies, I used this foam sheet pack craft-foam-sheets-multicolor.
Egg Carton Petal Frame For Entryway
Repurposing egg cartons into petals is cheap and surprisingly pretty. Cut individual cups, shape them into petals, paint two coats and glue them onto a cardboard base that fits your mirror. Back with foam core so it hangs flat. The glue gun is the MVP for speed but add a dab of PVA glue at each join for durability. One thing people miss is to stagger petal sizes for an organic look. For paints I used this small acrylic set acrylic-paint-set-12-colors.
Chalk Paint Medallion For Ceiling Mirror
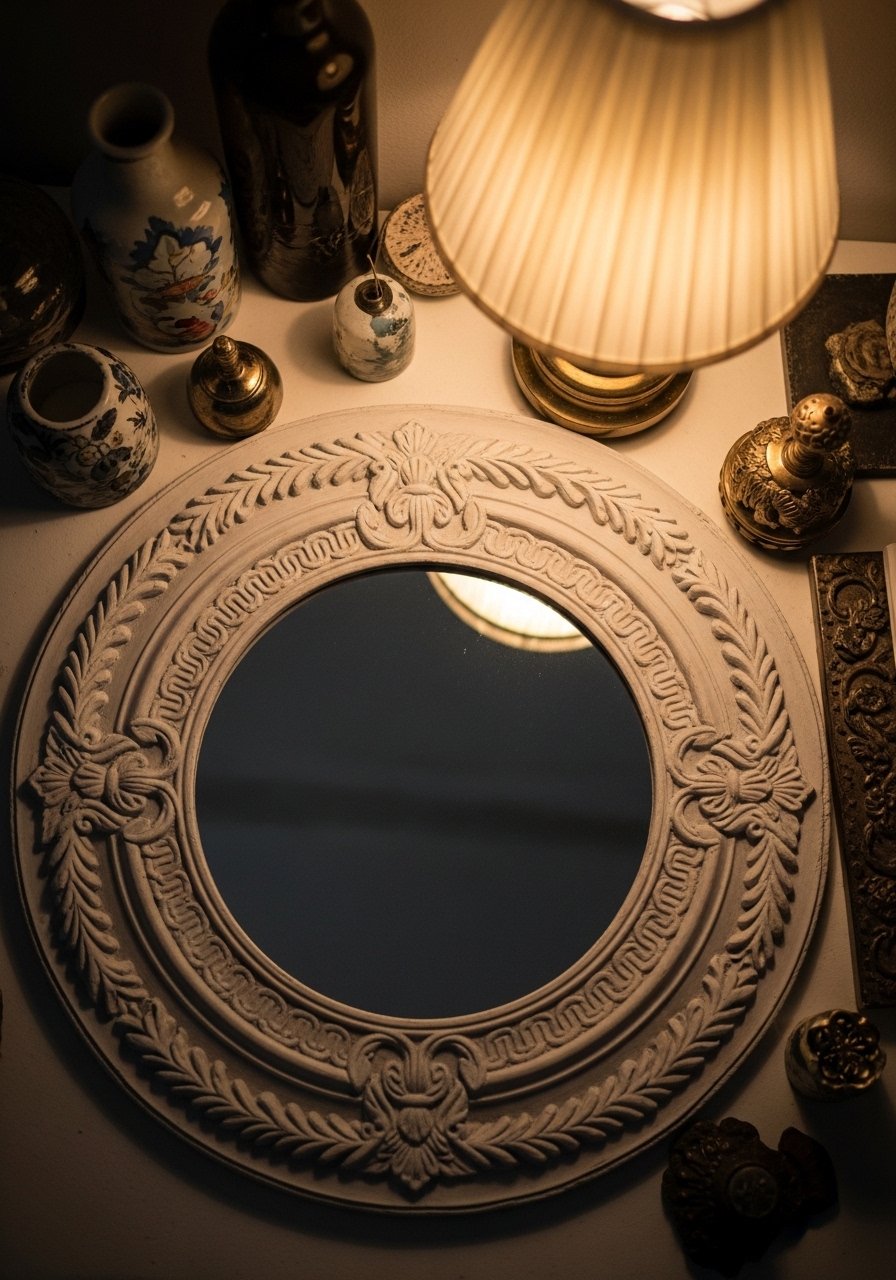
I wanted a soft plaster look without the weight so I painted a Dollar Tree medallion in chalk paint and mounted it around the mirror. Chalk paint dries matte and takes to sanding for a subtle age in minutes. Paint the back edges of the medallion too so the reflection does not show raw plastic. This trick reads expensive above vanities or in a bedroom. Use a 2 inch medallion and a coat of Annie Sloan inspired chalk paint. I like this chalk paint set for small projects chalk-paint-mini-set.
Twig And Wire Hook Frame For Mudroom
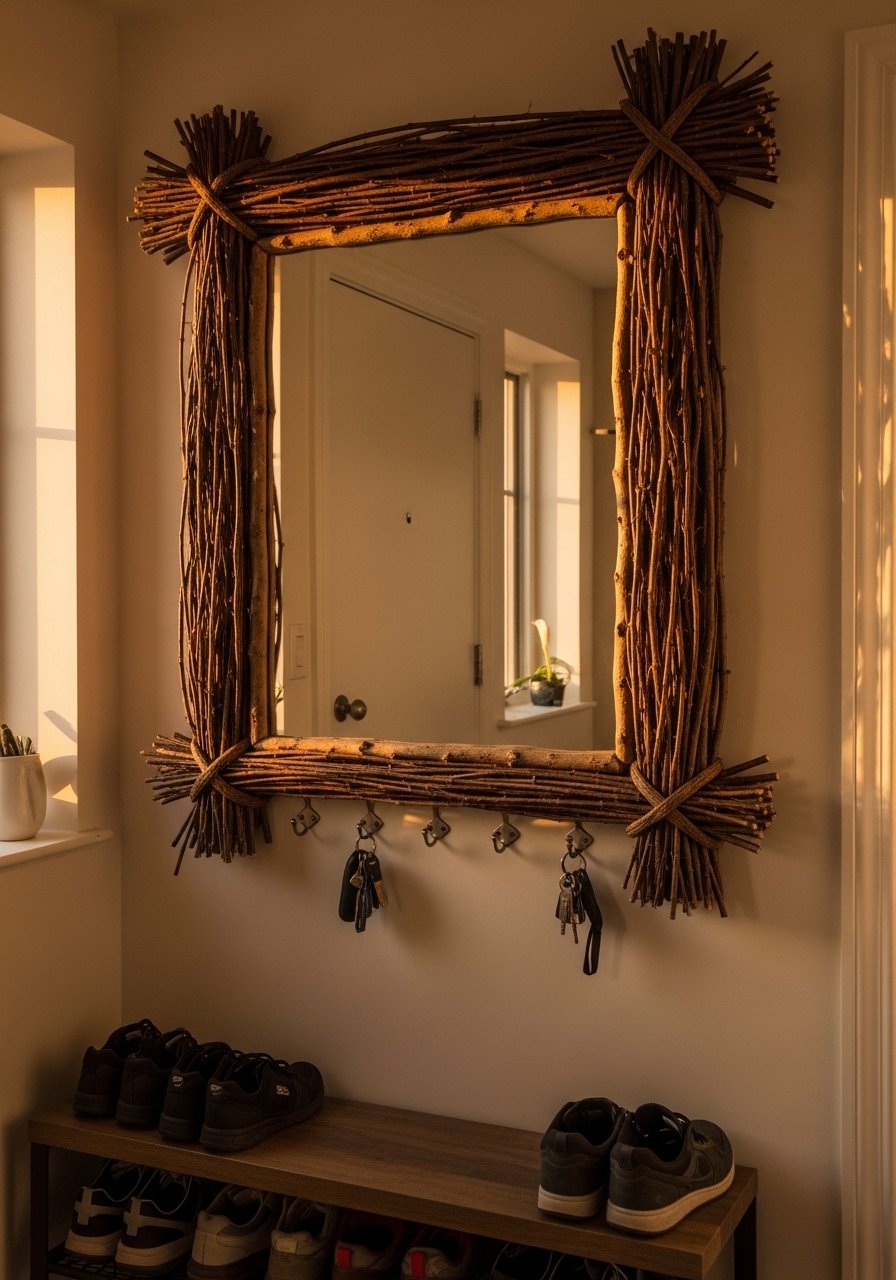
We had nowhere to hang keys by the door. I wired twigs together to form a frame and added small S-hooks for keys and masks. Seal the twigs with a matte spray so they do not shed. The frame doubles as functional storage and adds texture at eye level. A mistake is not anchoring the hooks to the frame where the twig is weakest. Reinforce with a small strip of wood behind the twig for each hook. I keep a set of small S-hooks handy small-s-hooks-pack.
Layered Mirrors On Foam Core For Boho Wall
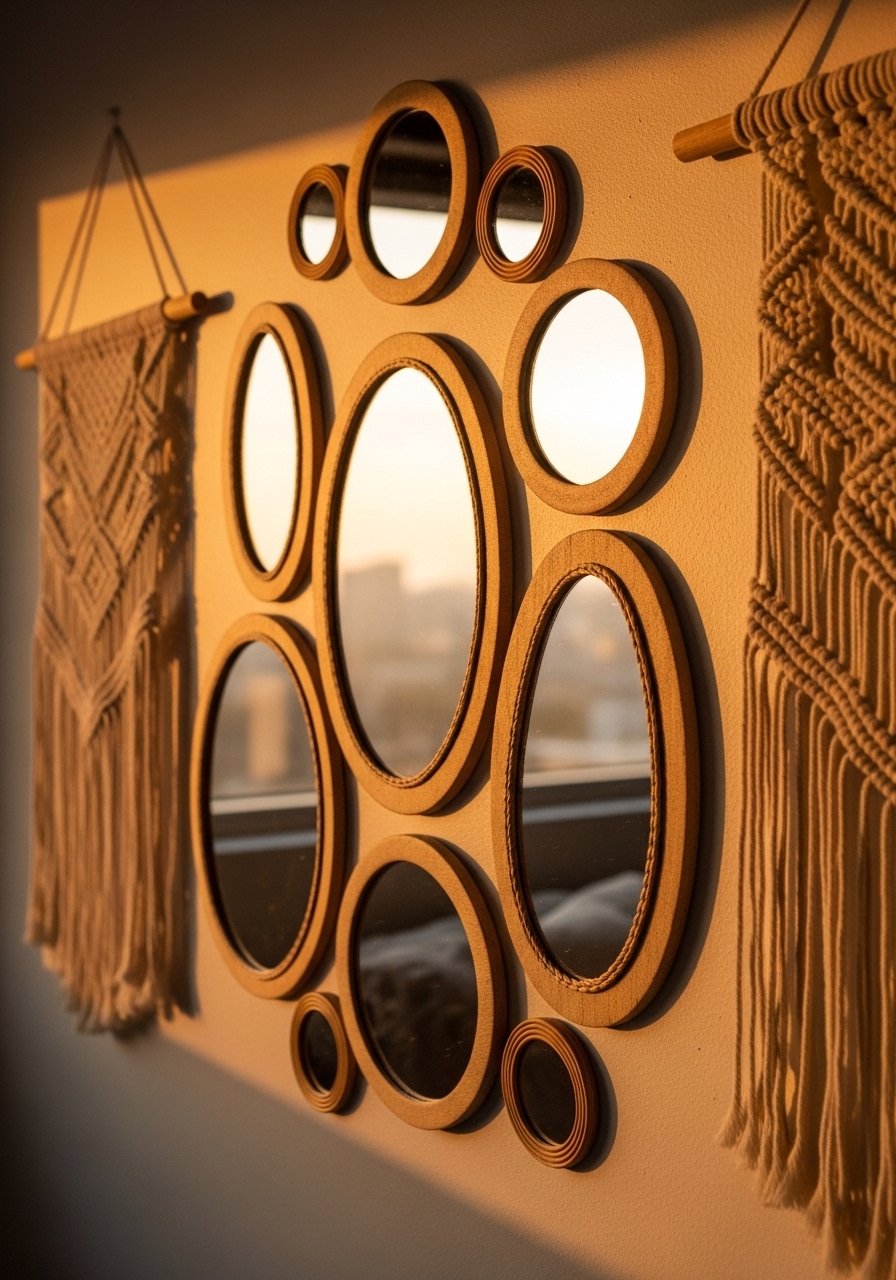
To make a statement without spending hours, mount a few different craft mirrors on foam core and layer them slightly for shadow and depth. Use odd numbers for an organic cluster. Foam core prevents wobble and keeps everything flush so the family does not nick their heads on a stray corner. One real-life note is to pick one mirror as the anchor and size the rest relative to that by roughly 60 to 75 percent. For foam core and craft mirrors, try foam-core-boards-24×36.
Copper Pipe Frame For Modern Industrial
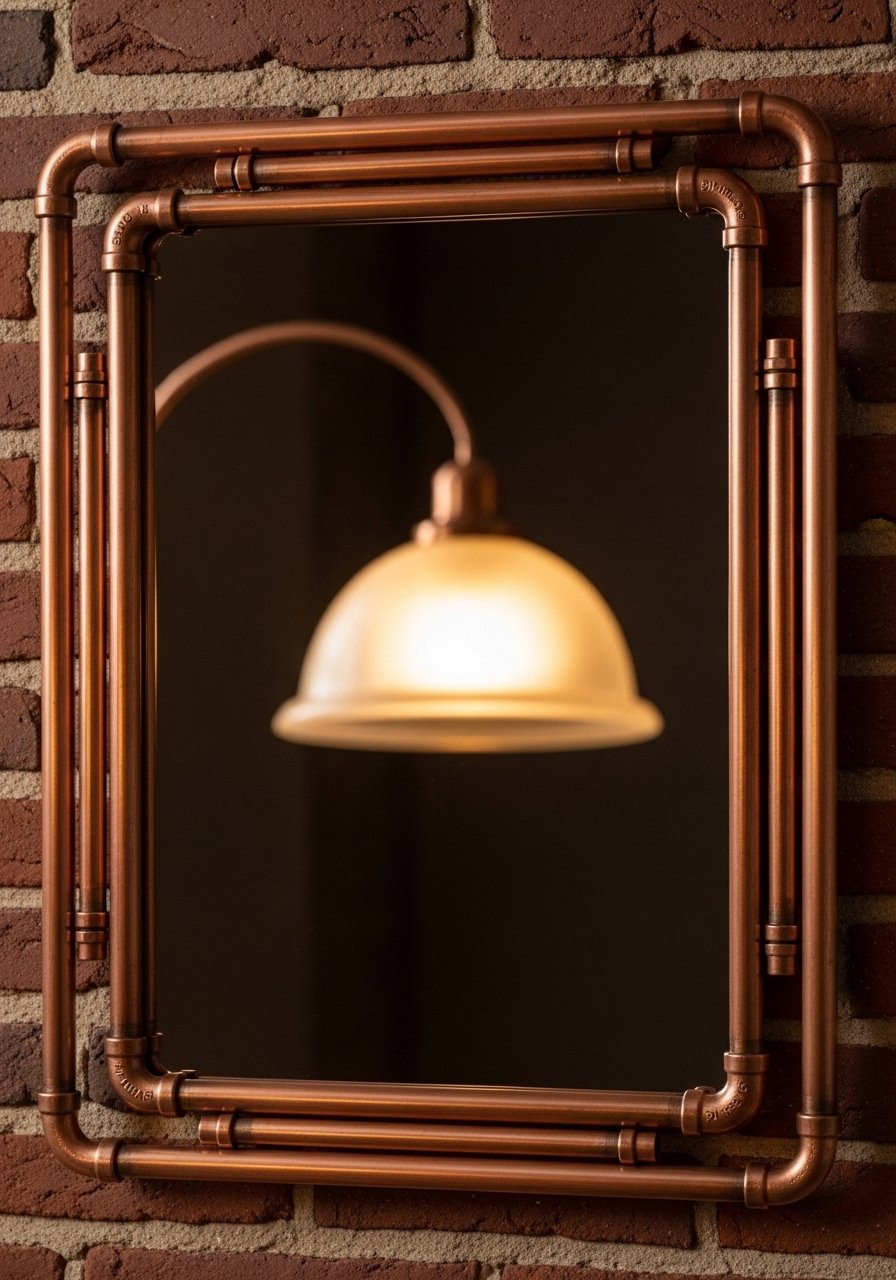
Copper pipe gave my hallway mirror an instant industrial edge. Cut and clean pipe sections, join with corner fittings, and mount them around the mirror with silicone. If you are in a rental, glue the fittings to a thin backer board and hang the backer with command strips. A common oversight is not polishing the pipe where it meets the wall, so the join looks unfinished. Use 1 inch diameter pipe for a balanced look on medium mirrors. I used this copper pipe kit for small projects copper-pipe-kit-1-inch.
Rope Wrapped Nautical Frame For Beachy Powder Room
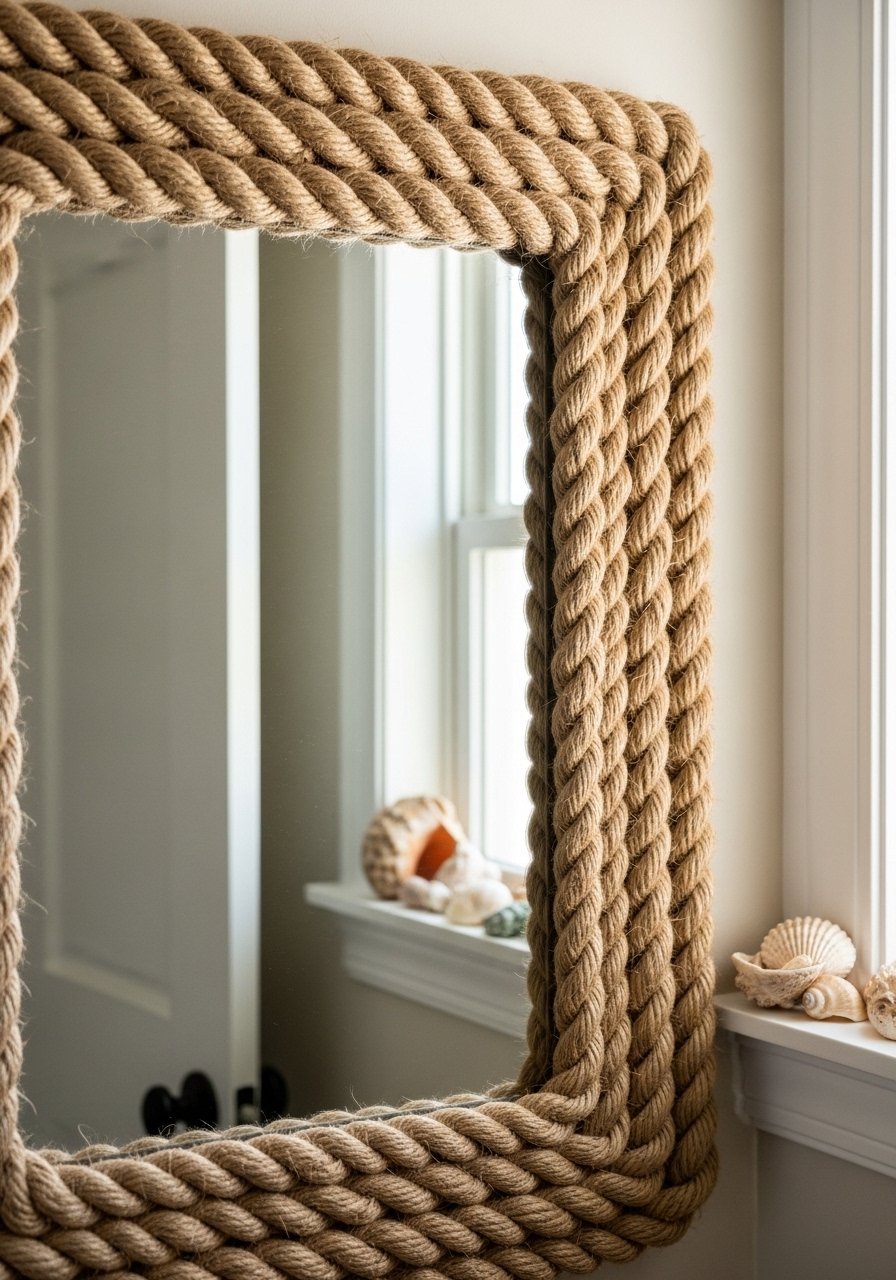
I wrapped jute rope around a thrift mirror to get a beachy feel for cheap. Start with a hot glue base and coil the rope in tight turns. Seal with a matte varnish if you expect humidity. The detail most people skip is tapering the rope thickness slightly at the corners so the reflection does not look uneven. A small roll of jute goes a long way and reads expensive when paired with white shiplap. I like this natural jute rope for wrapping natural-jute-rope-3mm.
Painted Popsicle Stick Geometric Frame For Kid’s Room
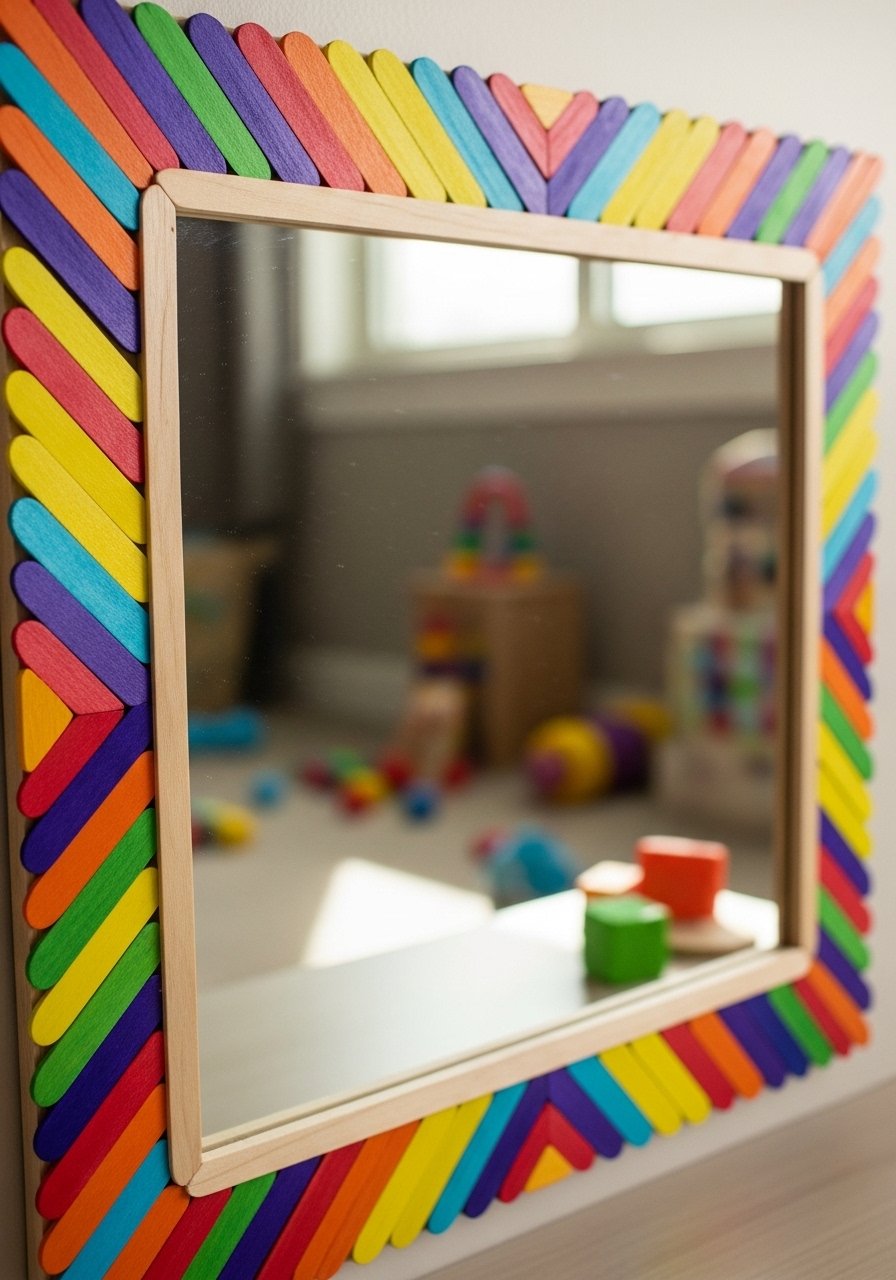
Popsicle sticks are a cheap, fast way to get color and pattern. Lay sticks in a geometric chevron or diamond pattern, glue to a lightweight board, and paint in playful hues. Use odd numbers in each cluster for a more natural look. The scale matters, so keep the frame strips 1.5 to 2 inches wide so they do not swallow a small mirror. For supplies, this popsicle stick bulk pack is great colored-popsicle-sticks-bulk.
Vintage Picture Molding Frame For Bedroom
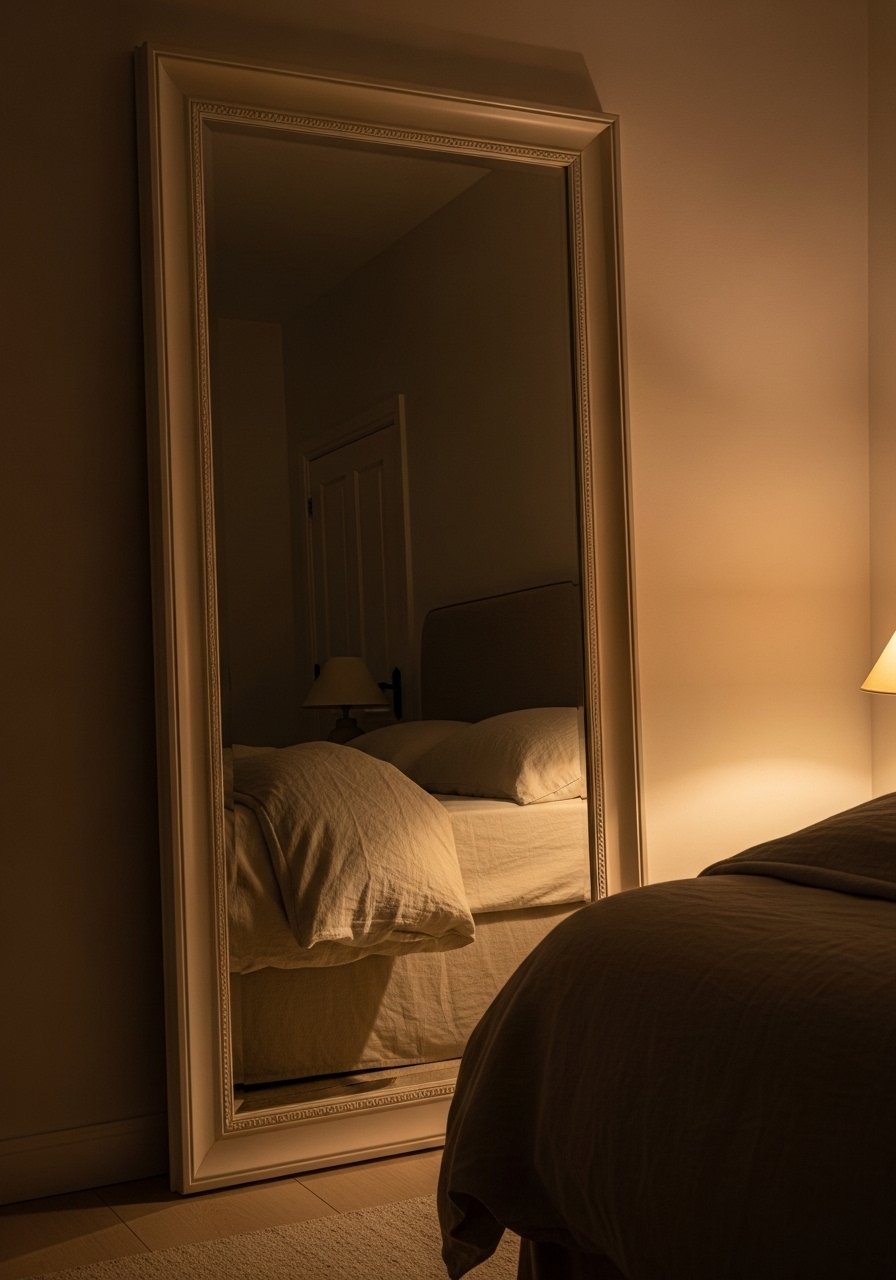
I scavenged picture molding to give a plain bedroom mirror architectural weight. Miter the corners at 45 degrees and glue the pieces, then clamp until dry. Paint the molding in a single soft tone so it reads built-in. Paint both sides before installation so the reflection does not betray raw wood. For a built-in look, make the frame width about 3 inches on a medium mirror. I used this picture molding strip for my small frame picture-molding-strip-1×3.
Mirrored Tile Border For Glam Dressing Area

Adding thin mirrored tiles around a vanity mirror gives dimension without bulk. Use glass mosaic tile and join with clear silicone so seams read invisible. The key is offsetting tile pattern every other row for a shimmering interplay. A mistake I often see is using tiles too large, which reads heavy. Stick to 1 by 1 inch tiles for delicate glam. For tiles and clear silicone, this small mosaic set works well glass-mosaic-tile-sample-pack.
Leather Strap Hanging For Minimalist Hall
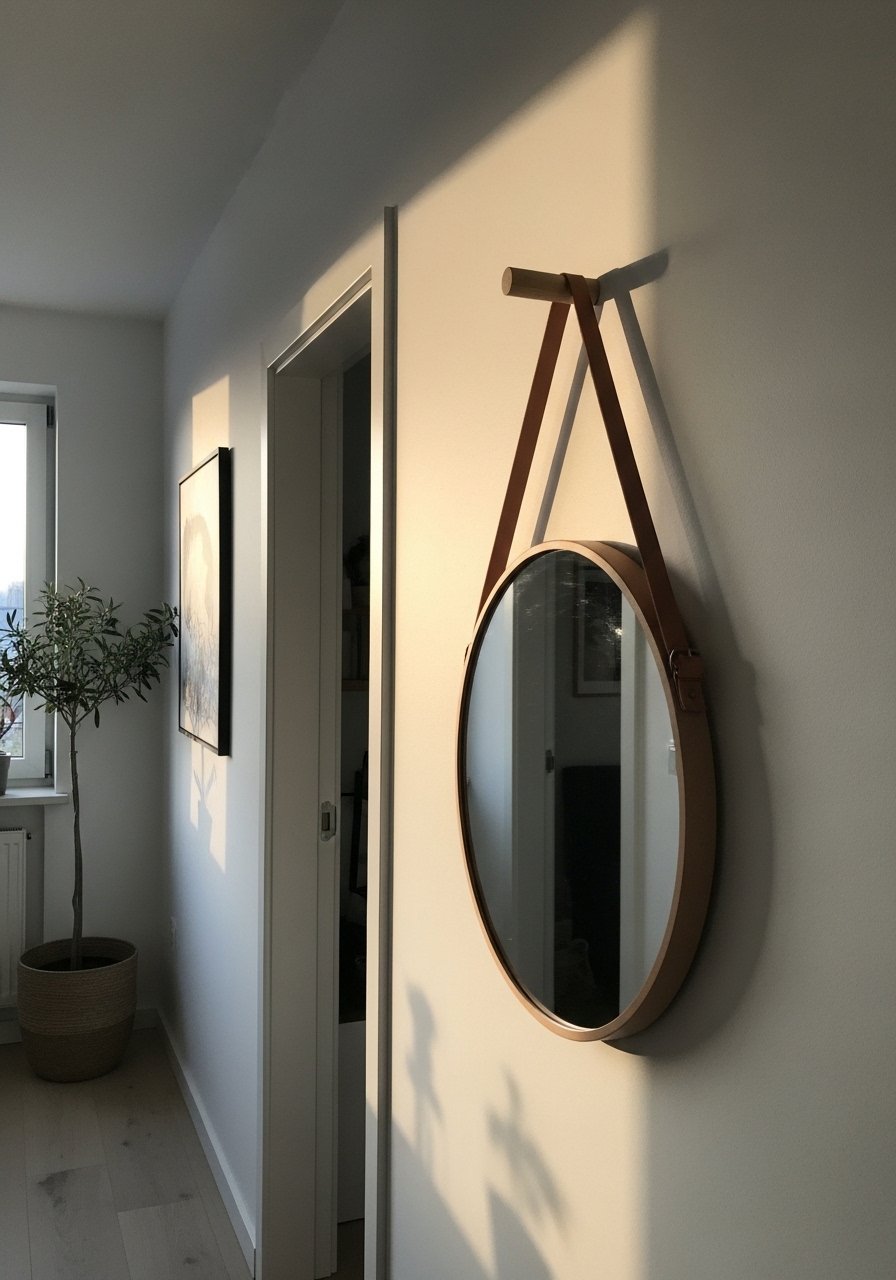
Leather straps give a mirror a Scandinavian, minimalist look. Attach the straps to a slim wooden bar or knob and let the mirror hang. Use full grain leather or high quality vegan straps for longevity. A detail many skip is reinforcing the strap attachments on the mirror with a small metal plate on the back to stop wear. For a clean installation, pick straps that are 1 to 1.25 inches wide. I used these leather hanging straps for a simple anchor leather-mirror-hanging-straps.
Driftwood Frame With Natural Texture For Coastal Living Room
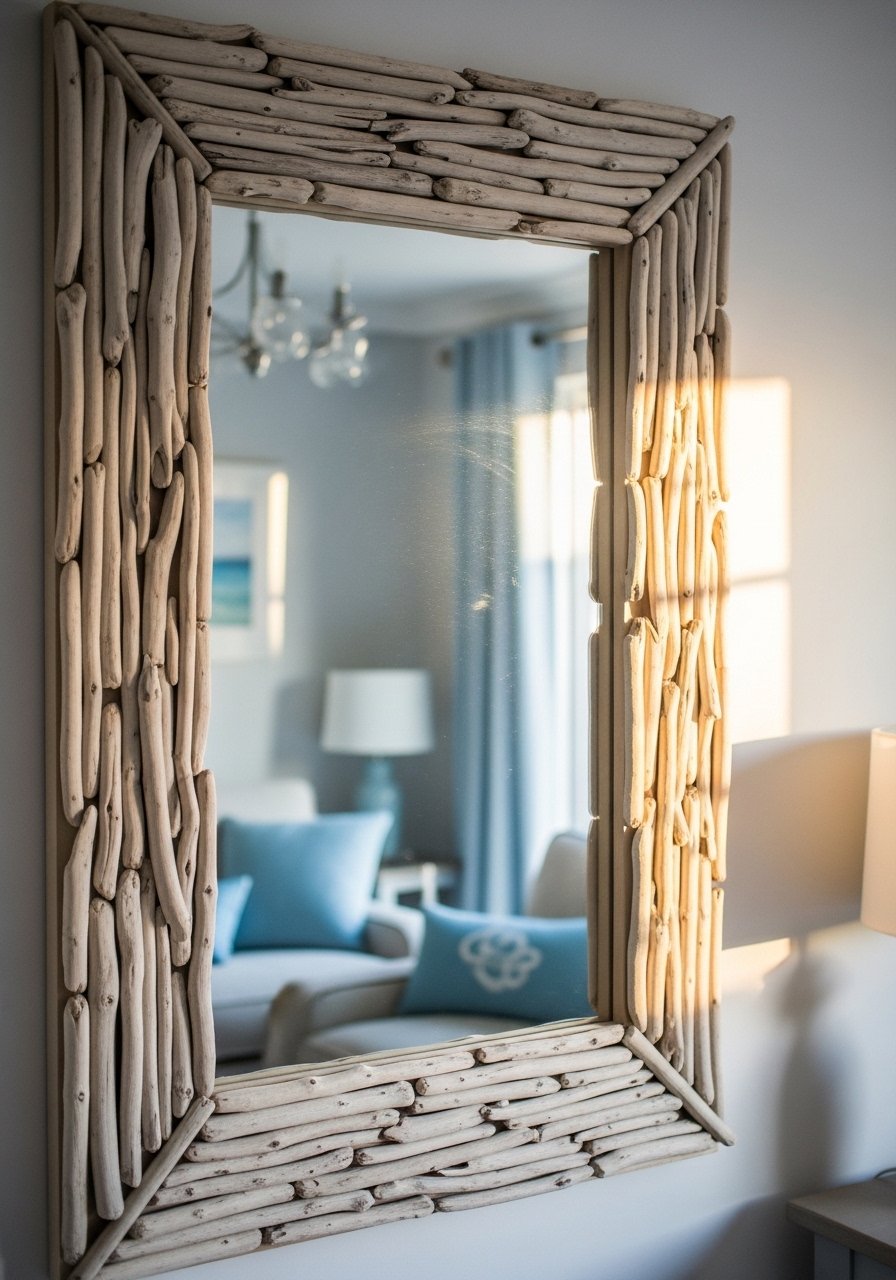
I walked the beach for these pieces and the frame became the room favorite. Glue driftwood to a plywood base and back the assembly with foam core for a flat hang. Seal with matte polyurethane to stop shedding. One tip people miss is to arrange pieces so the grain direction alternates, which stops the frame looking lopsided. For larger mirrors, use a hidden cleat to share the weight. You can also buy driftwood packs when hunting time is short driftwood-collection-pack.
Beadboard Shadow Box Frame For Country Kitchen
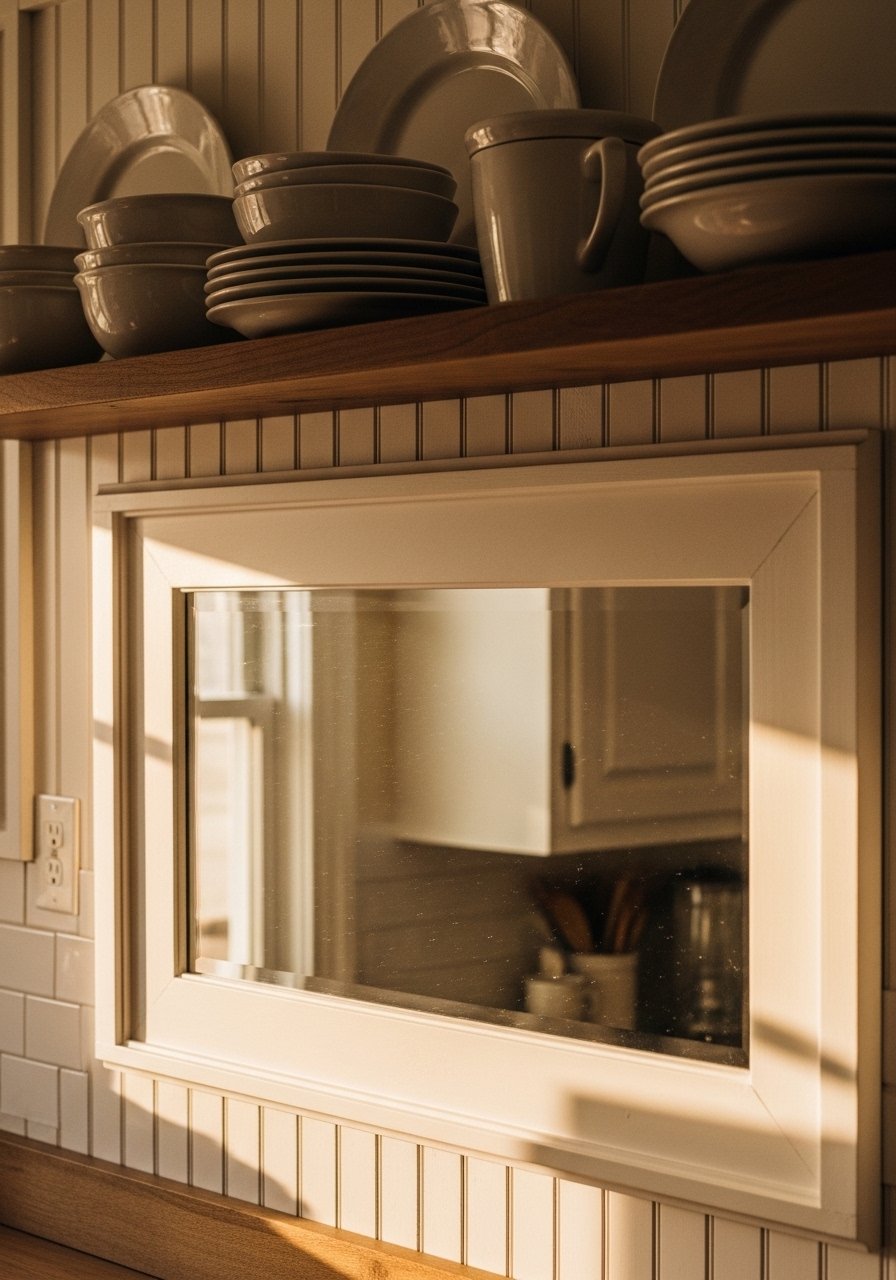
Beadboard gives a little cottage charm and builds a shadow box effect that hangs like art. Cut beadboard to the mirror size plus 2 inches of reveal, paint one coat and distress lightly. The shadow box reads custom above a breakfast nook and hides the ugly mirror edge. A real-life detail is to leave a 1/4 inch gap between beadboard and mirror to allow for expansion in humid rooms. I used this beadboard panel for a small project beadboard-panel-24×48.
Woven Rattan Overlay For Tropical Entry
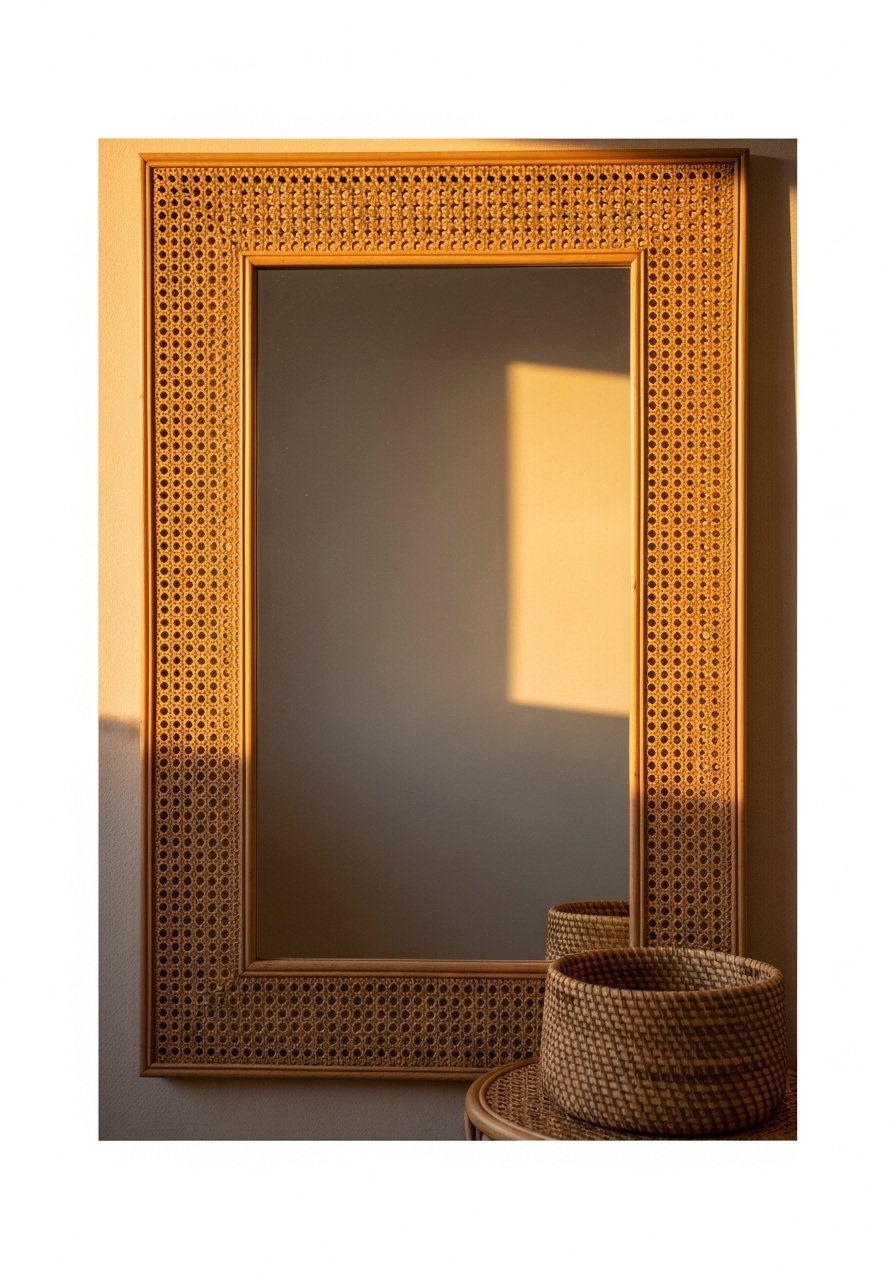
A thin rattan overlay glued to a thrift mirror makes a warm first impression. Paint the underlying frame a soft cream so the rattan pop is subtle. Rattan breathes and adds texture without bulk. One mistake is gluing rattan directly to glass. Always attach to a slim wooden backer or the frame edge. For small mirrors under 24 inches, use 1/4 inch rattan veneer for scale. I picked up rattan sheets and glue here rattan-veneer-sheets.
Your Decor Shopping List
- Honestly the best $40 I have spent. 22-inch down-filled linen pillow covers, set of 2 in light gray for layered sofa texture.
- For stick-on frames you need length. 1×2 pine boards, 8-foot cut down to size, about $5 each.
- Found these while looking for something else. Command picture hanging strips, medium pack for renter-safe installs.
- For molding and trim. Polystyrene decorative molding, 6-foot strips in white.
- Mini hot glue gun kit with sticks. Budget friendly and dries fast.
- Acrylic craft paint set, 12 colors for dyeing beads and egg cartons.
- Foam core board pack, 20×30 inches for backing cheap mirrors.
- Black metal corner brackets, set of 8 for industrial detail.
- Small mosaic glass tile sampler for mirrored borders and accents.
- Natural jute rope, 50-foot for nautical wrapping, similar at Target.
Shopping Tips
White oak beats dark wood in 2026. Design feeds have shifted completely. White oak floating shelves look current, not dated.
Grab these velvet pillow covers for $12 each. Swap them seasonally and the whole room feels different.
Curtains should puddle or kiss the floor, never hang halfway up. 96-inch linen panels are right for 9-foot ceilings.
Lead with natural materials. One big plant looks better than five small ones. 6-foot fiddle leaf fig, faux adds scale without the maintenance.
If you rent, use command strips and mounting squares and test adhesion on a hidden spot first.
Frequently Asked Questions
Q: Can I make these frames without power tools?
A: Yes. Many ideas here use foam core, hot glue, or command strips so no saw is required. Stick-on wood frames and molded polystyrene are renter-friendly options.
Q: How do I stop a DIY frame from showing raw wood in the reflection?
A: Paint both sides of any wood or trim before attaching. That prevents the mirror from reflecting an unfinished edge.
Q: What width should a bathroom mirror frame be?
A: For mirrors under 30×40 inches, keep frame width between 2 and 4 inches. A narrower trim keeps the mirror balanced with the vanity.
Q: My DIY frames keep falling off in humid rooms. What helps?
A: Use adhesive foam tape or construction adhesive rated for bathroom conditions and space command strips every 4 to 6 inches. Also paint and seal edges to reduce warping.
Q: Are cheap craft supplies worth it for a polished look?
A: Yes when you add simple details like staggered bead sizes, a one-coat distress stain, or added brackets. Most folks nail a frame refresh for under fifty bucks.
Q: How do I hang a heavy driftwood frame safely?
A: Use a hidden cleat and anchor into studs when possible. For renters, build a lighter plywood backer and distribute weight with two large command hooks rated for the mirror’s pounds.
Q: Can pet owners keep these frames clean and durable?
A: Use sealers on organic materials and fast curing glue where your pet might rub. Also choose materials that do not shed, and avoid loose embellishments near low mirrors.
Q: Where should I start if I feel overwhelmed by tools and choices?
A: Pick a no-tool idea like foam ring sunburst or foam core backed clusters to gain confidence. Over half of renters stick to no-damage tricks.
