

I hate rooms that feel cluttered but still somehow empty. I’ve stood in my hallway holding a stack of mail, unsure where anything should live. That confusing, half-organized feeling is what DIY organizing fixes for me.
I write like I work: small changes that make a room feel calm and useful. You don’t need perfect tools — just a plan and a few well-placed pieces.
How to Organize Your Home Using DIY Projects
This is the method I use every time a room feels unfinished. I focus on shaping the space so things have obvious homes, not hiding everything away. By the end, rooms feel balanced, breathable, and easier to keep tidy — often with an organic modern or Japandi touch.
What You'll Need
- Woven seagrass storage basket, 16"x12" (~$25–45)
- Floating wood shelf, 24", natural finish (~$25–60)
- Linen fabric storage bin, medium (~$20–45)
- Glass apothecary jar set, 3-piece (~$20–35)
- Storage ottoman, 36"x18", upholstered linen (~$70–140)
- Adhesive metal wall hooks, 8-pack (~$8–18)
- Pegboard wall organizer, 24"x16" (~$30–65)
- Removable chalkboard labels, 60pcs (~$6–12)
Step 1: Edit first, then add storage
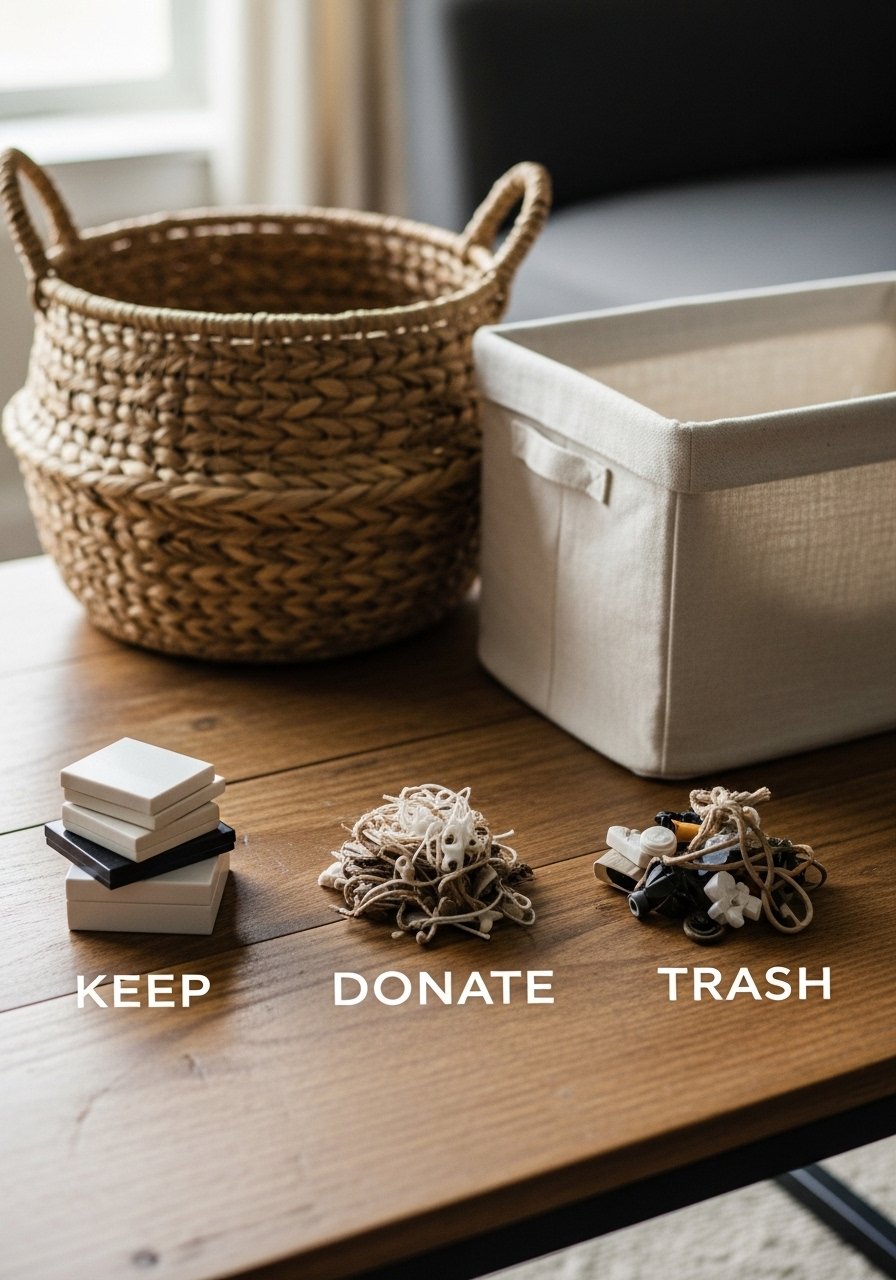
I always start by editing. I set a timer for 15 minutes and sort surfaces into keep, donate, and toss. The visual change is immediate: fewer objects, more breathing room. The insight most people miss is sorting by use, not by how pretty something is.
Avoid buying a storage piece until I know what stays. A common mistake is adding bins for "stuff" that should actually leave the room.
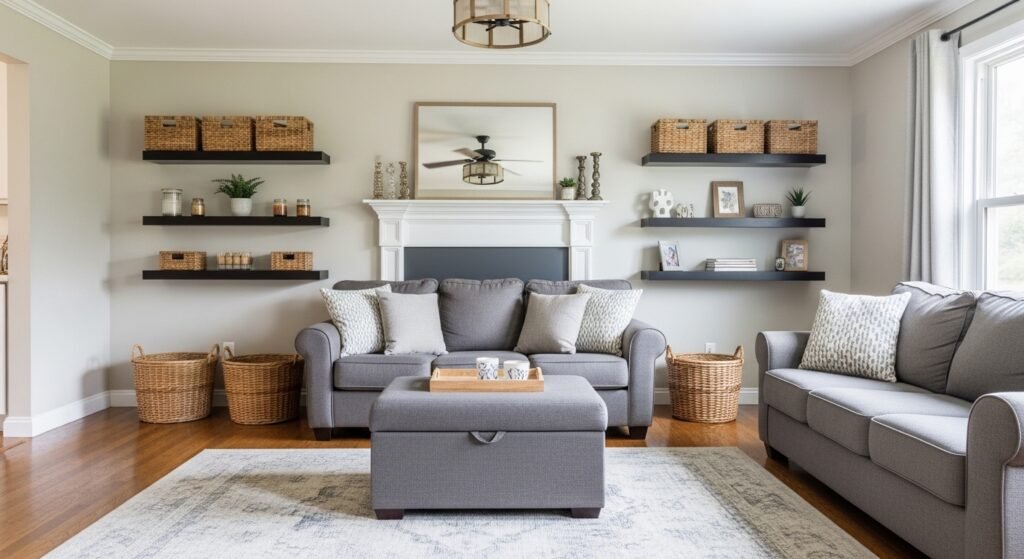
Step 2: Define zones with deliberate pieces
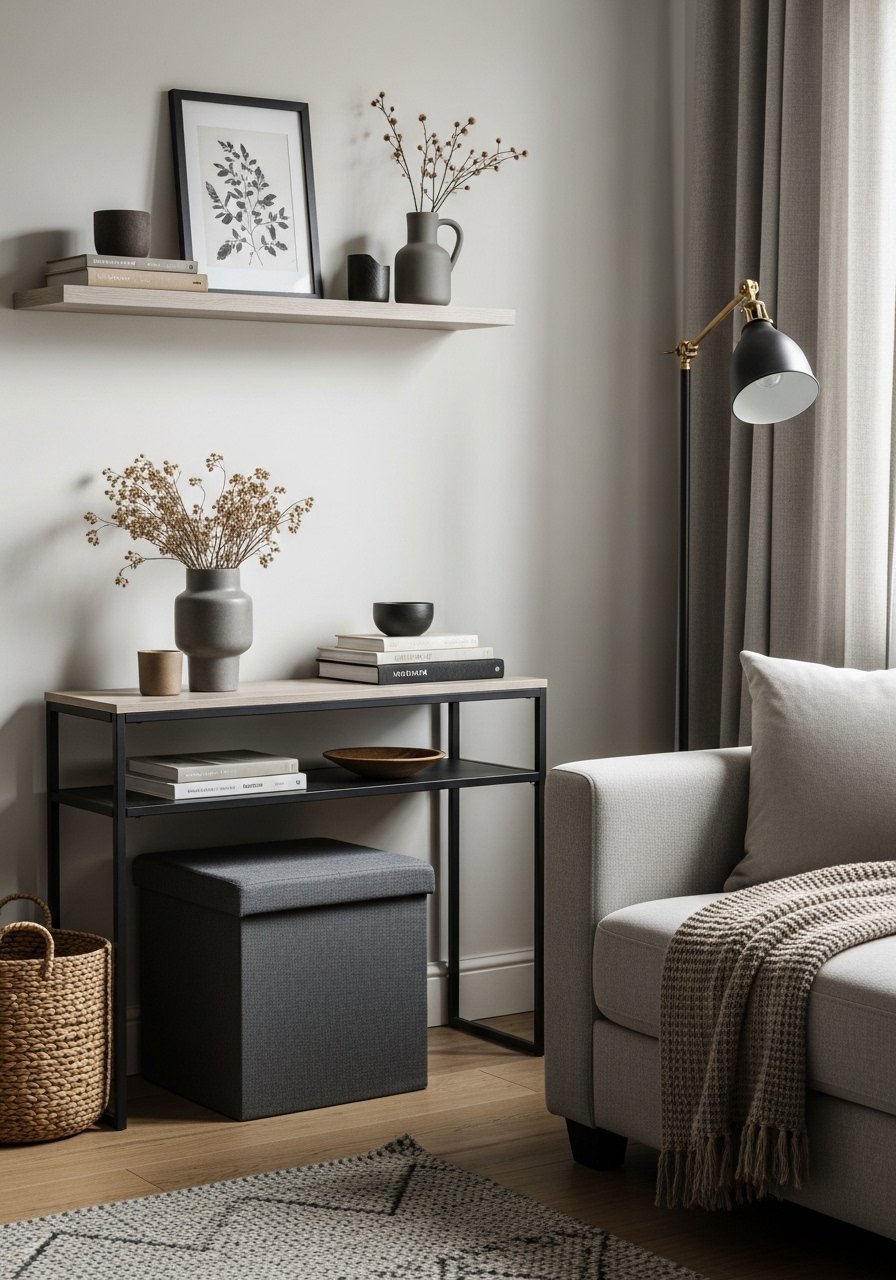
I decide what each corner will do: drop zone, media, reading nook. I place a floating shelf to anchor the eye and a storage ottoman to ground the floor. Visually, the room finally reads as intentional, not improvised. People often forget negative space — letting one shelf breathe makes the whole wall calmer.
A mistake I watch for is overloading a zone. I stop when each area has one functional object and one decorative touch.
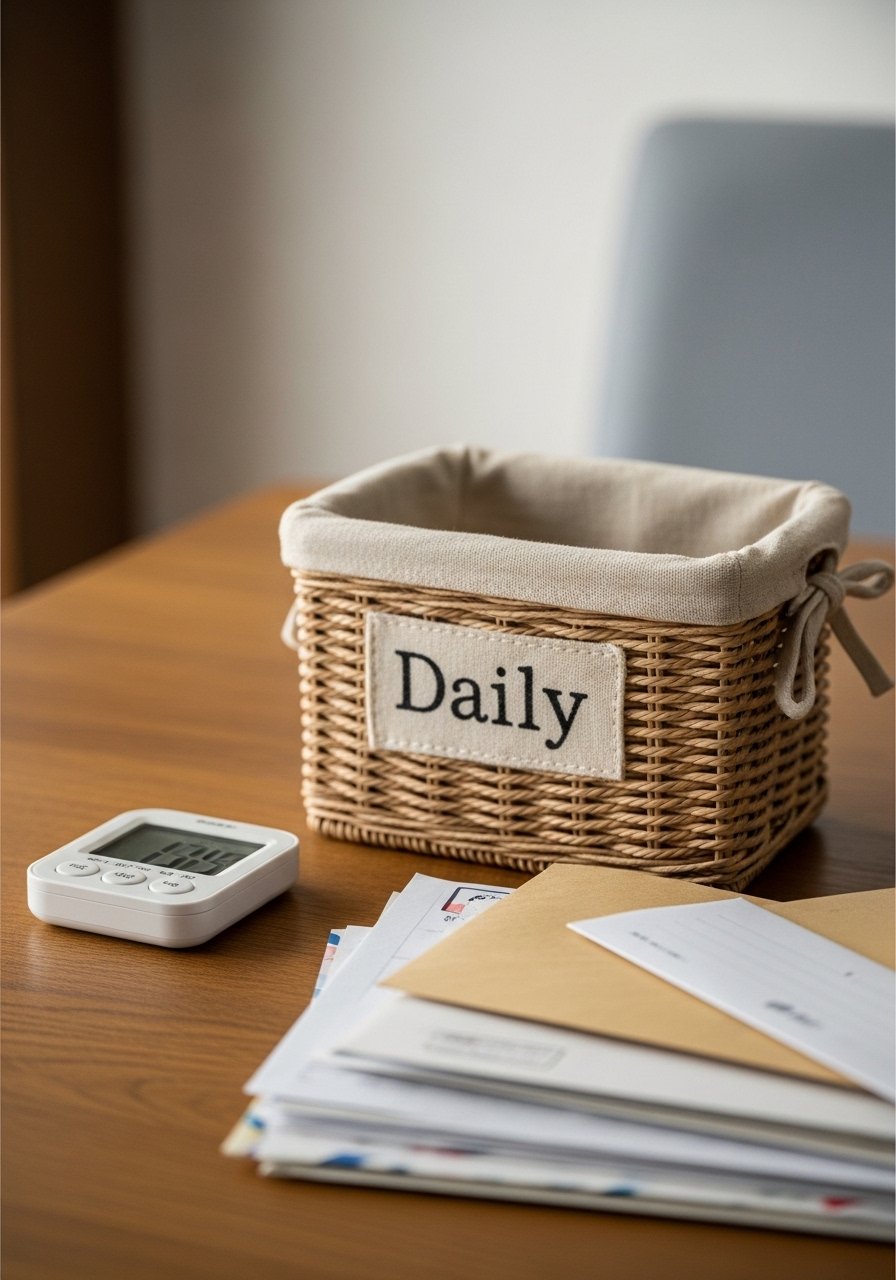
Step 3: Make everyday items visible and attractive
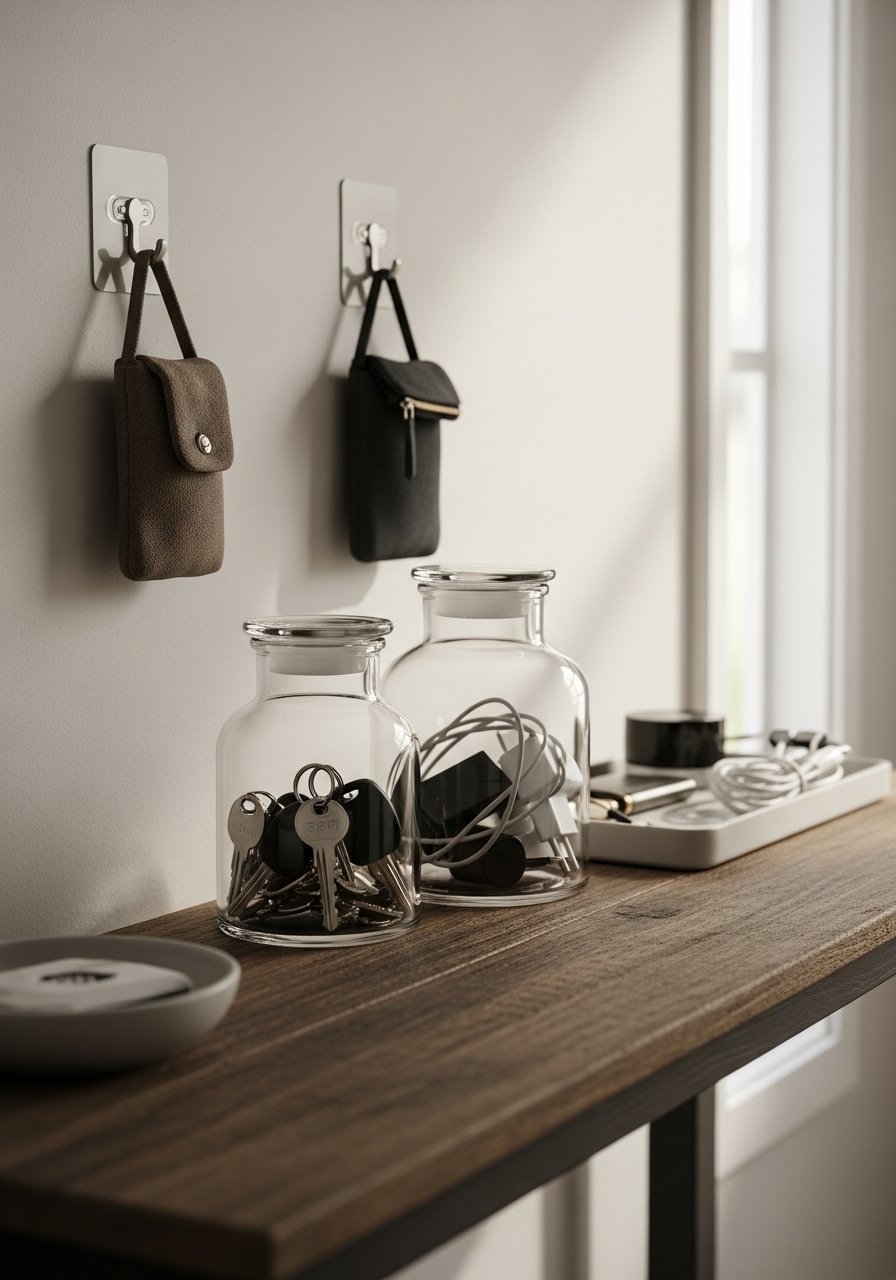
I put daily things where I’ll naturally reach for them. Glass jars for small items, a tray for mail, and hooks at eye level. The visual shift is practical and pleasing — useful items now look curated. People miss scale: tiny jars get lost unless paired with a tray or stack of books.
Avoid mixing too many container styles. I keep to two materials (glass + woven) so the look stays cohesive.
Step 4: Layer storage for texture and function
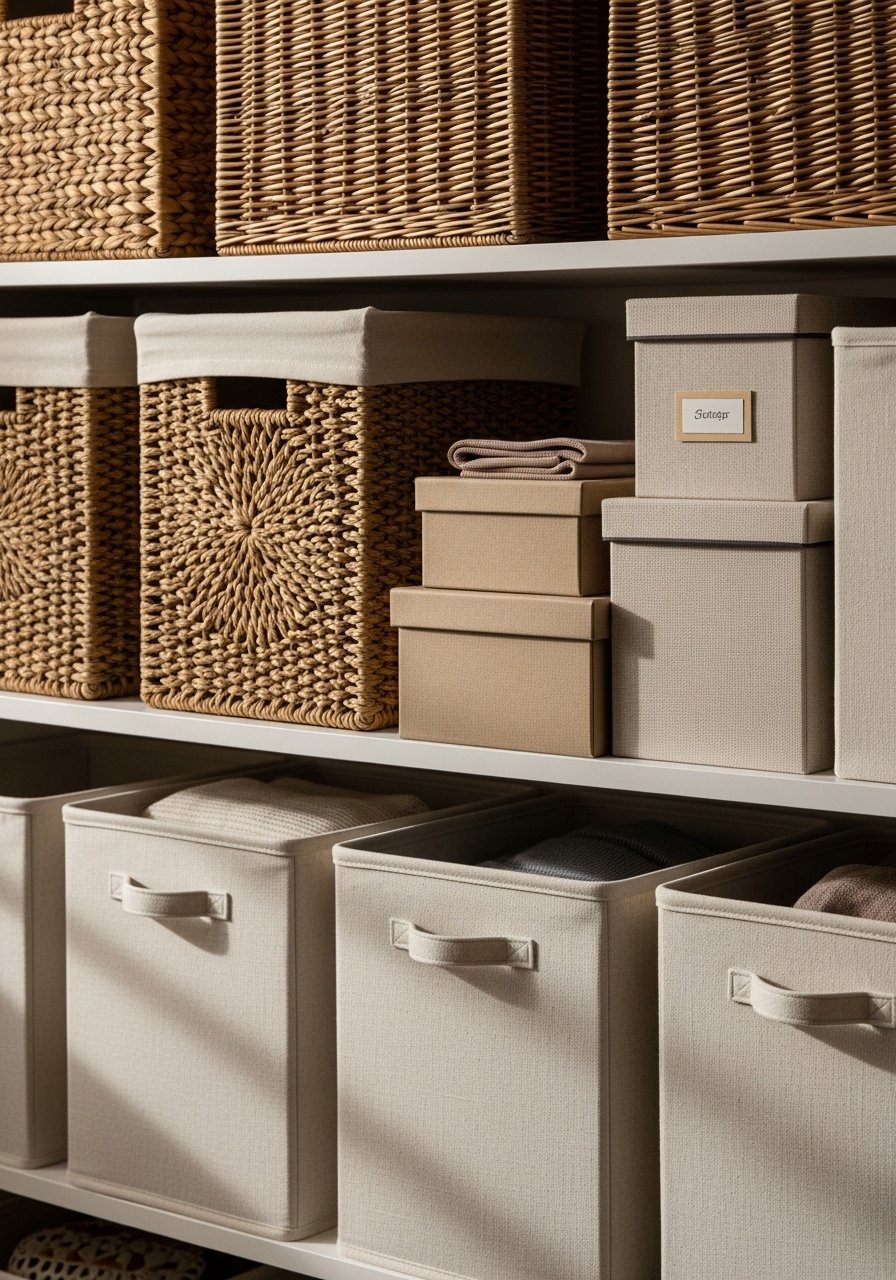
I layer baskets on lower shelves and linen bins on higher ones. Textures like seagrass and linen make storage part of the decor. Visually, the shelf reads as a composition, not a closet. The insight I use is mixing materials to avoid a matchy feel — that’s what makes organic modern styling work.
A common mistake is hiding everything behind matching lids. I leave one open basket to show function and keep it approachable.
Step 5: Build a short maintenance habit
I set a five-minute nightly reset: clear surfaces, return things to their labeled homes, and empty the drop basket. The room’s equilibrium stays intact and the payoff is immediate. People underestimate the power of a tiny routine — it keeps DIY fixes working.
Avoid thinking DIY is a one-time fix. I treat organizing like gardening: a little attention prevents overgrowth.
Common mistakes I see and how I fix them
I often see people add storage that competes with the room’s proportions. A huge cabinet in a small space makes the room feel crowded. I fix that by choosing floating shelves or a slim ottoman instead.
Other missteps:
- Matching every basket exactly — makes the space flat. I mix textures.
- Hiding everything — removes personality. I keep one shelf with visible, pretty items.
- No labels — things slip back into chaos. I use removable chalkboard labels for a quick system.
Adapting this method for small spaces or a tight budget
I work with what’s already in the room. A stack of sturdy shoeboxes gets covered in linen fabric and becomes a neat set of drawers. For small apartments, I prioritize vertical storage and choose one multiuse piece, like a storage ottoman.
Budget-friendly tips:
- Reuse jars and give them a label.
- Swap expensive shelves for painted plywood cut to size.
- Start with one basket per person to corral incoming items.
How I blend DIY storage with what I already own
I match finishes to at least one existing piece — a wood shelf to a coffee table, or a linen bin to throw pillows. I treat storage as styling material: baskets become art, hooks become a vignette.
Quick rules I follow:
- Keep to two dominant materials.
- Keep one visual "breather" per wall.
- Edit twice a year and rotate what’s in view.
Final Thoughts
Start with one corner, one basket, or one shelf. Small, intentional choices change how a room feels and how I live in it. I prefer picking a single low-cost piece — a woven basket or a set of jars — and letting it set the tone. Keep it simple, and the rest follows.
