

A real, lived-in dining room showing the final result of homemade placemats on a wooden table. Natural daylight, soft shadows, layered textures. Slightly imperfect styling with linen napkins, rattan placemats, and a simple runner. Wide angle that shows balance and flow. No text overlay.
I get stuck with empty tables all the time. A plain surface makes a meal feel unfinished and the room feel cold.
Making your own placemats changes that without fuss. It’s about rhythm across the table, texture against plates, and a warm, lived-in look.
How to Make DIY Placemats for Dining Tables
This is the method I use every time a table feels unfinished. You'll learn how to choose materials, arrange them so the table reads as one calm composition, and tweak spacing so every place looks intentional. The result reads organic modern or Japandi depending on your pieces.
What You'll Need
- Round woven rattan placemats, 12-inch (set of 4) (~$20–35)
- Natural cork placemats, set of 4 (~$12–25)
- Linen napkins in stone, 20×20 (set of 4) (~$20–40)
- Wooden acacia chargers, 12-inch (set of 4) (~$25–50)
- Small jute table runner, 14×48, natural (~$20–45)
- Matte white ceramic dinner plates, 10.5-inch (set of 4) (~$40–90)
- Brass napkin rings, set of 4 (~$12–30)
- Hand-blown water glasses, set of 4 (~$30–70)
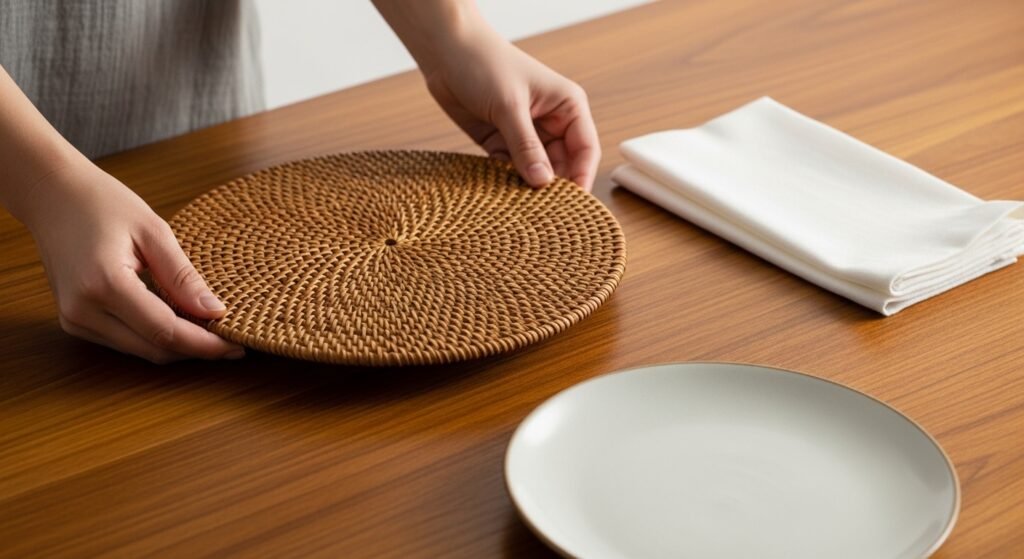
Step 1: Pick a base texture that sets the mood
I start by choosing the placemat material first. Rattan warms the table and feels organic-modern; cork reads cleaner and more minimalist. The base texture tells you whether the table will feel cozy or spare.
What people miss: the base affects everything else—glass looks different on cork than on rattan. Small mistake to avoid: mixing too many base textures at once. Pick one and let chargers or napkins do the rest.
Step 2: Establish even spacing for calm balance
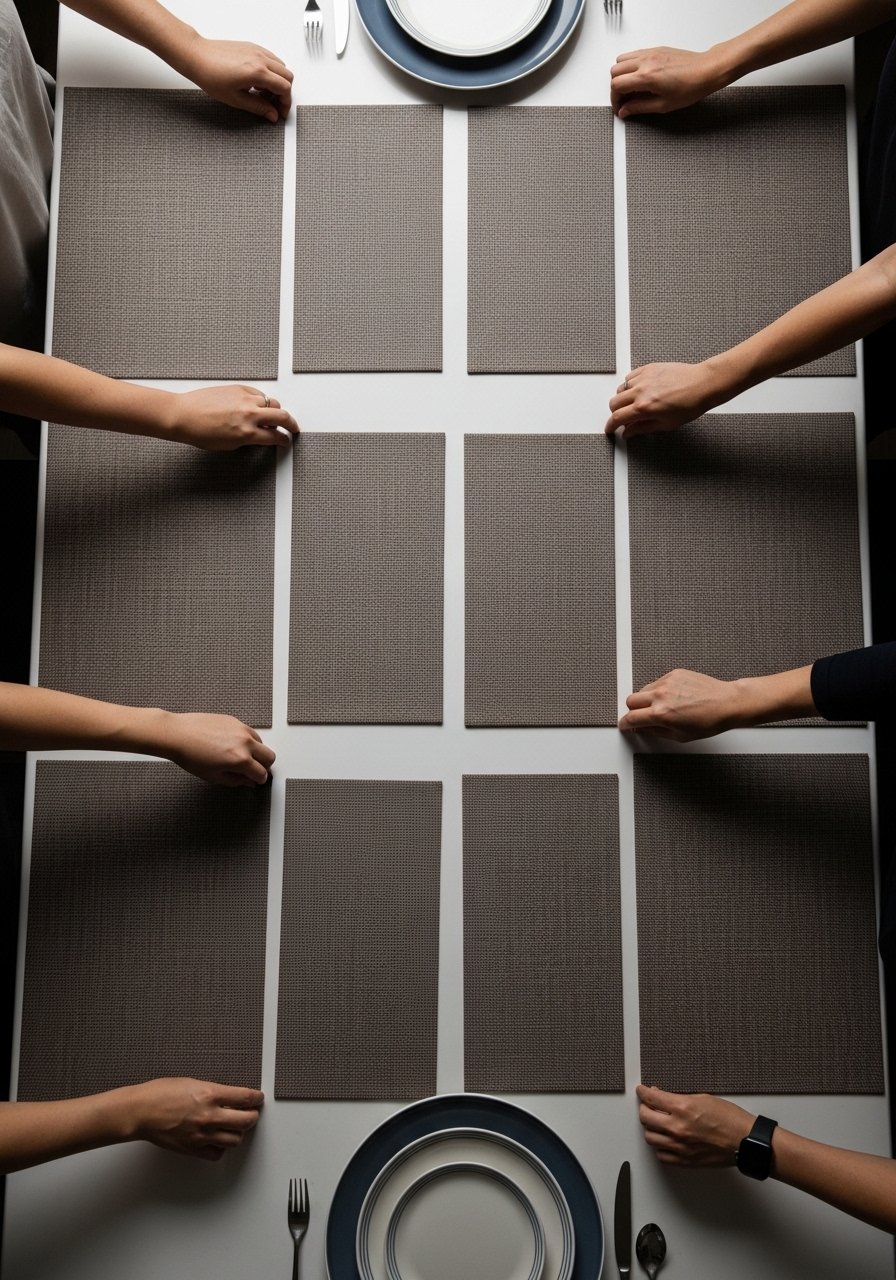
I visually divide the table into equal zones. I pull chairs out and set a placemat roughly where someone would sit, then step back. That small pause keeps spacing consistent across the table.
What visually changes: the table instantly reads as intentional. People often miss the rhythm—uneven gaps make the whole set-up feel accidental. Avoid the mistake of crowding the center; leave breathing room so the table doesn't look frantic.
Step 3: Layer chargers or small runners for depth
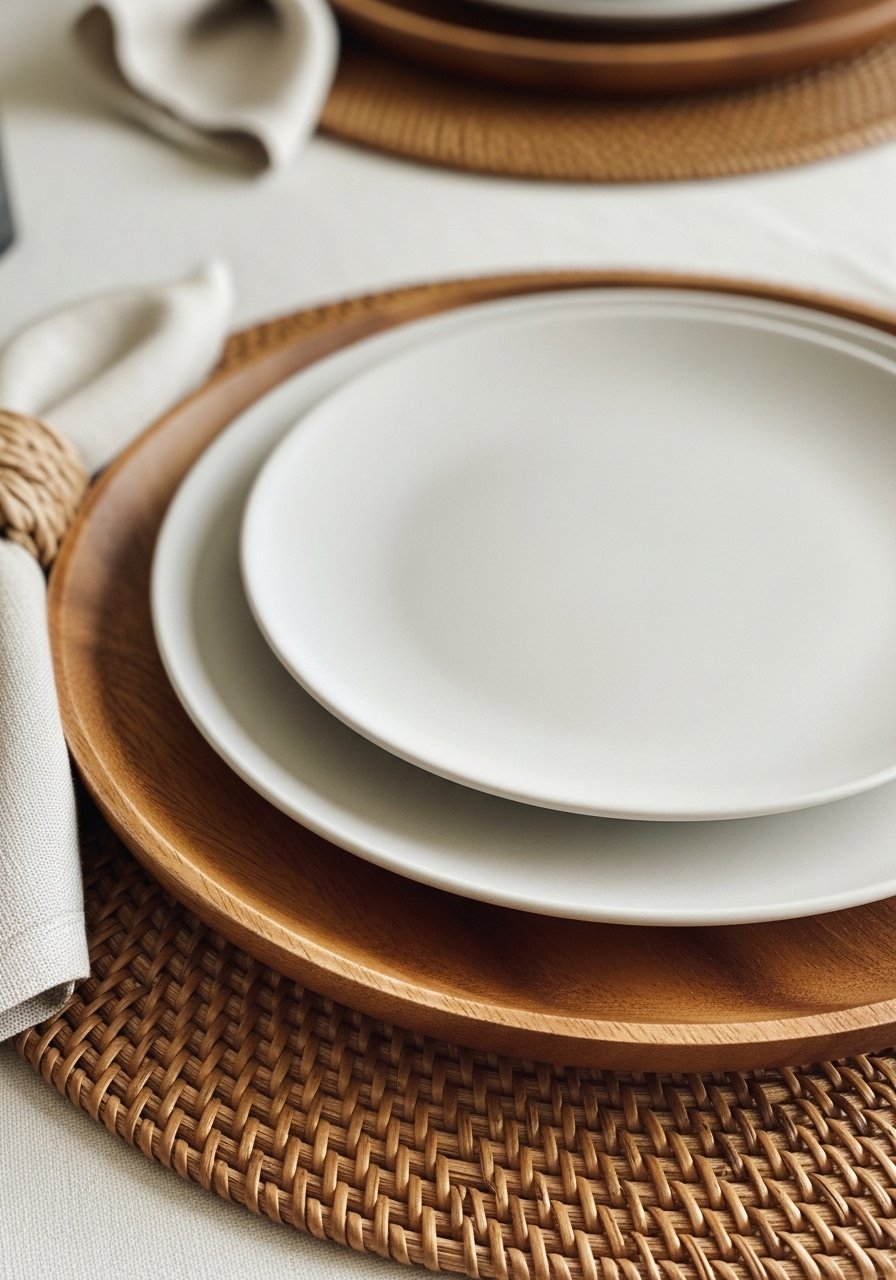
I layer a wooden charger or a narrow runner when I want depth. A charger grounds a place setting and adds weight without being busy. A runner down the center ties multiple place settings together.
What you see change: the table reads as composed and layered. People forget scale—chargers should be slightly larger than your plates. Small mistake: using a runner that competes with the placemat texture; choose one that complements, not clashes.
Step 4: Add soft accents for comfort
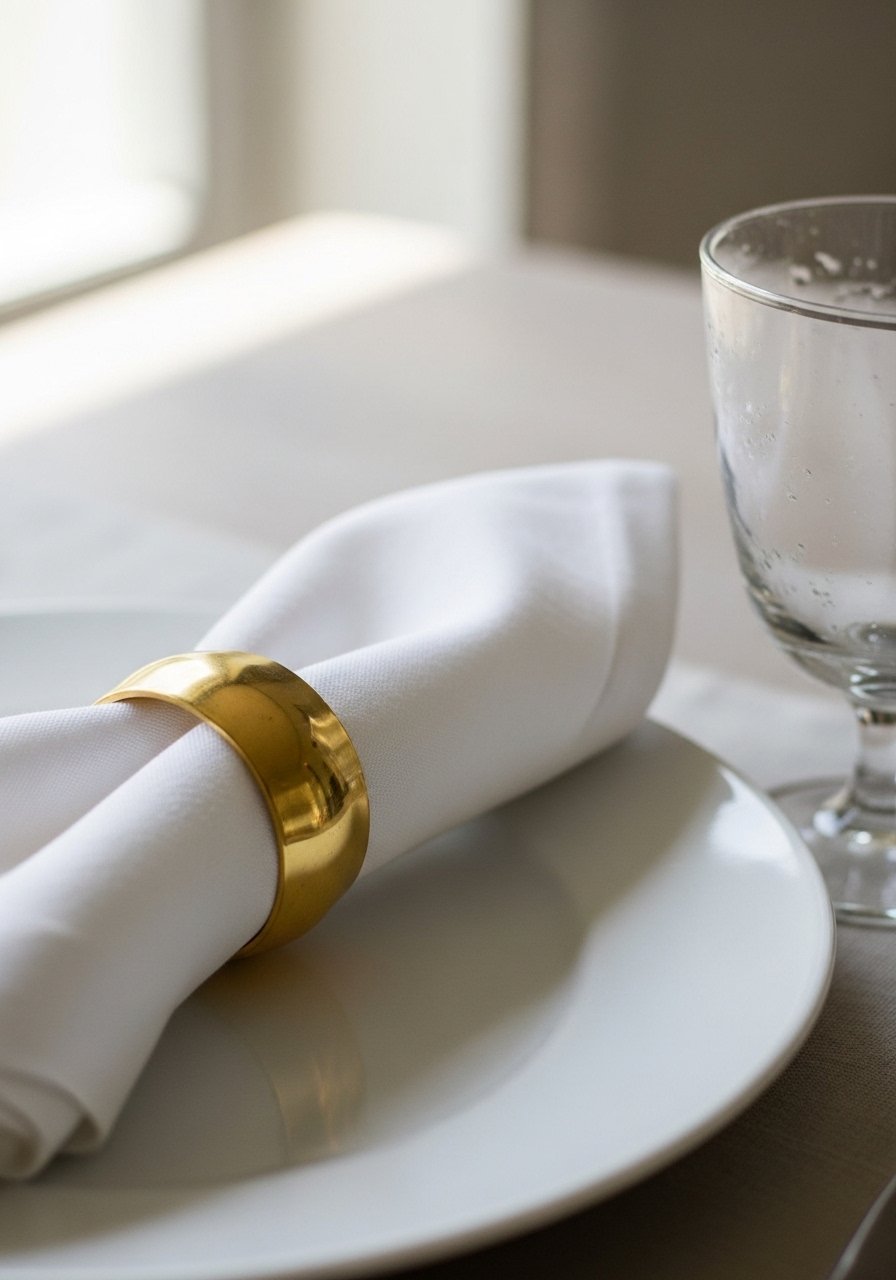
I fold linen napkins casually and tuck in a brass ring for a small metallic note. Glassware brings height, and a sprig or small plate of salt anchors each spot.
What changes: softness against harder textures makes the setting approachable. People often over-iron napkins—leave them a little lived-in. Mistake to avoid: too many decorative items at each place; keep accents small so they don't compete with food.
Step 5: Step back, test with a meal, then tweak

I sit at the table or place a bowl on each setting to test proportion. I adjust a placemat or shift a runner until it feels balanced from every angle. This is where the setup becomes a real, usable meal space.
What people miss: lighting and movement matter—test under both daylight and evening light. Small mistake: assuming a setting looks right from only one side. Walk around and tweak until the whole table reads cohesive.
Common mistakes (and how I fix them)
I see three repeat issues: too many competing textures, uneven spacing, and tiny, fussy accents that steal focus. I solve them by simplifying one element at a time.
- Limit textures to two main types (for example, rattan + linen).
- Keep a consistent margin from table edge—about the width of your palm.
- Use one metallic accent (brass napkin rings or flatware) rather than multiple metals.
These small rules help the table feel calm and intentional.
Adapting this look for small tables or a tight budget
On a small table I choose compact elements: smaller placemats, no runner, and one simple centerpiece. I sometimes use a set of cork placemats as a budget-friendly alternative to rattan.
- Small-table tip: overlap placemats slightly if your table is narrow.
- Budget tip: buy napkins instead of new plates; textiles change the mood cheaply.
I aim for comfort first. If something looks cramped, I remove one nonessential item.
Mixing this with what you already own (and seasonal tweaks)
I match my placemat texture to the dominant material in the room—wood, stone, or metal. If your dining chairs are bentwood, rattan placemats echo that warmth. For a more organic modern or Japandi feel, keep colors neutral and shapes simple.
Seasonal tweaks I use:
- Summer: lighter linens, more glassware, a sprig of greenery.
- Winter: deeper napkin tones, wooden chargers, and small candles for warmth.
Rotate one element per season rather than overhauling everything.
Final Thoughts
Start with one easy swap: a set of round rattan placemats or linen napkins. I always begin small and live with the placement for a week before changing it.
You don't need perfect symmetry—aim for calm, usable balance. That quiet step makes the table feel ready for real life.
