

I had a stack of photos in a drawer for months. Every store frame looked off once I brought it home. Pieces were too shiny or too small. I kept redoing the layout until the frames finally read as part of the room.
This method gets a simple, clean result. I've noticed it works for modern, organic, or vintage-leaning spaces. You can make a frame that looks like you bought it, not like it was made at the kitchen table.
What You'll Need
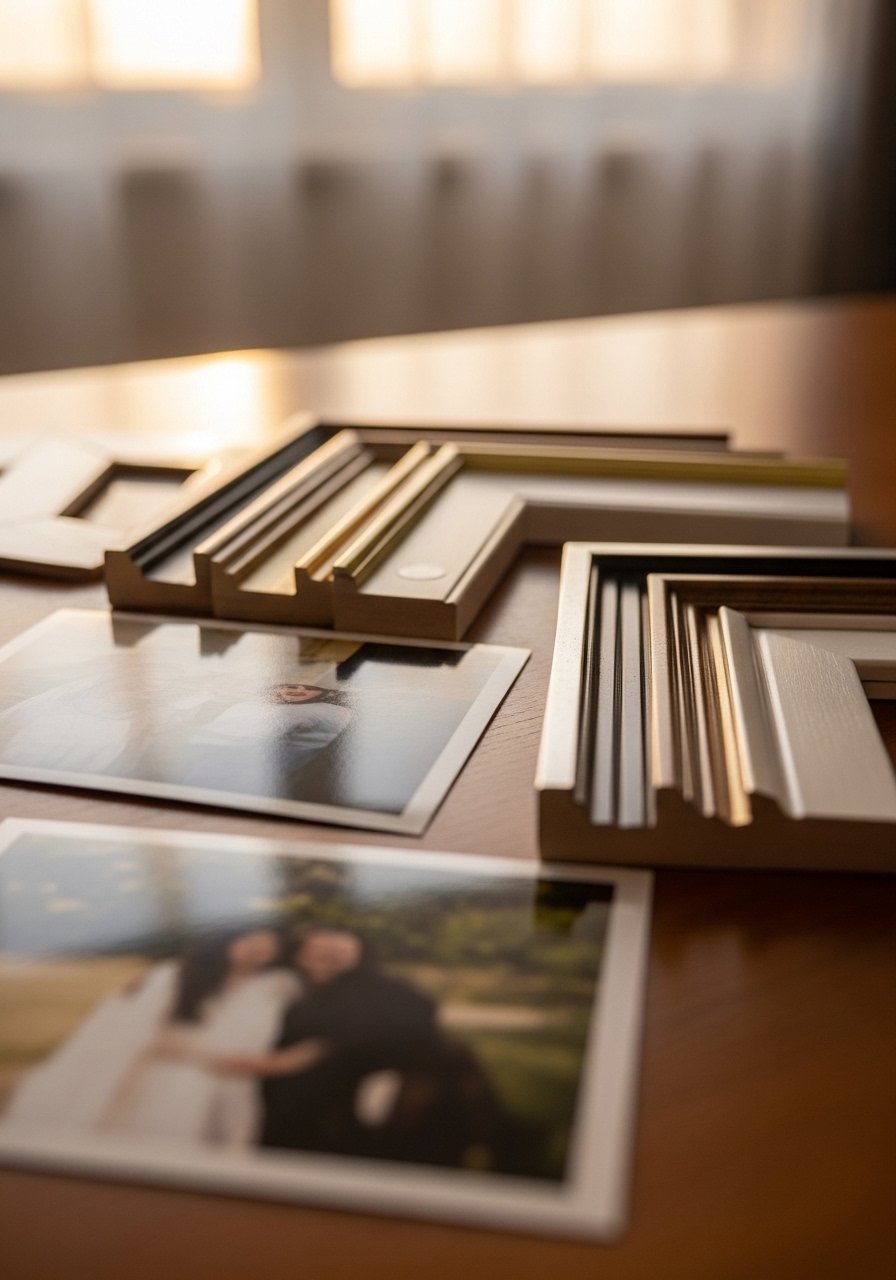
- A simple frame kit with hangers included ($12-30). Good for when you want clean corners fast
- Precut mat board in white or off-white, 8×10 and 11×14 sizes ($8-18). I use a pale cream for warm photos
- Acrylic glazing sheets, clear, various sizes ($10-25). Lighter than glass, less glare on sunny walls
- Floating frame kit for edge-to-edge photos ($25-45). Makes modern prints read high end
- Archival backing board, acid free, cut to size ($6-12). Keeps prints flat and lasting
- Set of brass picture ledges, 24-inch ($18-30). Useful when you want to swap frames often
- A few small decorative corner clips in brass or black ($4-9). Adds a collected look without bulk
Step 1: Pick the right scale and frame style
Start by matching photo size to frame scale. For a single portrait, choose a frame with a 1.5 to 2 inch mat border for an 8×10 image. The margin gives the photo room to breathe. If the border is too narrow the image feels crowded. If it is too wide the picture looks lost. I used to grab the prettiest frame first. Most people do that. It leads to a mismatch in proportion. Measure the wall and the photo. Pick frames that relate to each other in size. Keep finishes within two tones, such as black plus warm wood, for a cohesive look.
Step 2: Choose glazing and backing based on light and weight
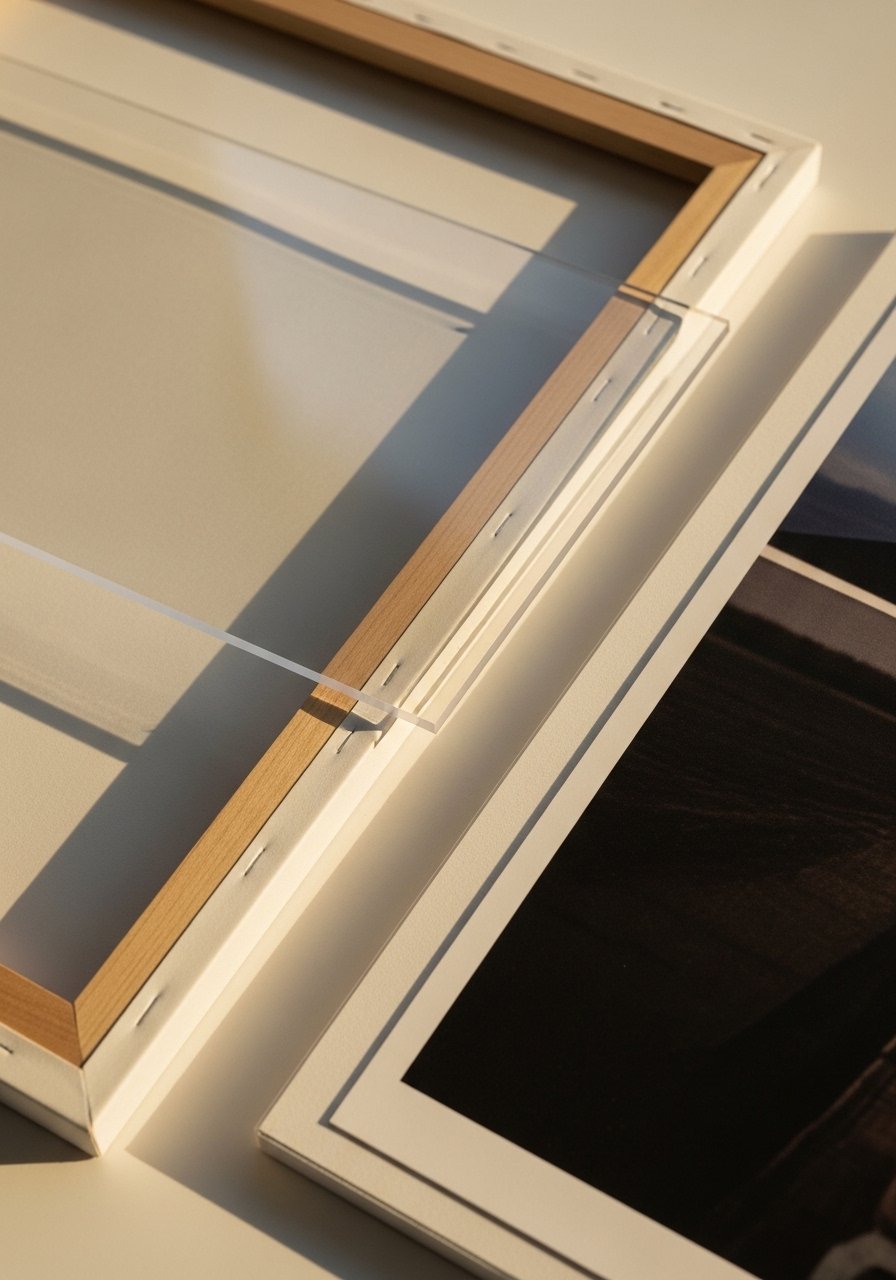
Acrylic glazing brightens images and cuts weight. I swap glass for acrylic on big pieces. It reduces glare and is safer if you have kids or pets. For small frames under 11×14 I often keep glass for a crisper look. The backing matters too. Rigid archival board avoids warping and keeps the photo flat against the mat. A common miss is using thin cardboard. That causes ripples over time. One mistake is overpacking the frame with glue or too much tape. Use minimal adhesive and clean edges. If the wall gets direct sun, pick a UV protective acrylic sheet. The change in finish is subtle but it lasts.
Step 3: Cut or buy the right mat, and get the reveal right

I used to skip the mat. Now it is the step that makes a homemade frame look intentional. Aim for a mat border that is larger on the bottom by about half an inch. That optical trick centers the image when hung. For a small shelf grouping use a 1.25 inch mat. For larger single pieces go 2 inches. People often cut mats too tight. The photo will sit off center when inserted. When done right the photo reads like it has breathing space and the frame reads expensive. When done wrong the image tilts and looks amateur. If you do not want to cut mats, buy precut sizes. The clean edge matters more than the color.
Step 4: Assemble with attention to corner alignment and finish

Lay the frame flat and check corner alignment before you lock anything down. The visual change here is immediate. Misaligned corners give a crooked look that you will see across a wall. I check the inside reveal by placing the assembled frame on the wall for a minute before securing the back. A small mistake is tightening hardware so much the frame warps. Tight is not the same as true. For a polished look choose frames with mitered corners that touch evenly. If a frame has visible join seams sand them lightly or hide them with a thin inner trim. Product choice matters. A floating frame gives a modern edge. A thin wooden moulding reads warmer.
Step 5: Hang with consistent spacing and a relatable sightline

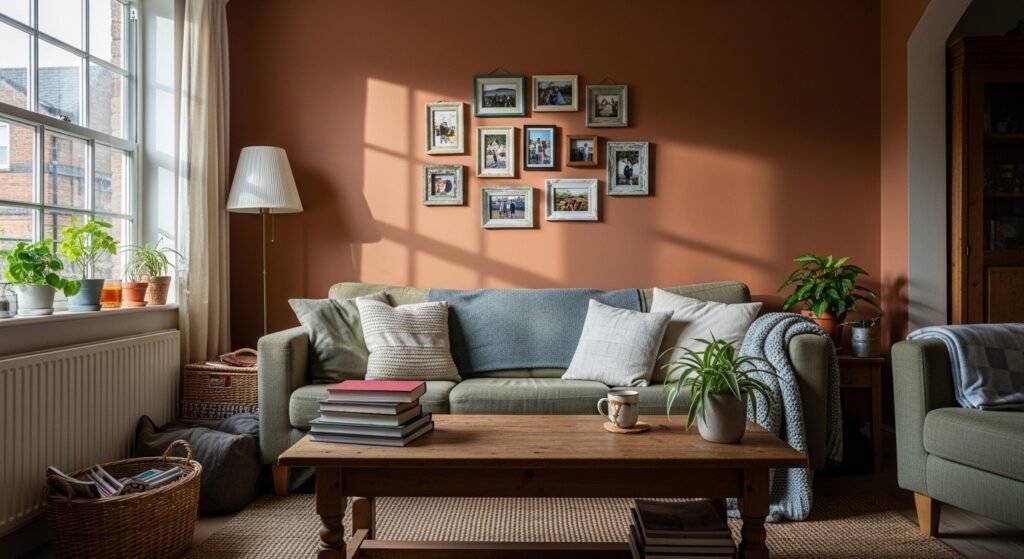
Spacing determines whether a cluster reads calm or chaotic. I hang frames 2 to 3 inches apart when grouping small frames. For a mixed gallery keep the central sightline at eye level, about 57 to 60 inches from the floor to the center of the grouping. People often hang frames too high. That makes the room feel disconnected. Another common mistake is uneven spacing between frames, which gives a jittery feeling. When arranging, lay pieces on the floor first. Step back. Swap until the cluster breathes. If you prefer changeability, use a brass picture ledge and rest frames on it. It allows mixing sizes without more holes.
Why Your Frames Still Look Mismatched
I've seen this in apartments and period homes. The pieces are fine on their own. Together they look like leftovers. Scale and finish are usually the culprits. Keep these rules in mind.
- Limit finishes to two families. For example, wood and matte black.
- Use a consistent mat color. White or cream unifies images from different eras.
- Keep spacing even, 2 to 3 inches for small clusters, 4 to 6 inches for larger pieces.
- Anchor a gallery with one larger piece or a shelf to prevent the arrangement from floating.
If a frame still reads off, swap in a larger mat rather than a new frame. It often fixes the balance.
Making This Work in a Small Room
A small wall wants restraint. Everywhere I look this year small spaces favor thin frames and brighter mats. Choose a single dominant scale and repeat it.
- Use thinner frames for a lighter feel
- Keep mat borders modest, 1 to 1.5 inches, to avoid eating wall space
- Lean frames on a narrow ledge to avoid multiple holes
- Group vertically to make ceilings read taller
I tried a full grid in a tiny room. It closed the space. Switching to a vertical stack changed the room immediately.
Mixing New Frames with Thrifted Finds
A friend asked me about blending a new floating frame with an old gilt. I like to use a recurring color to tie them together. Pick one finish from the thrifted pieces and repeat it in one new frame or in mat trim. If the vintage pieces are ornate, balance them with plain, slimmer frames. On a shelf, stagger heights and use a small plant or a book to prevent two gilded pieces from fighting for attention. The goal is rhythm, not match.
Start with One Frame
Pick your favorite photo. Make one frame exactly how you want it. Hang it where you see it most.
Completing one frame gives confidence to make the next. My suggestion is to begin with a simple frame kit or a floating frame kit. It is an easy place to learn scale and spacing before committing to a full wall.
