


I stared at a blank wall for weeks. Every picture I tried looked too small or too fussy. The room felt like half a conversation.
I kept moving furniture and nothing changed. I learned that fabric on the wall fixes scale and softness better than prints. It also forgives imperfect frames and adds calm without shouting.
I keep seeing people stuck on placement and scale. This guide shows the visual choices I make, and the end result you will get, a calm, grounded focal wall that reads like a room, not a bulletin board.
What You'll Need
- Large linen fabric panel, 50×70 ($30-60). One oversized panel makes a room feel finished without fuss
- Set of 3 small stretched canvas panels, 12×12 ($25-45). Use for a triptych of complementary fabrics
- Magnetic wood poster hangers, 24-inch ($12-22). They make raw-edge fabric read like framed art
- Walnut textile rod with leather cord, 40-inch ($18-35). For a casual, pulled-edge look
- Command picture hanging strips, large 8-pack ($7-14). Perfect for renters and light pieces
- Set of 3 ceramic vases, matte white ($25-40). Anchor the wall visually with small objects below the art
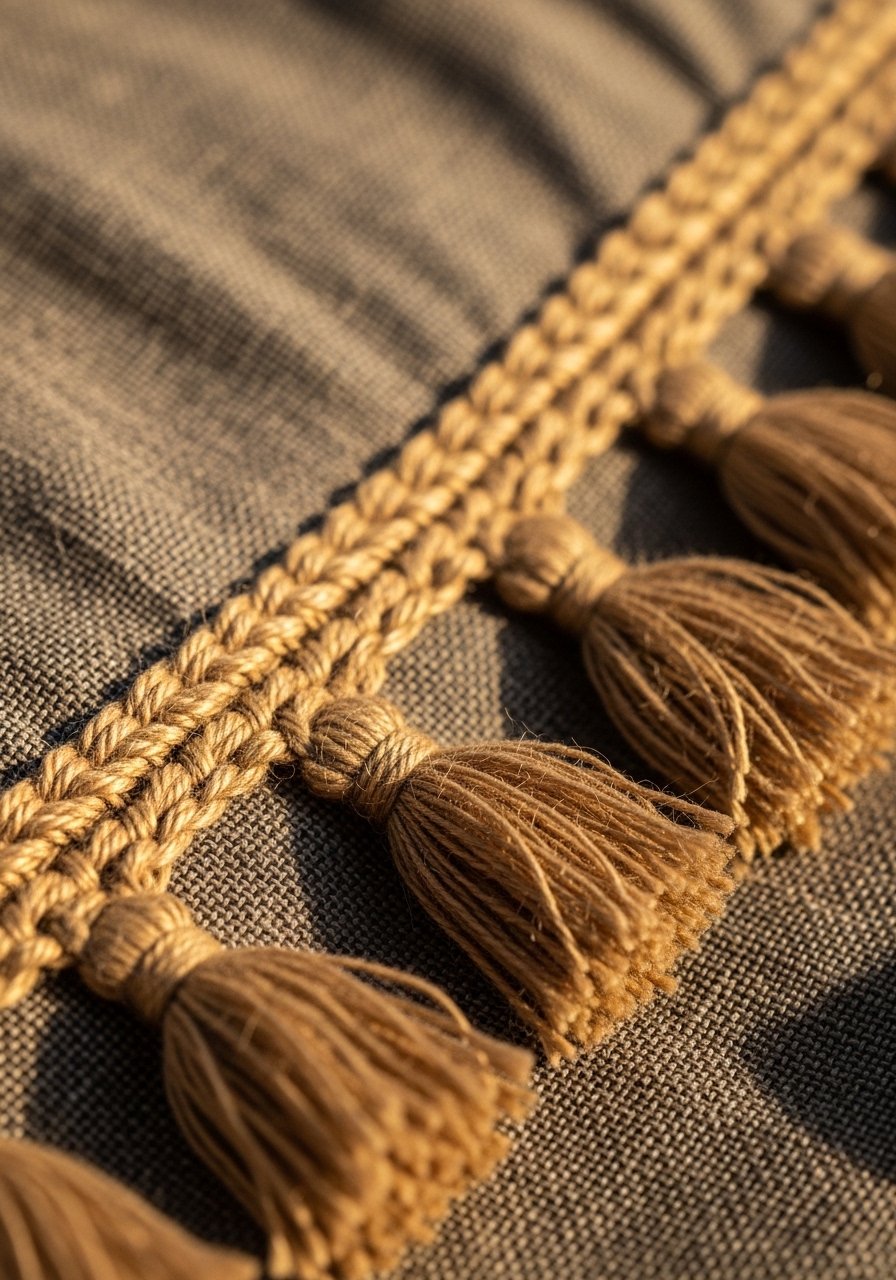
- Natural jute tassel trim, 5 yards ($8-15). Add edge detail when you want more texture
- Neutral area rug, 5×8 jute blend ($70-130). Grounds large fabric pieces so the wall feels integrated
Step 1: Pick the right scale for the wall
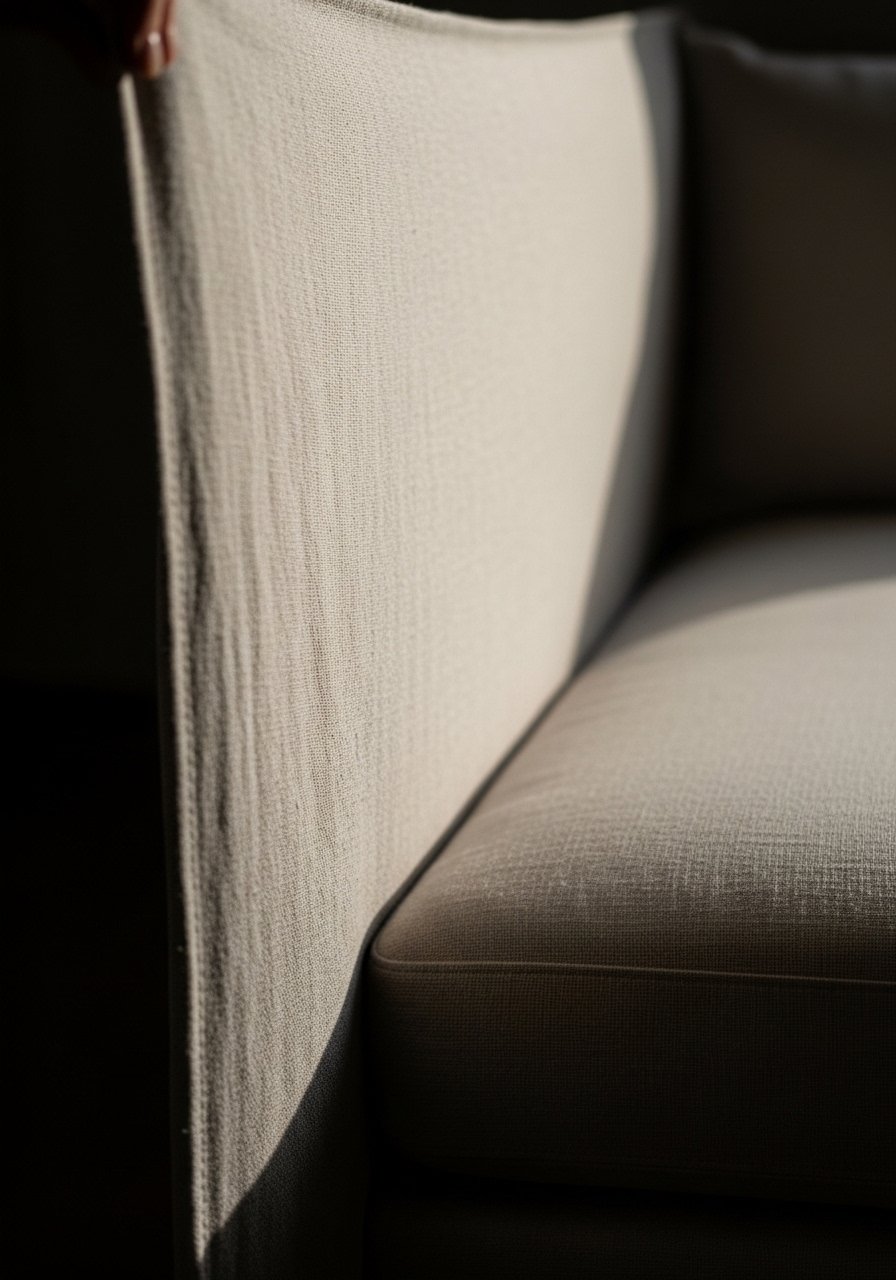
Most people start with the biggest art they can find. That often causes a visual mismatch. I start by measuring the furniture under the wall. For sofas I aim for art that is about 60-75% of the sofa width. For a small chair I choose 40-50% width. The visual change is immediate. The wall stops competing with the sofa. One thing people miss is vertical space. Leave 6-8 inches between the top of the furniture and the bottom of the fabric. Mistake to avoid, choosing a panel that is too narrow, which reads like an afterthought.
Step 2: Choose finish and hanging method
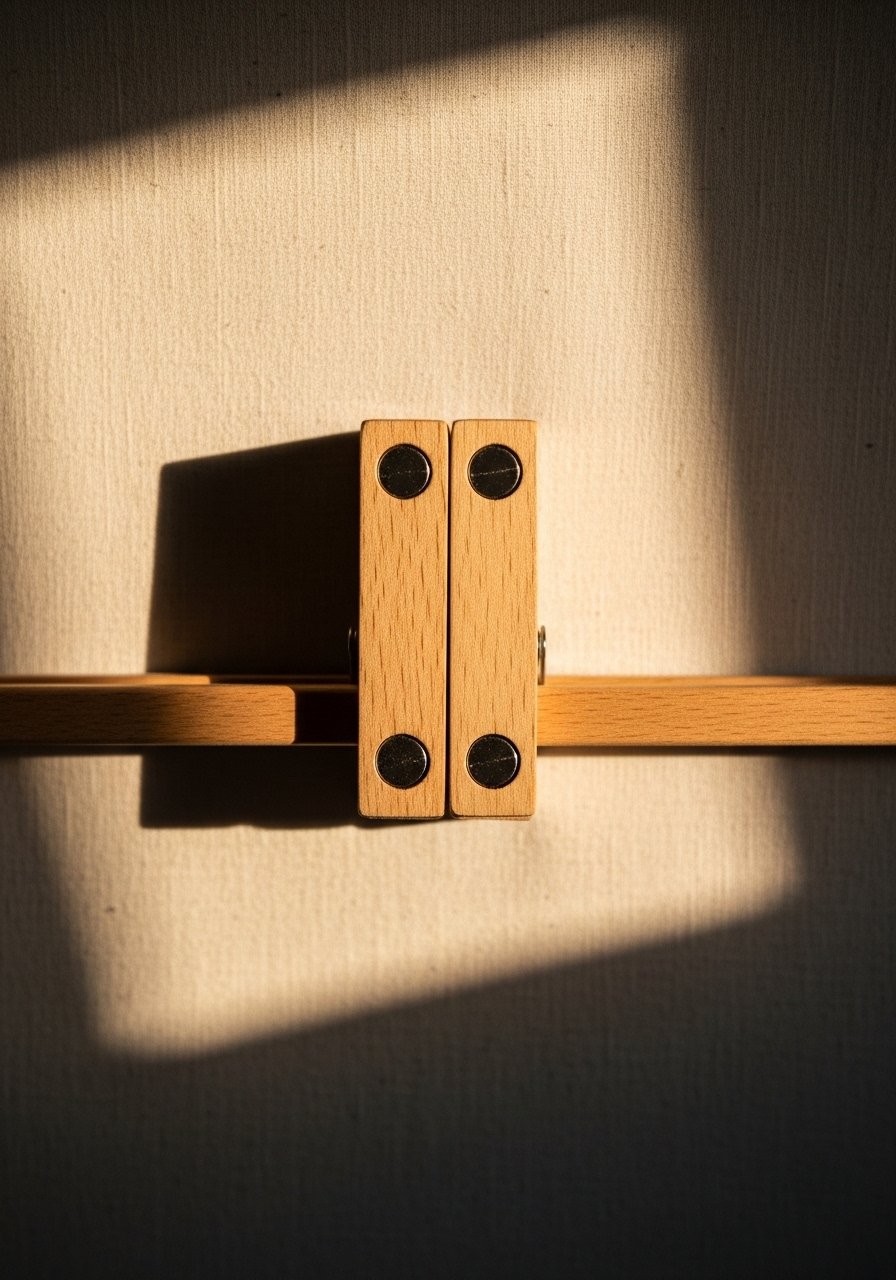
I used to think a hidden frame was the only clean answer. Now I prefer visible hangers for texture. Magnetic wood hangers make raw edges feel intentional. If you have a rental, Command strips can hold smaller canvases and panels. The visual change here is the difference between a flopping sheet and a confident piece. People miss how the top finish sets the tone. A walnut textile rod reads casual. A clean magnetic hanger reads modern. Mistake to avoid, using heavy fabric with light hangers, which causes sagging.
Step 3: Group pieces with proportional spacing
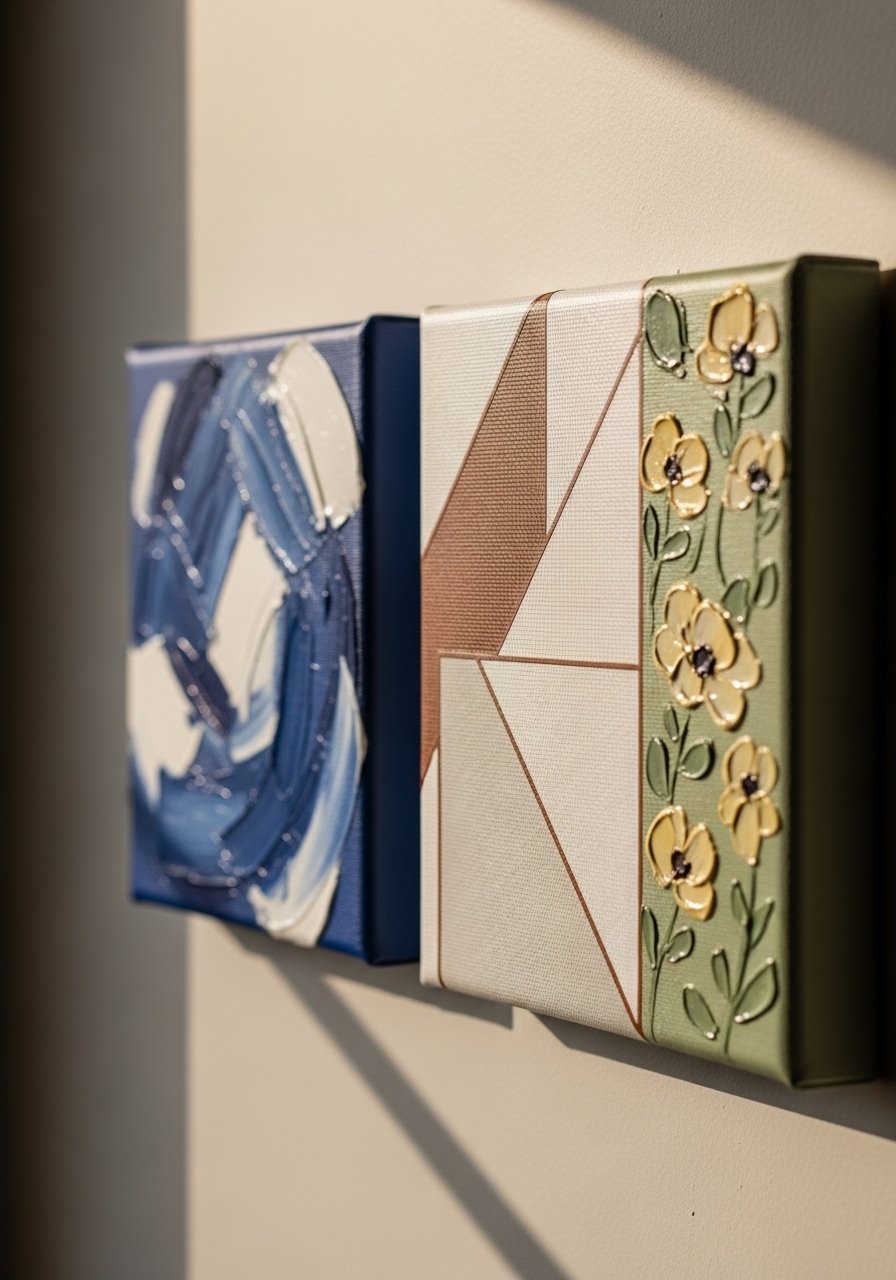
This is the step where the wall starts to look styled instead of chaotic. For a trio of small panels I leave 2-3 inches between pieces. For larger groupings, 3-5 inches reads cleaner. When done wrong, items feel jammed and make the eye stop. When done right, the group reads as one object. I tell people to mock the spacing on the floor first. You'll be tempted to crowd the pieces. Don't. Negative space is part of the composition.
Step 4: Hang at the correct eye line for the room
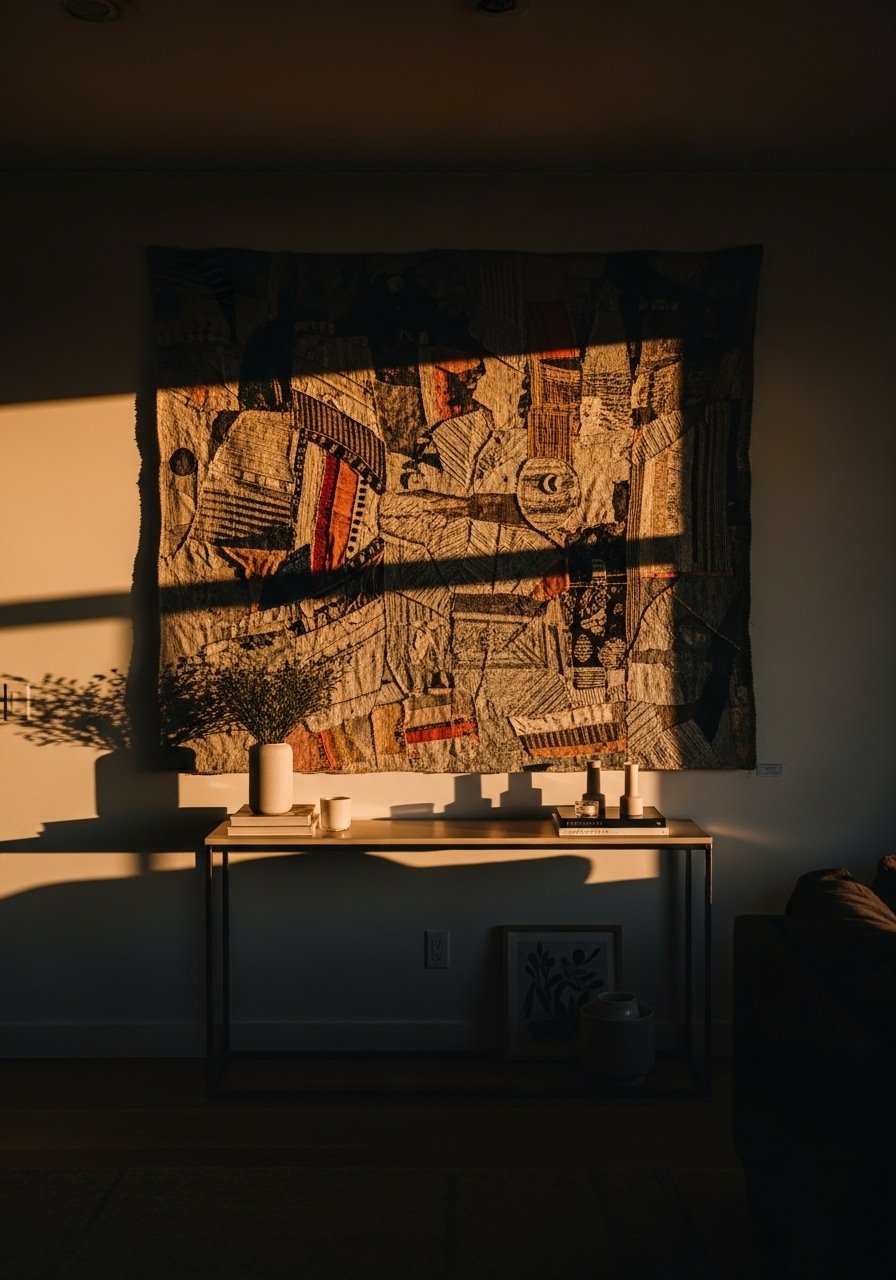
A friend asked me about perfect height. I aim for the center of the art to be around 58 inches from the floor in living areas. For dining rooms I raise it by 2-3 inches so it sits clear of chair backs. The visual change is harmony, everything reads at the same rhythm. People often hang too high. That makes the room feel chopped. Mistake to avoid, centering on the wall rather than the furniture beneath it.
Step 5: Balance with objects below and beside
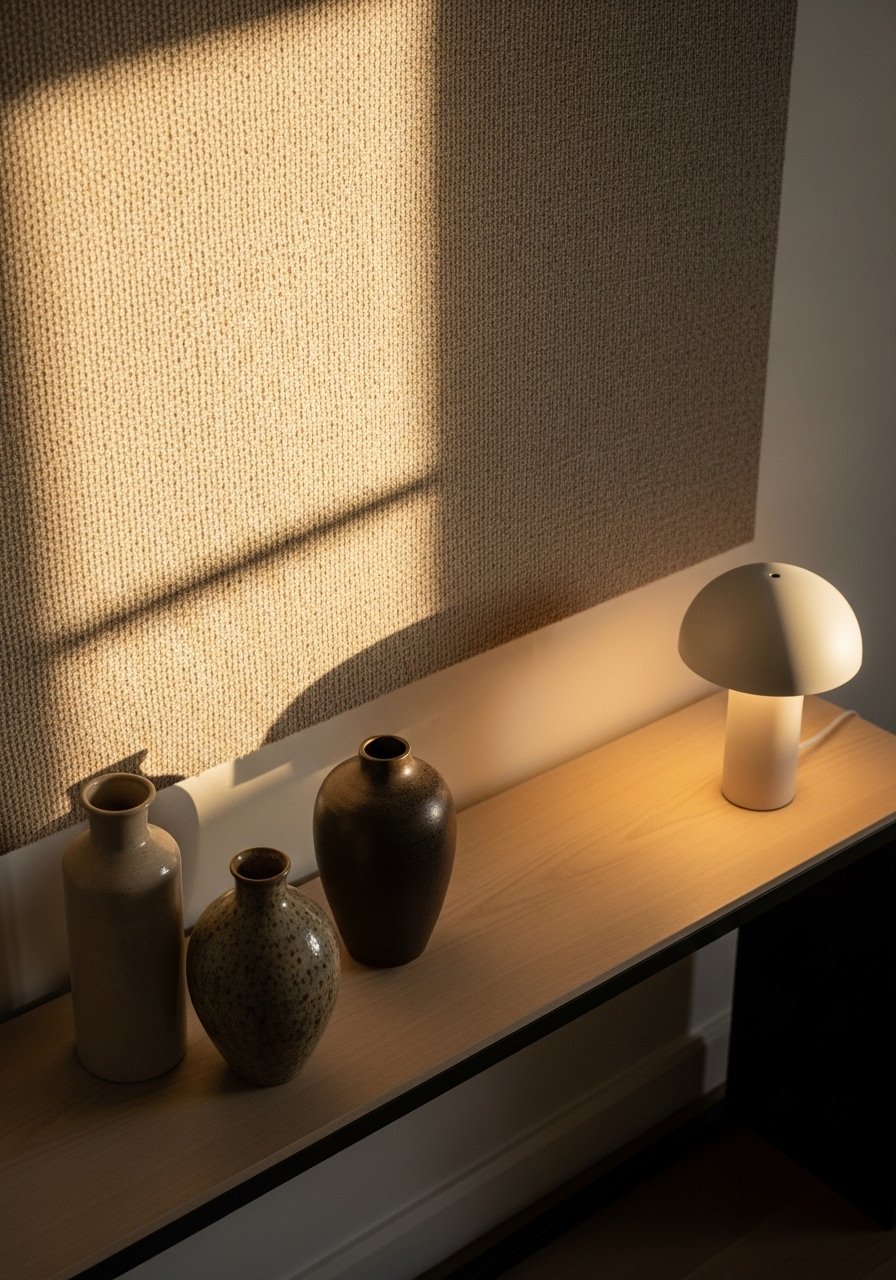
This is where the wall becomes room-friendly. I place a set of ceramic vases or a low lamp directly under the art to anchor it. A rug that picks up a color in the fabric ties the floor to the wall. The visual change is weight, not clutter. People miss scale again, choosing vases too tall which competes with the art. Mistake to avoid, leaving the console bare. One small grouping keeps the eye moving down and out, which feels complete.
Step 6: Live with it, then edit
I used to call it done and never touched it. Now I plan a tweak at week one. Swapping a panel, changing trim, or shifting a piece 1 inch often improves the balance. The change is subtle but real. People expect perfection on day one. That pressure leads to overworking the wall. Mistake to avoid, hanging heavy decisions permanently. Try an inexpensive linen panel or the walnut rod as a low-commit first piece. If it feels off after a week, adjust.
Why Your Fabric Art Can Still Look Flat
I kept seeing perfectly made panels that read flat on the wall. Often the issue is contrast and layering. Fabric needs either depth behind it or objects in front to sing.
- Add a thin wooden frame or hangers for a shadow line
- Layer a narrow shelf below and place one or two sculptural vases
- Use tassel trim or a stitched border to create an edge the eye can catch
Small tweaks like these add depth without adding visual noise. The last three rooms I styled all improved when I introduced one small shadow line beneath the fabric.
Making This Work in a Small Room
Small rooms benefit from lighter scale and softer textures. Pick a single narrow panel rather than a wide triptych. Aim for 40-50% of the furniture width. Mount close to the ceiling if you want a taller feel, but keep 4-6 inches between the top of the art and the ceiling to avoid a cut-off feeling. Use lighter linen and avoid heavy tassels. My feed is full of small-space solutions that use a single textile and one low console to keep sightlines open.
Mixing New Fabric Art with What You Own
Start with color echoes, not exact matches. Take a pillow fabric, a rug thread, or a lamp shade and repeat that tone in the wall piece. If you already have framed prints, offset the fabric by using different heights and a change in finish. A walnut textile rod pairs well with wood frames. I used a neutral jute rug under a warm linen panel and the room instantly felt cohesive. A simple rule I follow, repeat one color in three places across the room.
Pick One Wall and Commit
Pick one wall and make it the focus. Start with a single linen panel or a set of small canvases. Spend an hour holding pieces up, then live with the choice for a week before changing anything. You will see what needs adjusting. A walnut rod or magnetic hanger is an easy, low-commit start and will give you the calm result you want.
