


I stared at a blank wall for months before realizing the problem wasn’t lack of photos — it was how I displayed them. When I switched to intentional DIY displays, the room finally felt like mine. These 11 projects are easy, affordable, and grounded in current trends I see everywhere: warm wood tones, mixed metals, and tactile textures that read cozy and modern.
These ideas favor modern farmhouse, boho, and minimalist vibes. Most projects run under $75; a few splurges hit $100–150. They work in living rooms, entryways, bedrooms, home offices, and small apartments. I’ve noticed warm wood tones and natural materials everywhere this year, and I lean into that for consistency. These displays are renter-friendly when you use removable hooks, peel-and-stick photo mats, and lightweight frames.
What You'll Need to Get This Look
Textiles & Soft Goods:
- Cream chunky knit throw (~$35-55)
Wall Decor & Photo Tools:
- White oak floating shelves, set of 3 (~$45-70)
- Mixed metal picture frames, set (~$25-45)
Lighting & Accents:
- Warm LED string photo lights (~$15-25)
Plants & Greenery:
- Artificial fiddle leaf fig tree, 6ft (~$60-90)
Budget-Friendly Finds:
- Peel-and-stick linen texture wallpaper panels (~$20-35) — similar at Target/HomeGoods
Clothespin String for Boho Bedroom
Style/Vibe: Boho / Cozy
Budget: $ (under $50)
Best For: Bedroom / Dorm
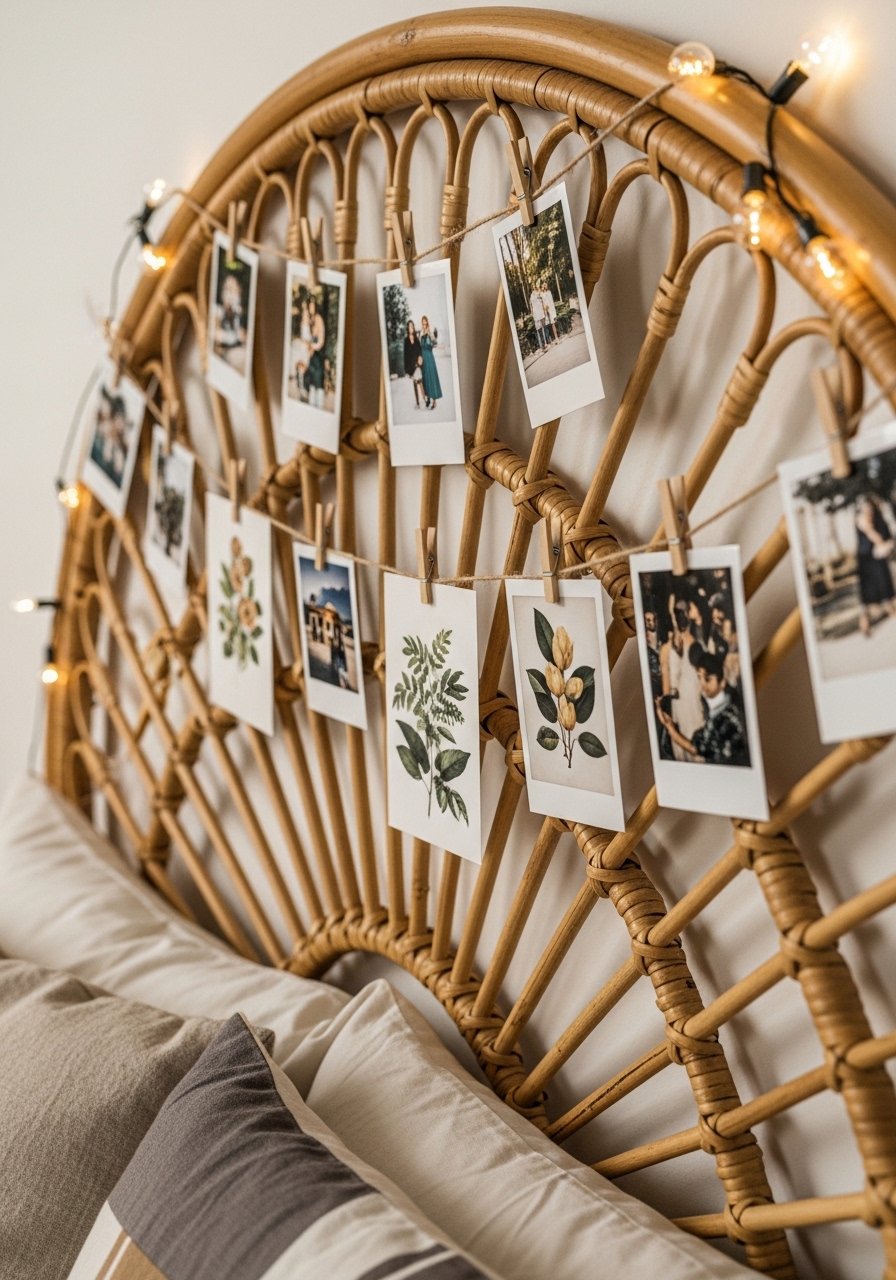
I love this because it reads casual and layered, perfect for a bedroom. Use natural jute and wooden clothespins for texture and pair with warm LED string photo lights to add soft glow. Keep polaroids and instant photos mixed with 4×6 prints in odd-numbered groupings for balance. Common mistake: hanging the string too taut — let it sag slightly for a relaxed look. This is an easy way to add personality without making the room feel cluttered.
Grid Wire Panel for Minimalist Office
Style/Vibe: Minimalist / Modern
Budget: $ (under $50)
Best For: Home office / Studio
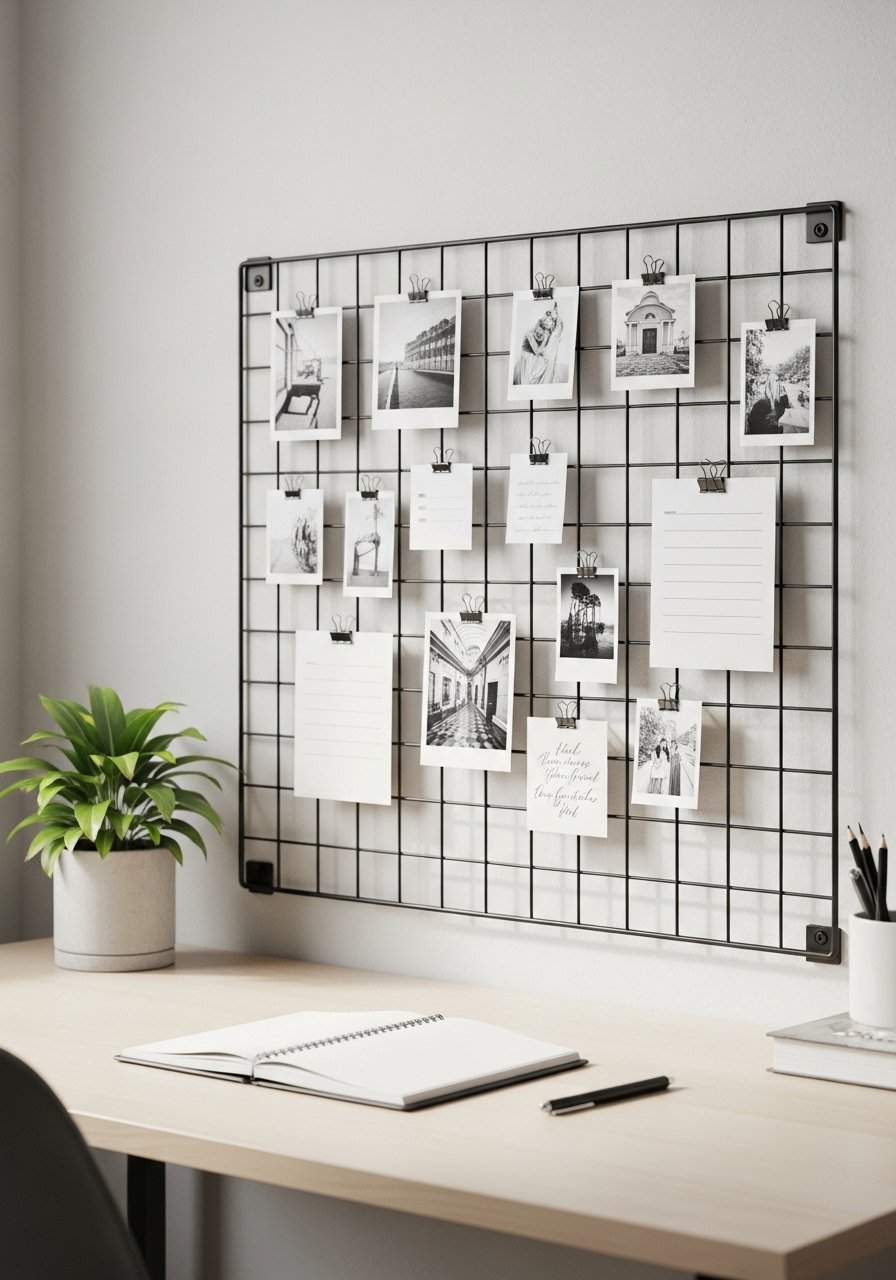
A black grid is my go-to for neat, changeable displays. I clipped black-and-white prints and index cards, then layered with a few washi-tape accents for pops of color. I used a grid wall panel that mounts with removable hooks — great for renters. This creates visual rhythm and keeps everything accessible. Mistake to avoid: overcrowding the grid. Leave negative space so each photo reads clearly. The grid pairs well with matte frames and clean textures.
Floating Ledge with Curated Greenery for Living Room
Style/Vibe: Modern Farmhouse / Warm
Budget: $$ (under $100)
Best For: Living room / Entry
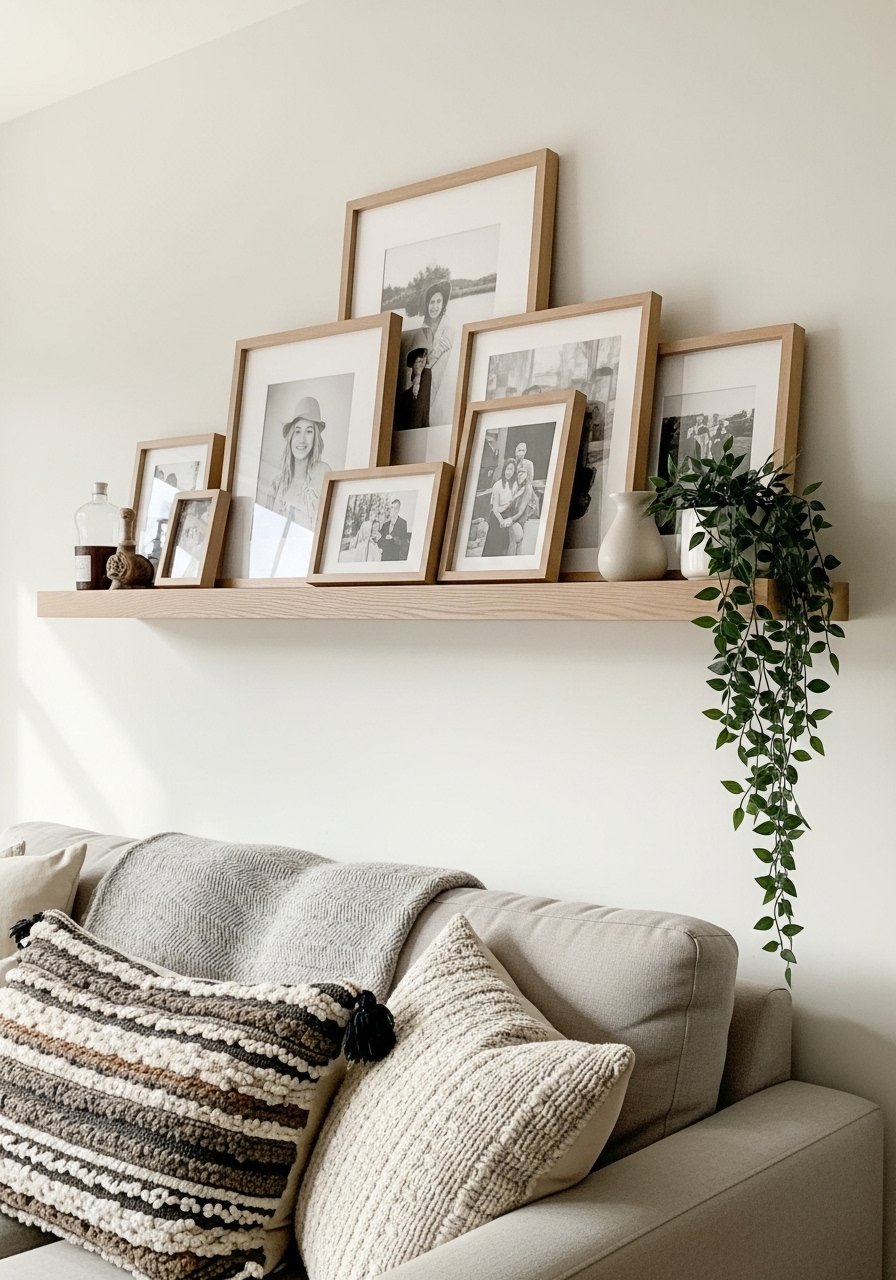
Floating ledges make it easy to layer frames, books, and plants for a gallery feel that’s low-commitment. I used white oak floating shelves and mixed frame sizes in a 3-2-1 ratio to keep sightlines interesting. Adding a small trailing plant softens the edges and complements warm wood tones I see everywhere this year. Avoid aligning everything perfectly — stagger heights and let one frame overlap another. This keeps the display cozy, not rigid.
Vintage Frame Cluster for Entryway
Style/Vibe: Vintage Eclectic / Warm Neutral
Budget: $ (under $75)
Best For: Entryway / Hall
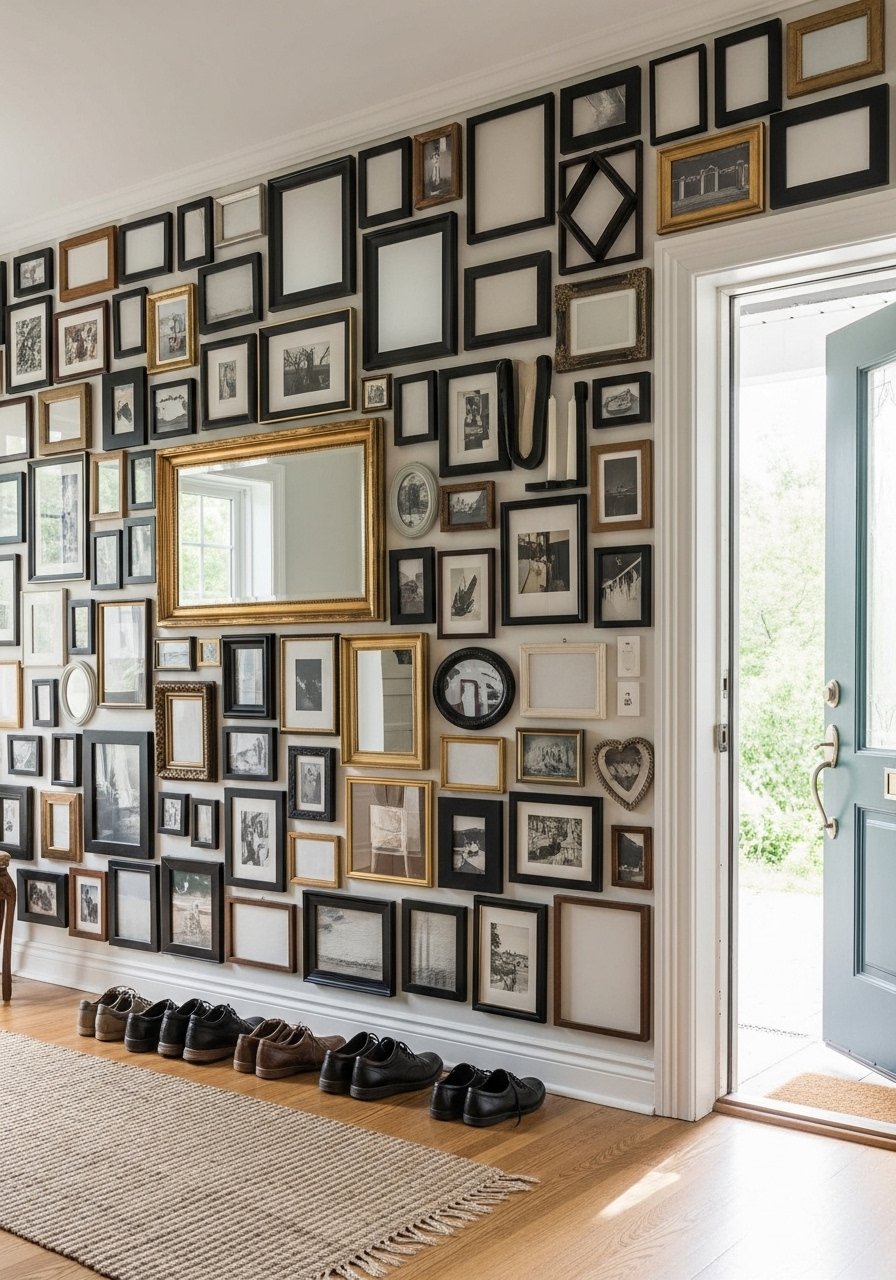
I scavenged thrift frames and paired them with new linen photo mats for a cohesive, lived-in gallery. Mixing metals like brass and black steel reads current and intentional. Keep odd numbers for groupings — five or seven frames feels balanced. Common mistake: matching everything by era — the charm is in contrast. This approach gives your entry instant personality and tells a story the moment guests arrive.
Polaroid Washi Gallery for Staircase
Style/Vibe: Playful / Casual
Budget: $ (under $40)
Best For: Staircase / Hall
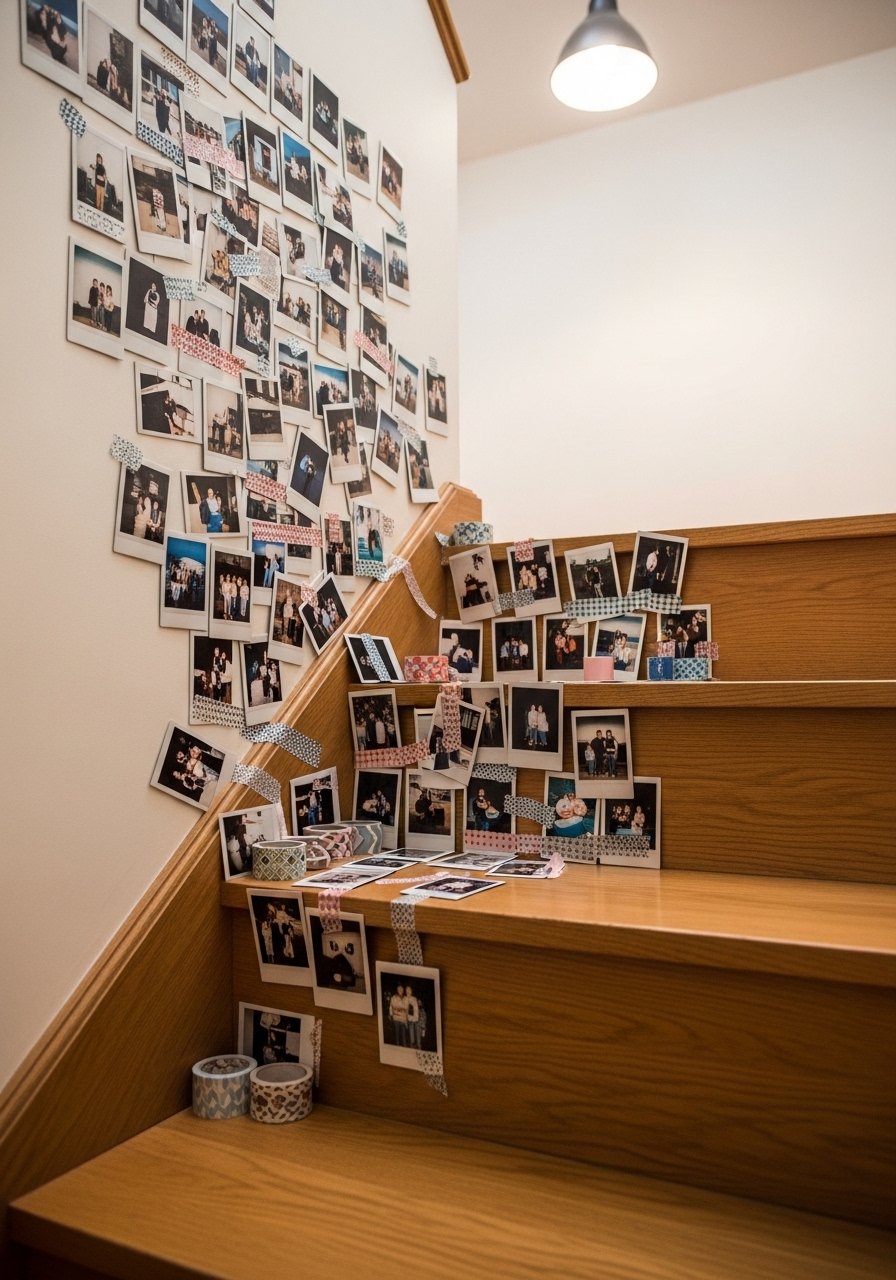
This is my favorite for capturing vacations and kids’ milestones. I used instant photos and alternating washi patterns to create rhythm up the stairs. I stick them directly on the wall using removable washi tape sets so nothing is permanent. Mistake to avoid: placing photos too high — keep them at eye level for the primary traffic flow. This low-cost idea adds movement and nostalgia without heavy frames.
Clipboard Wall for Creative Studio
Style/Vibe: Industrial / Creative
Budget: $ (under $60)
Best For: Studio / Kitchen command center
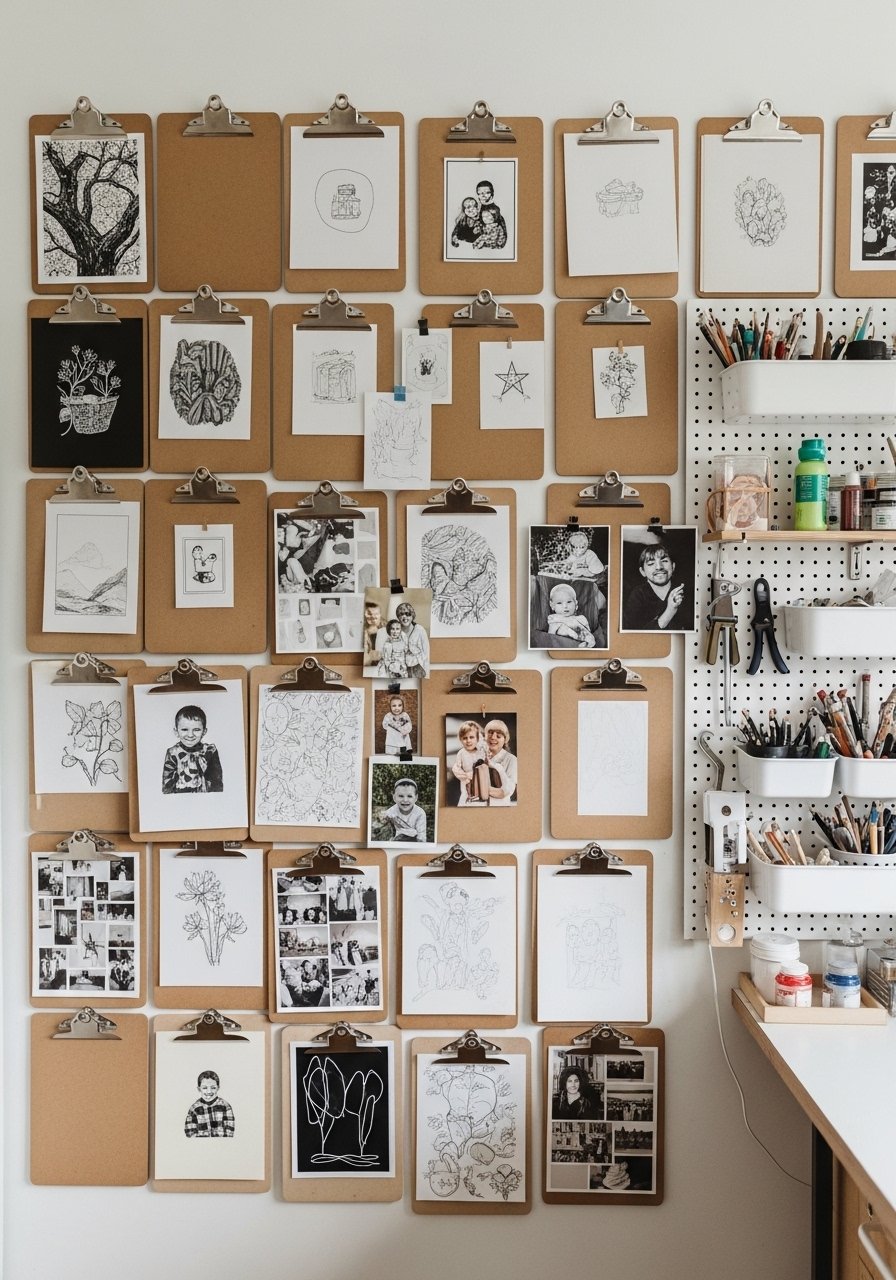
Clipboard walls are practical and changeable — perfect when you switch images often. I hung a row of wooden clipboards and alternated color photos with sketches and postcards. The clipboards give a uniform base that still allows layered visuals and mixed media. Avoid using fragile paper without backing; add a lightweight mat to prevent warping. This setup works for recipes in the kitchen or rotating inspiration in a studio.
Shadow Box for Travel Memories in Hall
Style/Vibe: Curated / Transitional
Budget: $$ (around $75)
Best For: Hallway / Nook
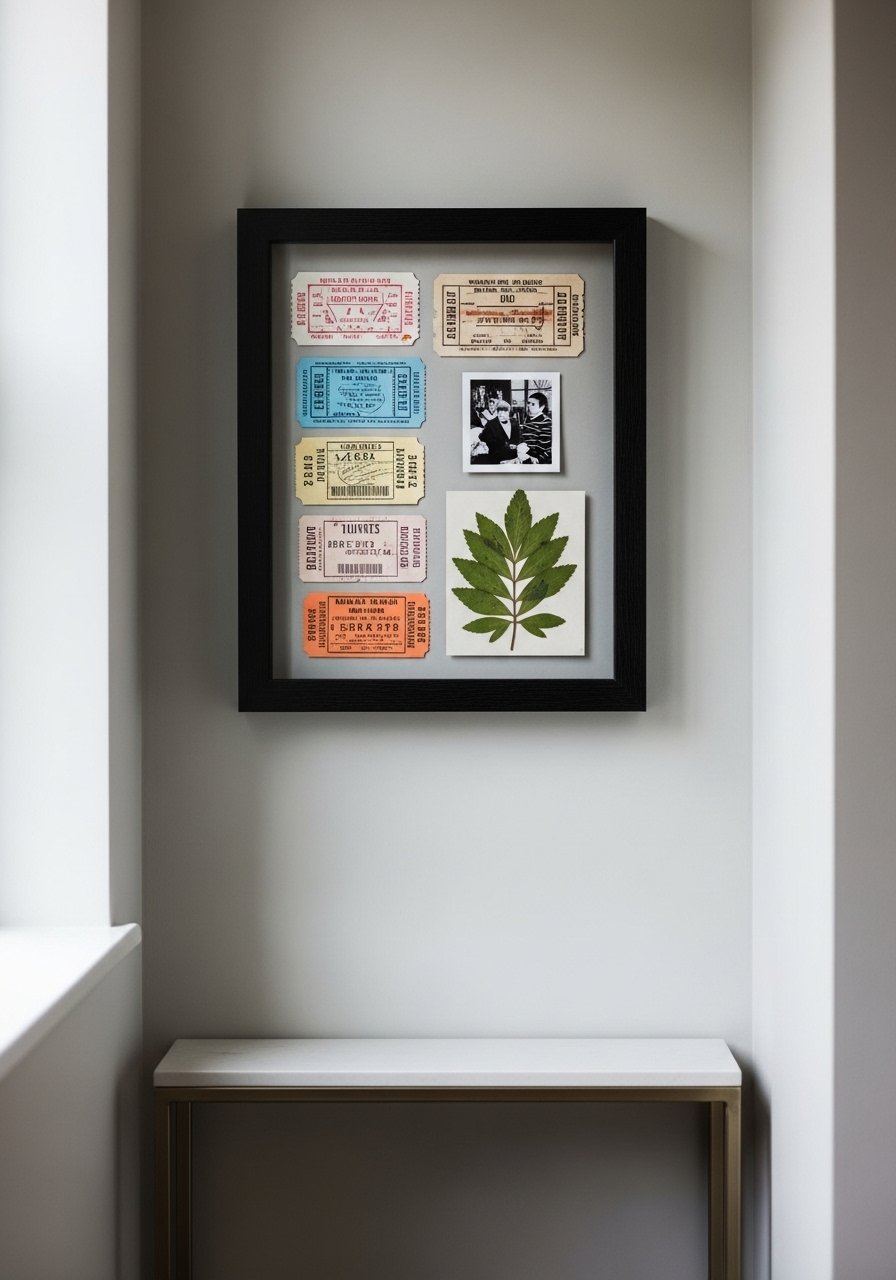
Shadow boxes let you include three-dimensional keepsakes with photos for deeper storytelling. I used a 12×12 shadow box frame for a travel vignette — a ticket stub, a polaroid, and a pressed leaf. The depth creates a sculptural effect that reads like a mini museum. Mistake to avoid: overstuffing the box. Aim for one focal photo and 1–2 supporting items so the eye rests. This gives the hallway real personality without clutter.
Mixed-Metal Rail for Modern Kitchen
Style/Vibe: Modern / Functional
Budget: $ (under $70)
Best For: Kitchen / Breakfast nook
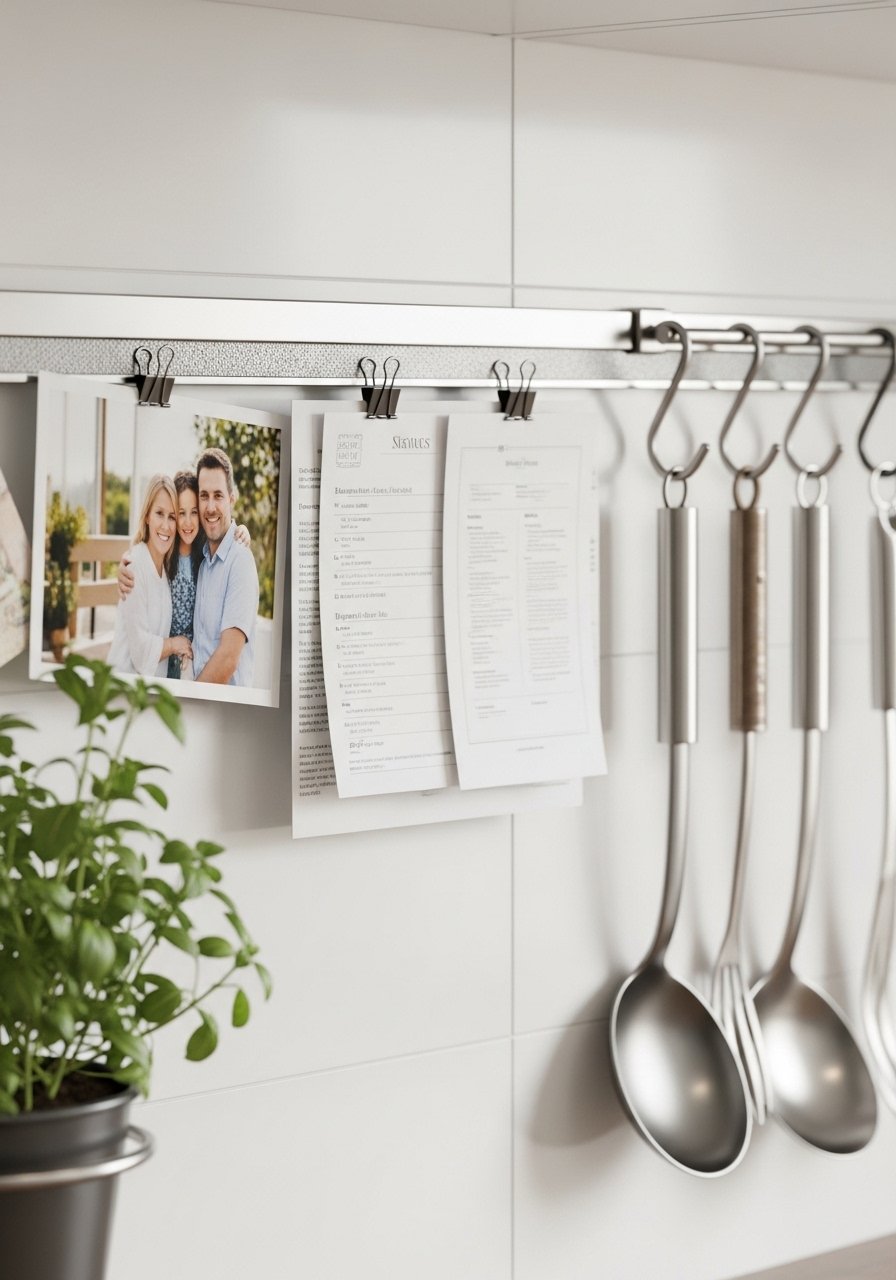
A slim rail is great for kitchens where walls are limited. I hung photos on clips and interspersed recipe cards and a tiny herb planter. I chose a mixed-metal hanging rail to tie in brass cabinet pulls and stainless appliances. Use 2–3 clips per grouping and vary heights for a lived-in look. Mistake to avoid: using heavy frames — stick to clips and lightweight prints to keep things practical and safe near food prep areas.
Photo Mobile for Nursery or Playroom
Style/Vibe: Soft / Playful
Budget: $ (under $50)
Best For: Nursery / Playroom
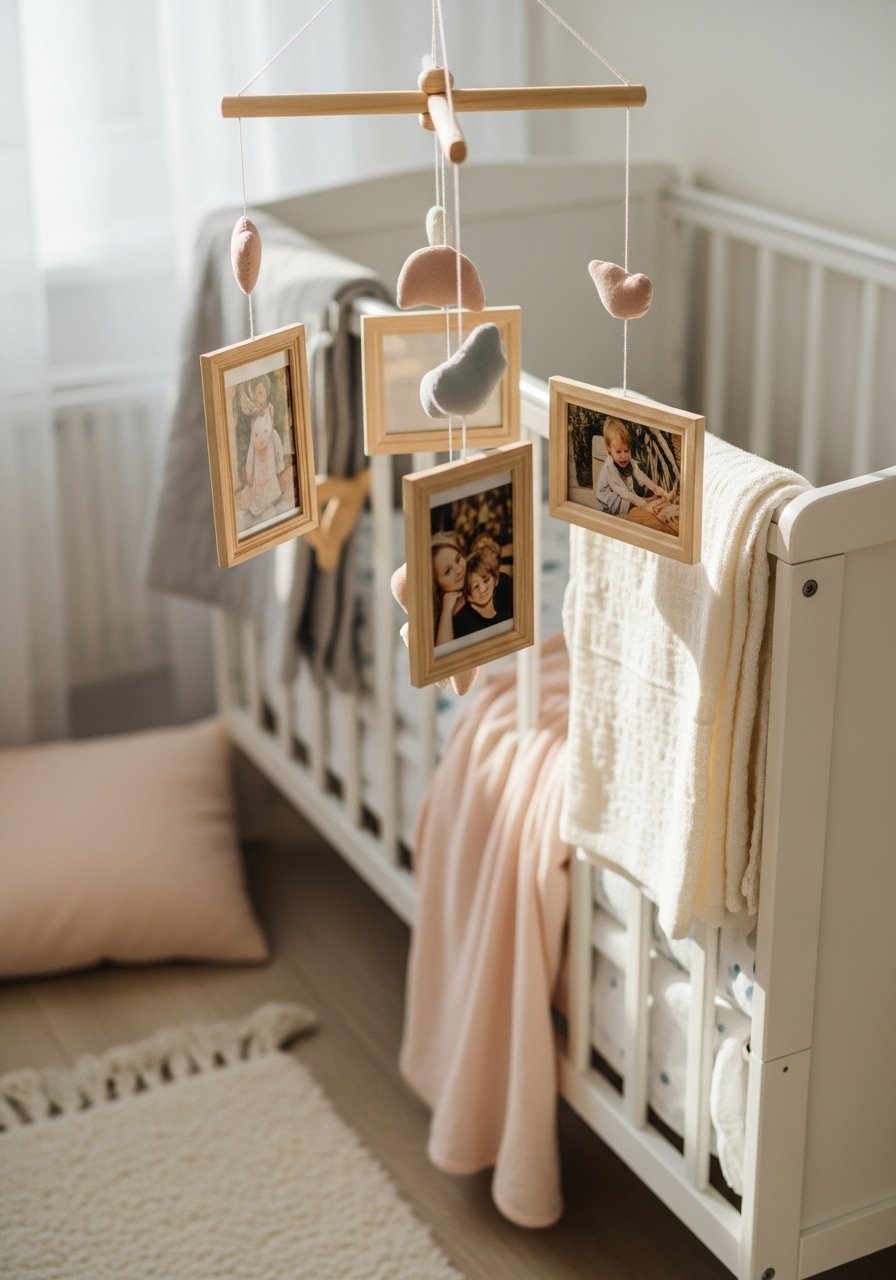
I hung a small mobile with laminated 3×3 photos and felt shapes above my child’s reading corner. The gentle motion brings photos to life and keeps them out of tiny hands. I used a wooden photo mobile kit and laminated prints for durability. Mistake to avoid: putting it too close to the crib; keep it safely out of reach. This adds charm without crowding wall space and pairs well with soft textile layers.
Textile Photo Banner for Cozy Reading Nook
Style/Vibe: Cozy / Scandi
Budget: $ (under $60)
Best For: Reading nook / Bedroom corner
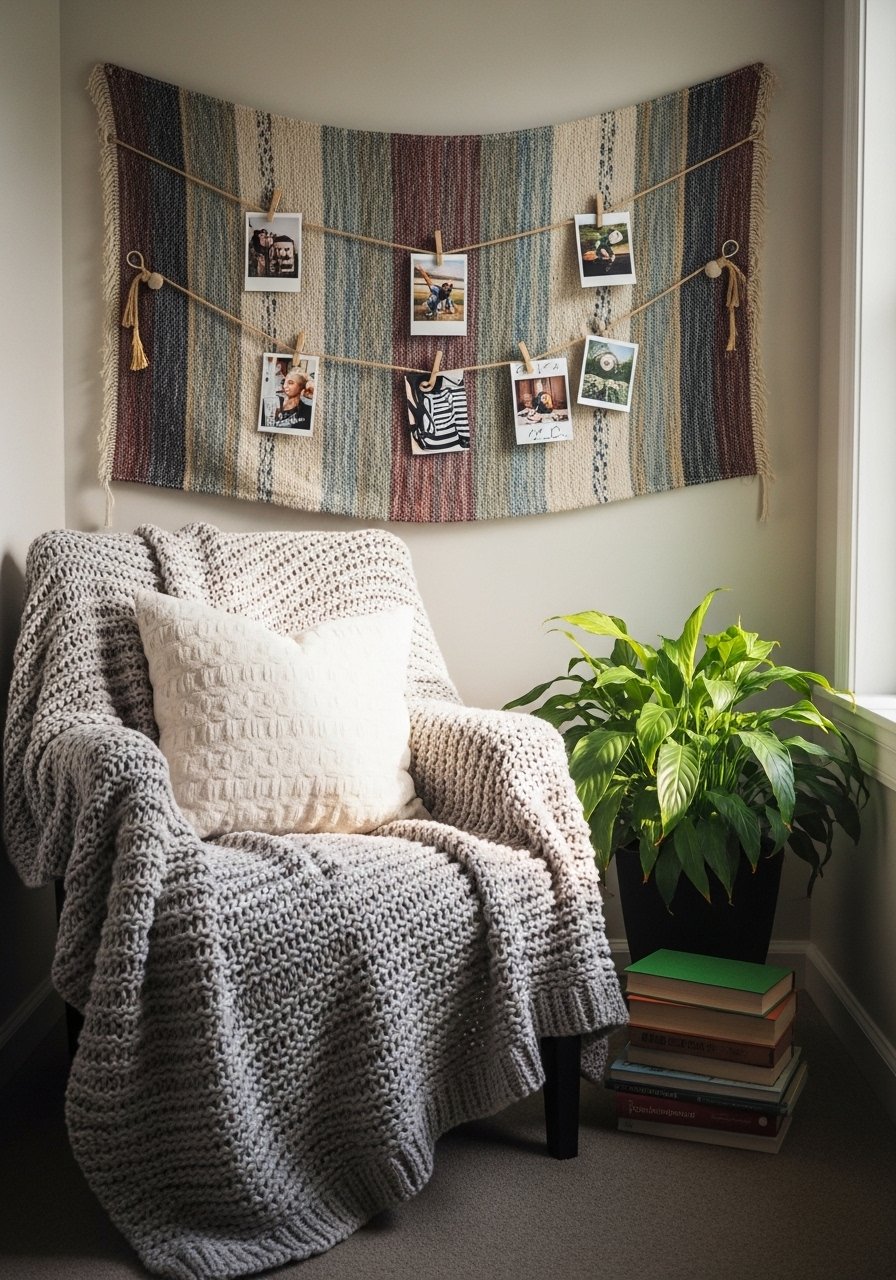
I made a textile banner from a linen scrap and clipped photos onto it with wooden pins for a soft, tactile display. The linen complements warm wood furniture and a cream chunky throw. I recommend a small linen banner kit to get the right look. Mistake to avoid: using bright, glossy photos that glare; matte prints read warmer and layer better with textiles. This soft display feels intentional and cozy for curling up with a book.
Lighted Corkboard for Dorm or Small Space
Style/Vibe: Functional / Warm
Budget: $ (under $50)
Best For: Dorm room / Small apartment
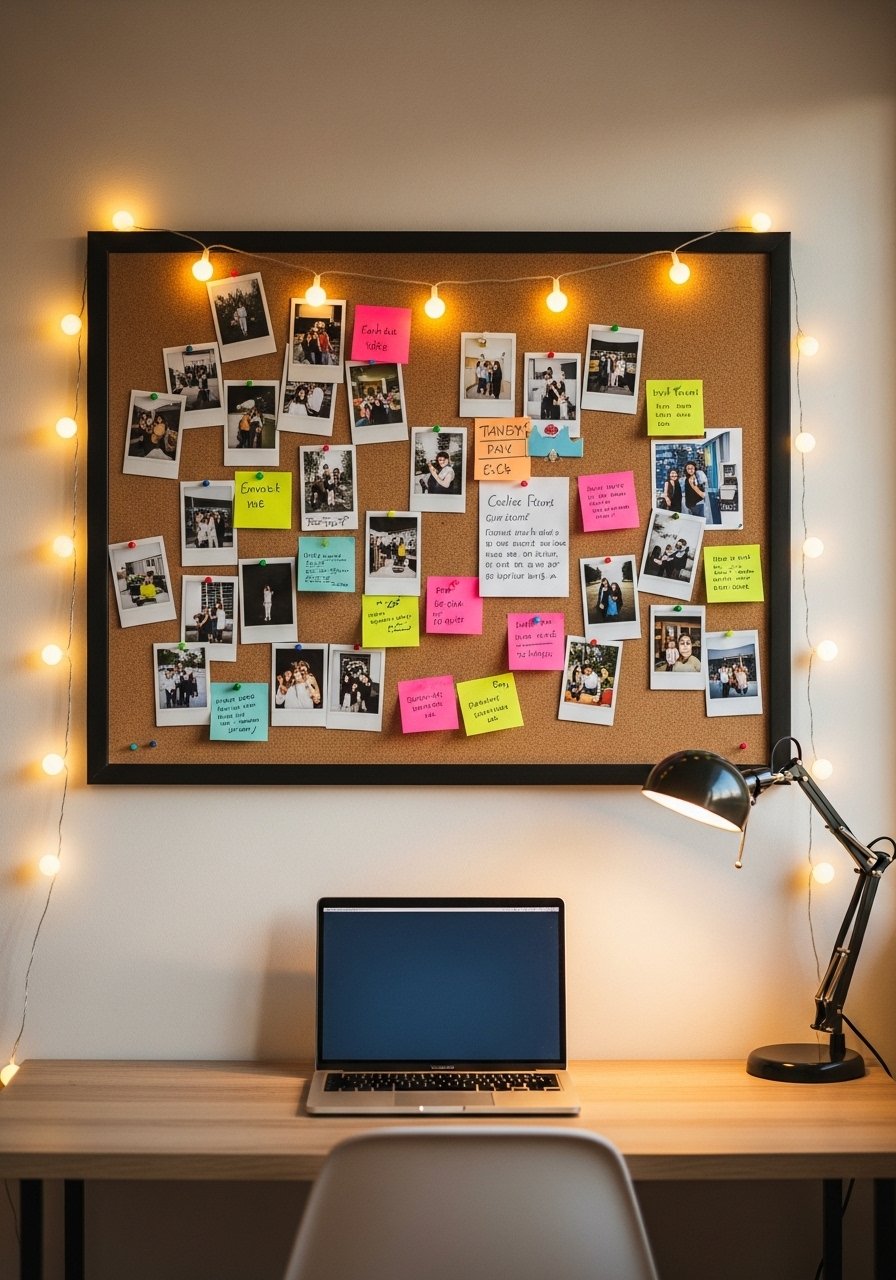
For small spaces, a corkboard is flexible and renter-friendly. I framed one with thin molding and added warm mini LED lights around the edge to make it a focal point. Pin photos, ticket stubs, and notes in clusters — keep it asymmetrical so nothing competes. Mistake to avoid: using overpowering colors; neutral cork and warm lights keep the board from dominating the room. This keeps memories front-and-center without sacrificing functionality.
Shopping Tips for These Looks
Buy frames in bulk: Buying a mixed frame set saves money and helps unify a gallery wall.
Invest in quality mats: I always buy acid-free photo mats — they protect prints and instantly look more finished.
Pick one dominant tone: If you’re unsure, choose warm wood or black — white oak shelves are my current go-to to tie things together.
Use removable hardware in rentals: Reusable picture hanging strips prevent holes and make swaps painless.
Mix real and faux plants: A single 6ft faux fiddle leaf fig adds height without upkeep and balances small live succulents.
Choose matte prints for texture: Matte photos reduce glare and read better with textiles and wood. I use matte photo paper packs.
Frequently Asked Questions
Q: How do I hang photos without drilling into plaster?
A: Use removable hooks and heavy-duty picture hanging strips. They hold surprisingly well and peel off cleanly — I use them in rentals and on plaster walls.
Q: What's the best way to keep photos from fading?
A: Opt for acid-free photo mats and avoid direct sun where possible. I rotated a few wall clusters to a brighter wall and noticed prints last longer in shaded spots.
Q: Can I mix frame styles in one gallery?
A: Yes. Mix metals and woods for depth. Start with a mixed-frame set and add thrifted pieces for contrast. Keep mat color consistent for cohesion.
Q: How do I make a small wall look intentional, not cluttered?
A: Use 2–3 key pieces and negative space. A single 36-inch round mirror or one floating shelf with three framed photos reads curated and calm.
Q: What's an easy way to display photographs on shelves?
A: Layer frames in front of books and small plants. I use white oak floating shelves and place frames in odd numbers, backing larger frames with smaller ones to avoid a flat look.
