

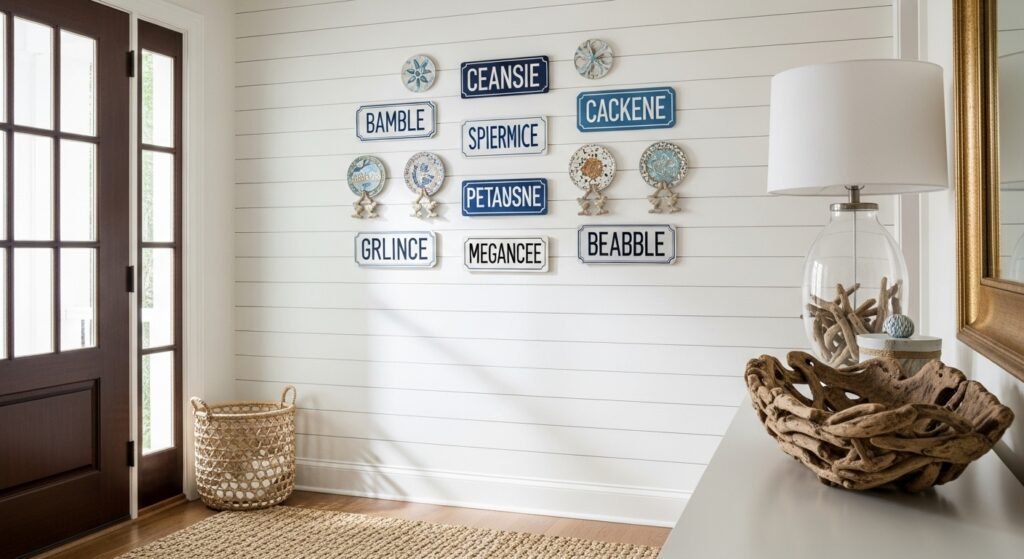
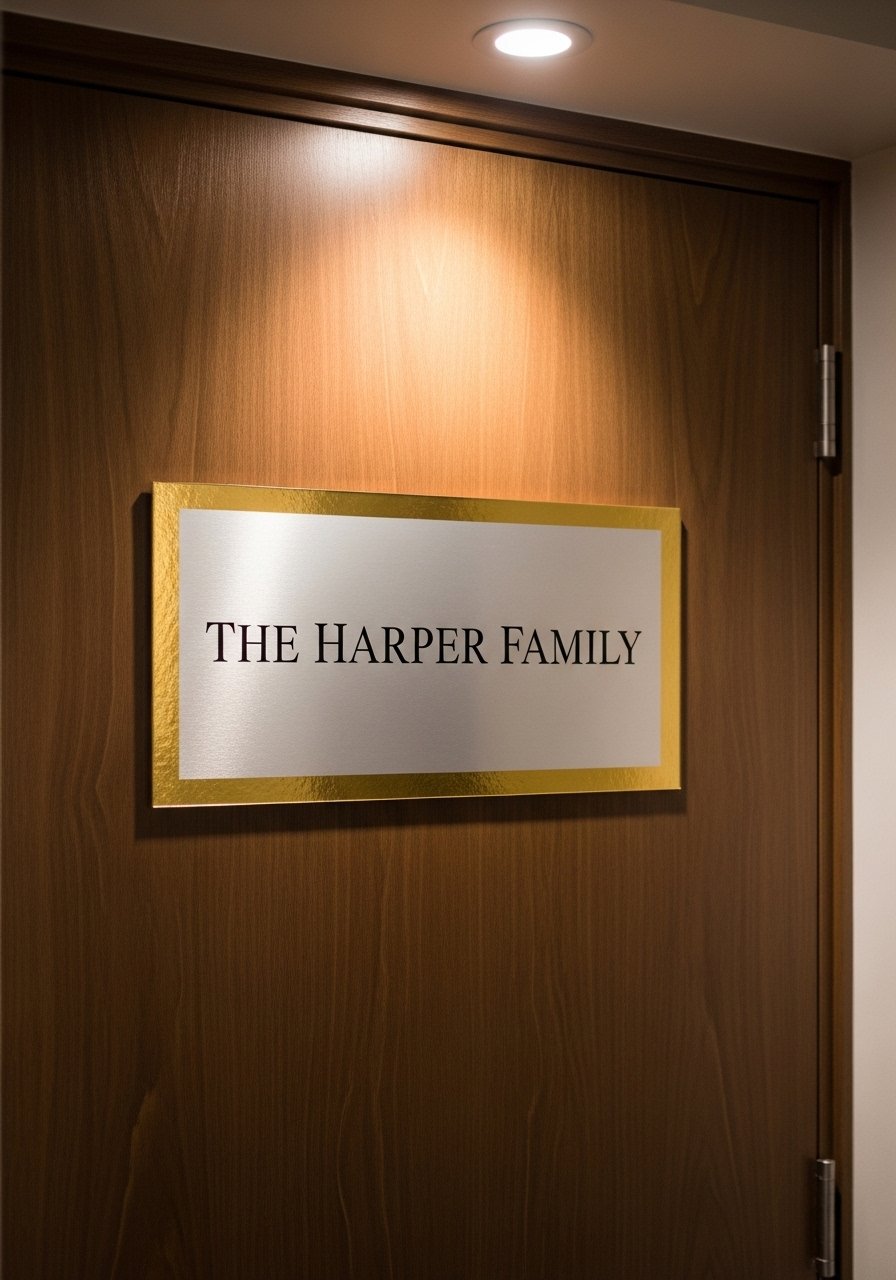
My living room had nice furniture and decent lighting but it still felt like a waiting room. Took me embarrassingly long to figure out it was missing texture. Every surface was smooth, every color was flat, and nothing invited you to actually sit down. Swapping a few small signs and one resin name plate made the space stop being polite and start feeling like home.
These ideas lean coastal with a mix of modern and boho notes. Most projects are under $50, with a few splurges around $100. Great for entryways, mudrooms, porches, and small walls that need personality without permanent changes.
Painted Wooden Door Plaque, Playful Coastal Entry
The classic wooden plaque still wins when you want a kid-friendly, beachy look. Paint the base with two coats, let each coat touch-dry, and PVA glue wooden letters on top. Most folks end up doing two paint coats anyway to skip streaks. Seal everything with a clear coat like Aquaclear to stop peeling in humid rooms near the coast. I like a 10×4-inch board for small doors and 14×6 for double doors. A common mistake is skipping a primer. Use gesso on cheap wood so your texture and stickers hold. Try a wooden name plate for a ready base.
Acrylic Insert Holder, Modern Coastal Hall
If you want a professional look without carving, an acrylic insert kit is the answer. Stack foil, then a printed film, then the acrylic cover and snap it shut. That exact stack keeps text crisp and prevents shifting. Use printable film for the name so you can swap it between guests or seasons. Mounting with twist-off adhesive keeps landlords happy. Over half skip screws for stick-on mounts that peel off clean. The assembly takes ten minutes and looks expensive. My tip, print at 300 dpi and trim with a craft knife. Pick up an acrylic name plate kit to try this.
Gesso-Textured MDF Welcome Board, Boho Coastal Hall
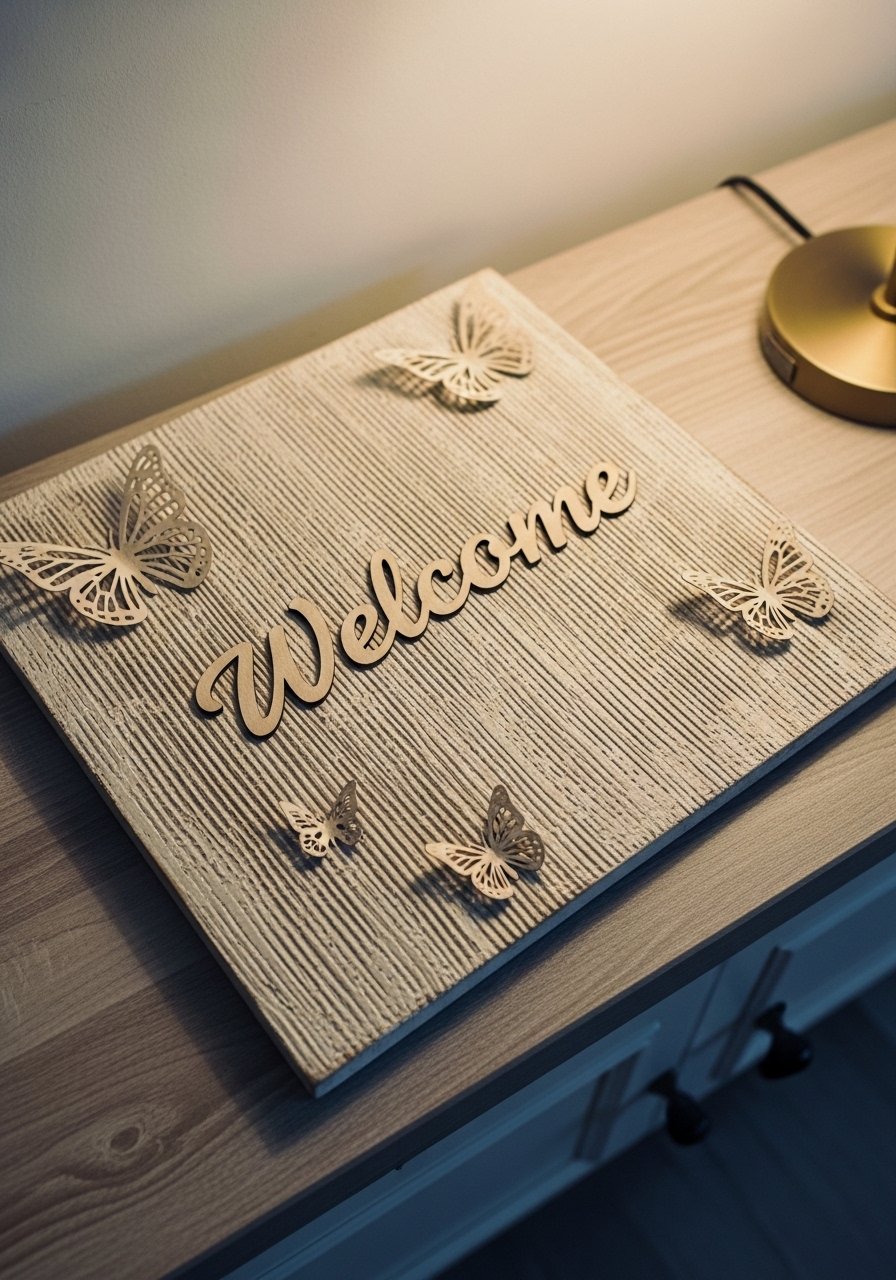
Gesso gives you grip for mixed media and hides cheap MDF flaws. Apply a layer, dry with a heat gun until it is touch-dry, then add texture paste and butterfly cutouts. Heat-gun drying stops tacky layers in humid coastal air and saves you from later flaking. I size the board to 12×18 inches for a console table and screw in a small sawtooth hanger or use double-sided tape for renters. People often skip sealing textured pieces, which leads to dust and fingerprints gathering. After everything cures, use two thin coats of Aquaclear for durability. I used a 12×18 MDF board for mine.
Shell Name Cards On Driftwood Base, Organic Coastal Shelf
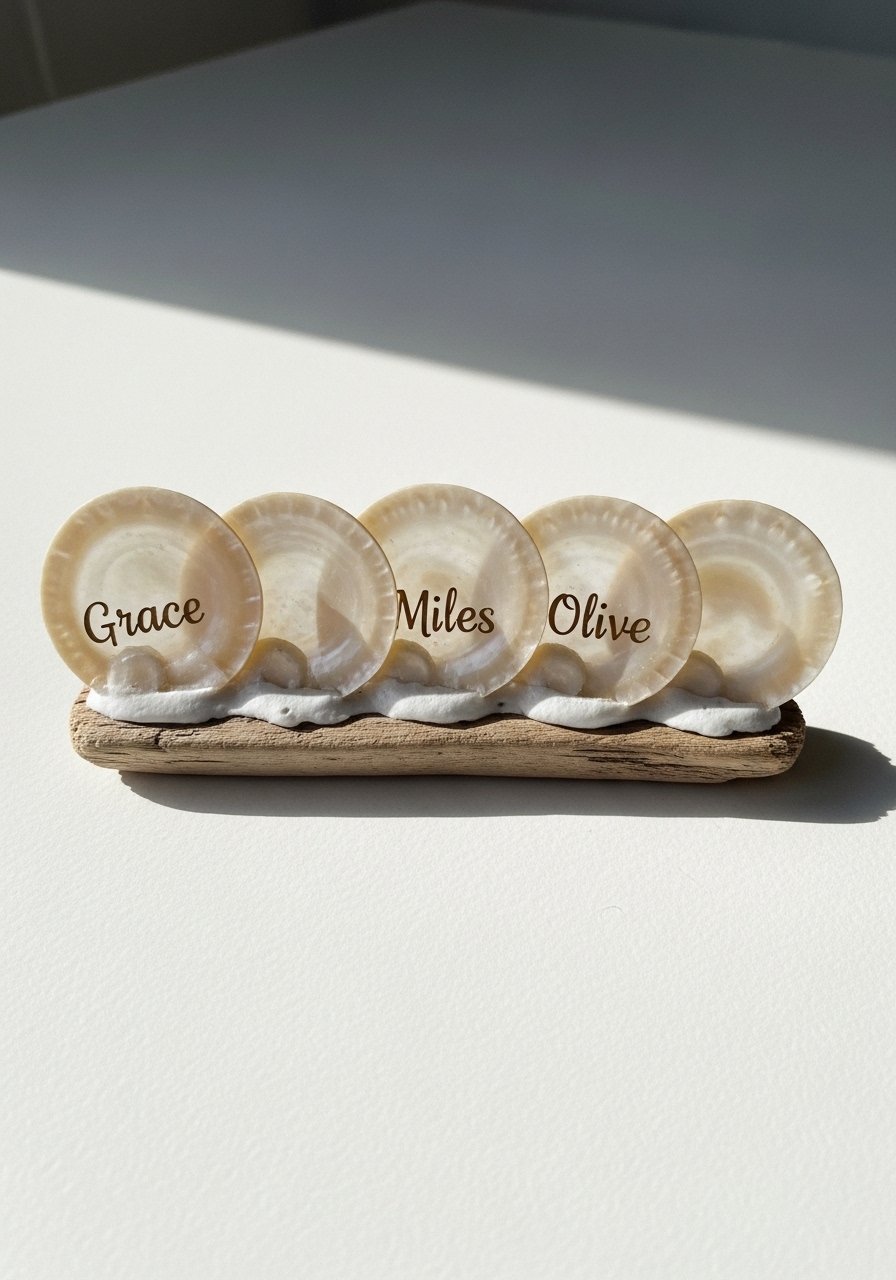
Collecting shells is the easiest way to get genuine coastal texture. Use only flat shells, write names on the smooth interior with a gold fine-tip marker, then hot-glue them onto driftwood. Flat shells make script legible and stop shaky lines on uneven surfaces. One mistake is trying to write on bumpy shells. That job always looks messy. For glue, PVA works for light pieces but hot glue grips better for heavier shells and faster handling. Seal the names with a clear topcoat so fingerprints do not rub off. I wired my driftwood base for a shelf display, but small Command strips work if you are renting. Find Capiz-like shells with pearly shell packs.
Rock Name Plates With Masking Tape Lines, Minimal Coastal Porch
When I wanted something free, flat beach rocks did the trick. Use masking tape to mark straight lines, paint a base, then write names with a waterproof white pen. Masking tape keeps the script neat on a rough surface. One detail people miss is selecting the flattest side of the stone for a readable result. Rocks are weatherproof once sealed with two coats of clear coat. Budget is basically free if you find rocks on a walk. For a consistent look, pick stones roughly 4-6 inches wide so the names sit comfortably. I keep a small waterproof paint marker on hand for these.
Resin Ocean Nameplate With Embedded Bits, Glossy Coastal Door
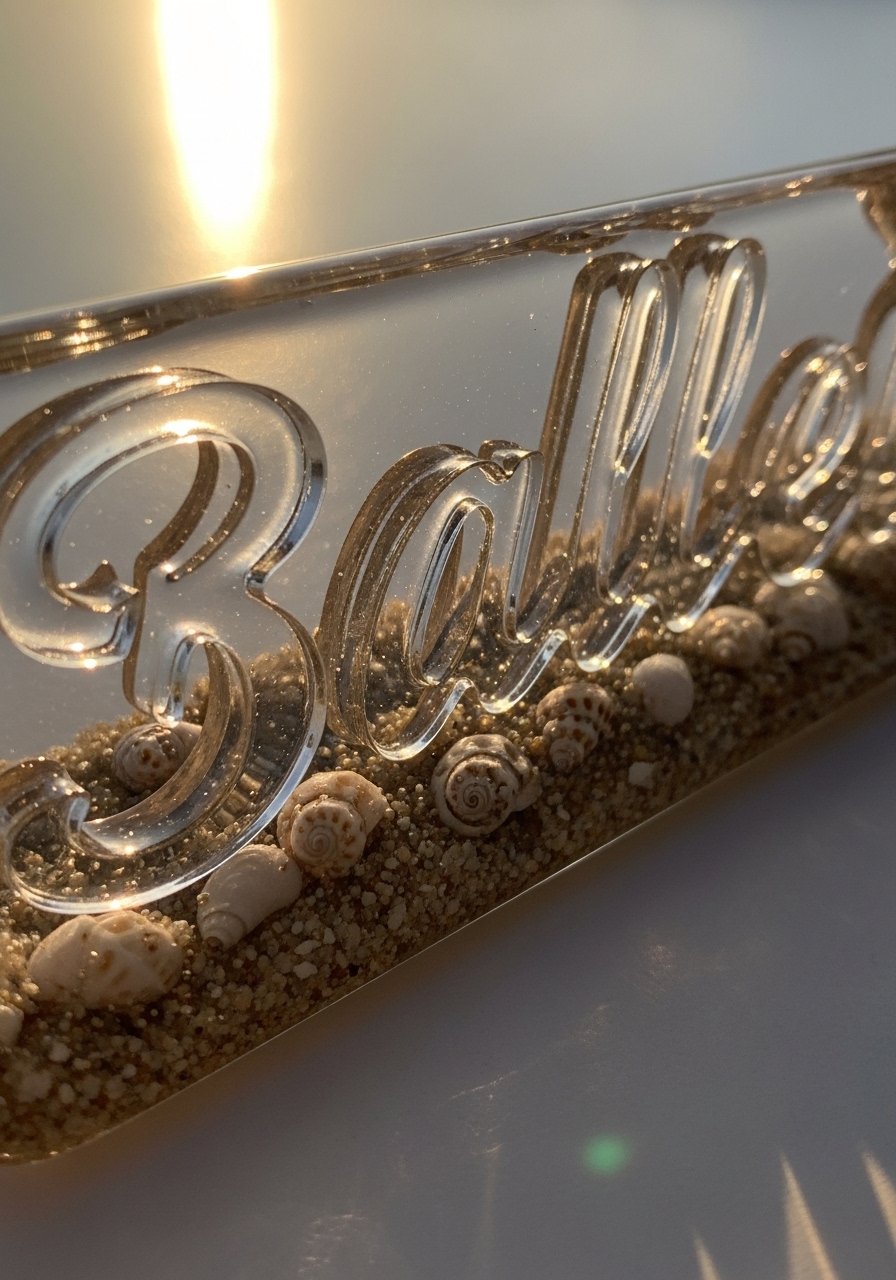
Resin makes names feel preserved forever. Pour a thin clear base, place tiny shells and a printed name film, then finish with another resin layer. It looks salon-made and can be mounted with suction cups for renters. People underestimate cure time and end up with fingerprints in the resin. Use a heat gun gently to pop bubbles and wait the recommended cure period. A 10×4 inch mold gives you a nice scale for most doors. My resin sign receives far fewer scratches after two coats of finish. Try a clear casting resin kit if you are new to pours.
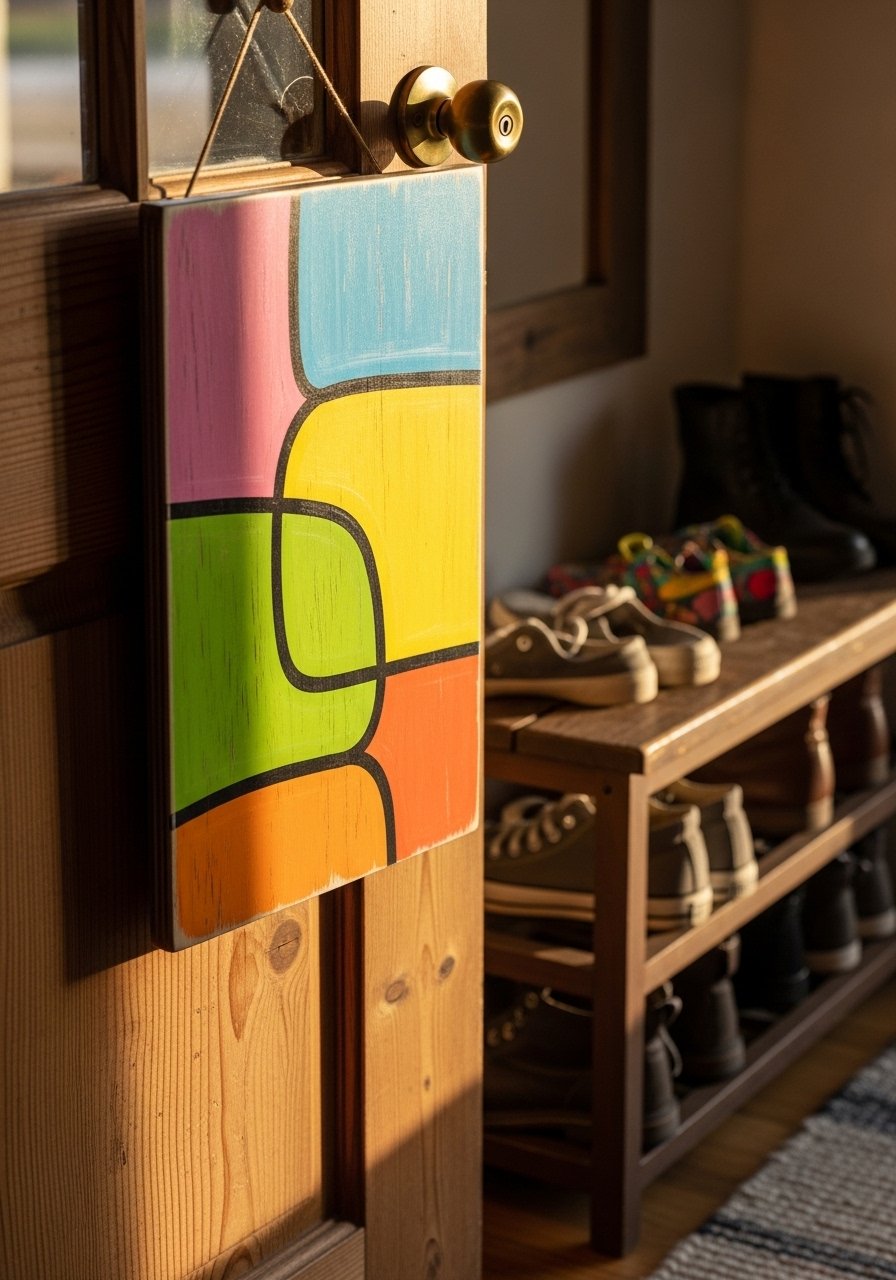
Stencil-Painted Wood With Stickers, Transitional Coastal Kid's Room
Stencils are the fast route to balanced script when freehand scares you. Paint the base with two coats, stencil the name, peel, then add a few translucent stickers for texture. The stencil keeps everything readable even on a slightly uneven board. I use a 22-inch width for shared doors so both names fit without crowding. A mistake I see often is painting over stickers before the base is dry. Wait until paint is fully cured and then seal. For a renter, stick the plaque with heavy-duty Command strips. I bought a set of letter stencils that made the whole job painless.
Layered Acrylic With Custom Print, Clean Coastal Office

For a modern clean office, layer a printed film over a metallic foil and protect with acrylic. The foil gives a small metallic pop without using metal that will rust. Stack in exact order so the snap fits and nothing shifts. Use a level when mounting to avoid that crooked look that bothers guests from across the room. A printed film also allows seasonal swaps, which is handy for hosting. Budget is typically $18 to $45. I use a thin 3mm acrylic so the sign does not look bulky. Pick up printable transparency film for crisp results.
Butterfly And Texture Mixed Plaque, Eclectic Coastal Nursery

Mixed elements make a name plate feel collected. Gesso first so glue and paint have something to bite into. Attach lightweight paper butterflies with PVA, then add a light spray of water to settle texture paste. A detail competitors miss is drying gesso with heat so layers do not tack in humid rooms. Use two thin clear coats to protect delicate pieces from curious hands. I sized mine 11×14 so it sits above a changing table without overwhelming the wall. Pair this plaque with a soft textile from the shopping list for balance. Try a pack of paper butterfly cutouts.
Chalk Marker On Oyster Shells, Grandmillennial Coastal Table
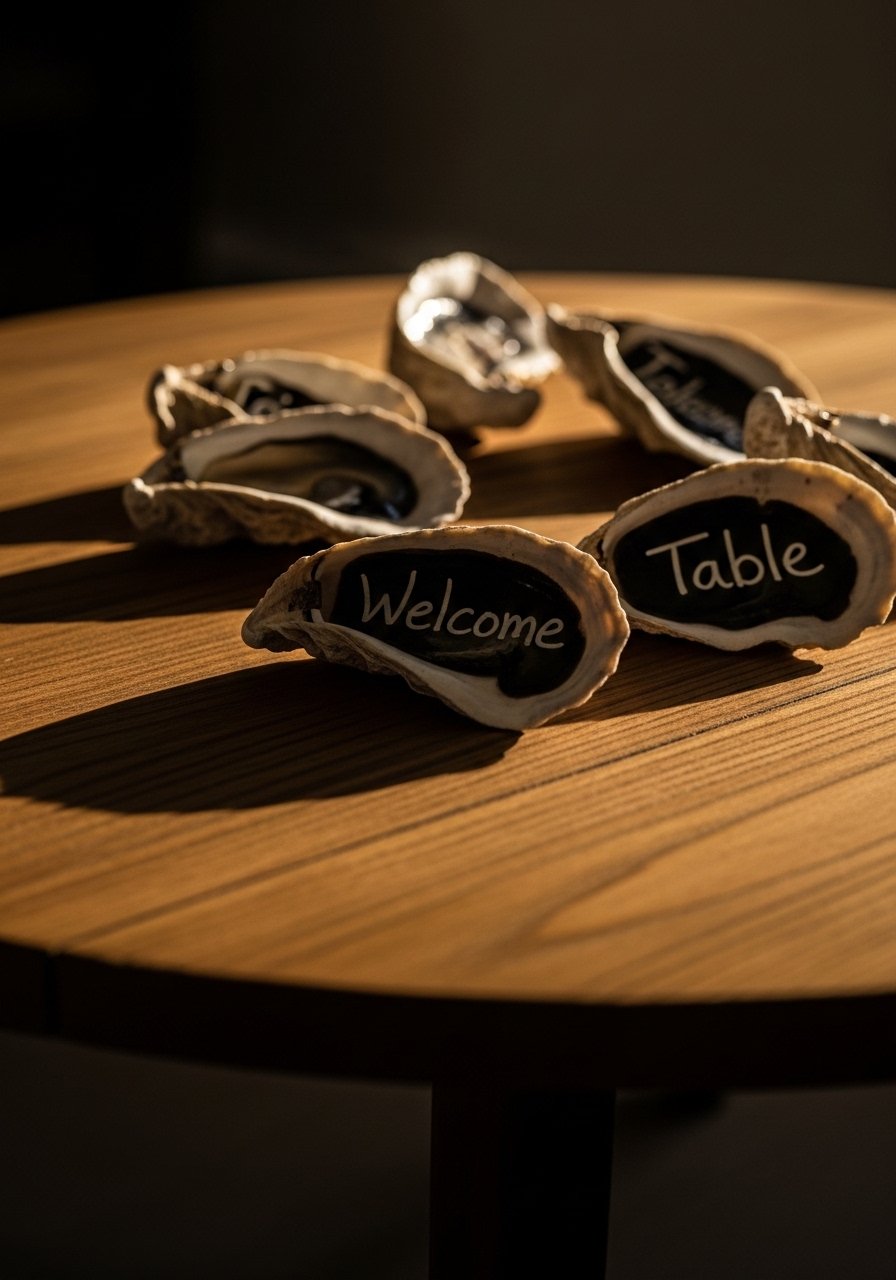
Oyster shells have a pearly sheen that plays well with chalk markers. Pick the cleanest side, write the name, and top with a clear seal for longevity. This trick is fast and budget friendly, and the shells double as place cards for small gatherings. A common error is skipping the flatness test. If the writing surface bounces, your script will wobble. I keep a handful in a bowl by the entry so guests can grab one. For permanence, two light coats of clear spray will keep the white readable. I used a white chalk marker.
Foil-Backed Printed Door Sign, Industrial Coastal Mudroom
If you want metal without the weight or rust risk, back a print with metallic foil. Print the name, adhere foil behind it, then seal and mount. That metallic pop mimics brass hardware and reads easily from the porch. People sometimes skip stacking the foil and print in the right order, which leads to bubbling. Cut the print a fraction smaller than the acrylic to hide edges. For durability, choose an 8×10 size for single doors. I paired mine with black farmhouse hooks for contrast. Use a metallic foil roll to test finishes.
Sealed Color Block Name Board, Scandinavian Coastal Bedroom
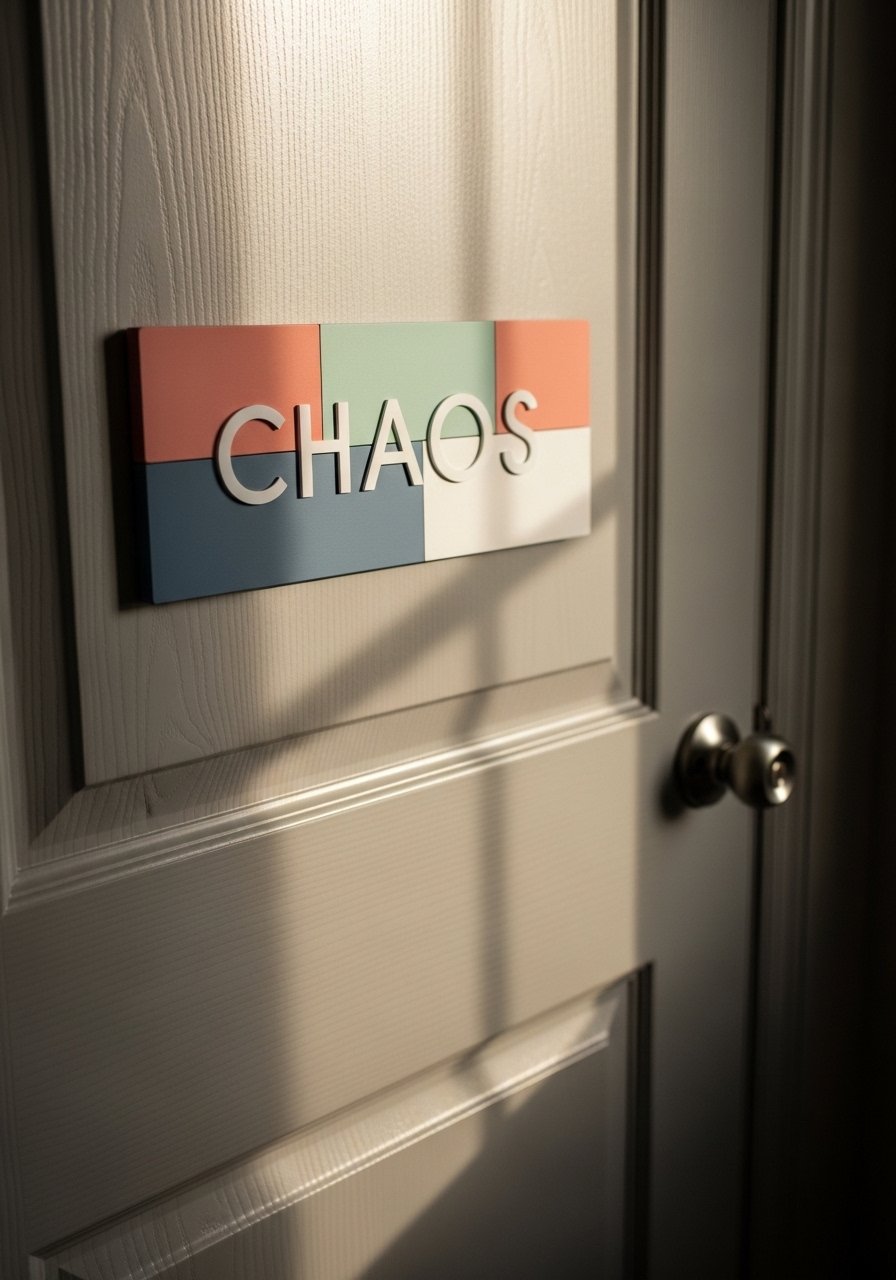
Color blocking nods to beach huts without being literal. Paint three blocks in a roughly 60/40/20 ratio so the composition feels balanced. Two coats on each block keep coverage even. Seal with Aquaclear to protect from fingerprints and fading in sunny rooms. People often use colors that fight the room tone. Pick one color from your bedding and one neutral to tie it together. I use an 8×12 board for bedroom doors so the design reads at arm height. Buy a small can of clear spray sealer and test on scrap wood first.
Capiz Script On Thin Shells, Modern Coastal Bathroom
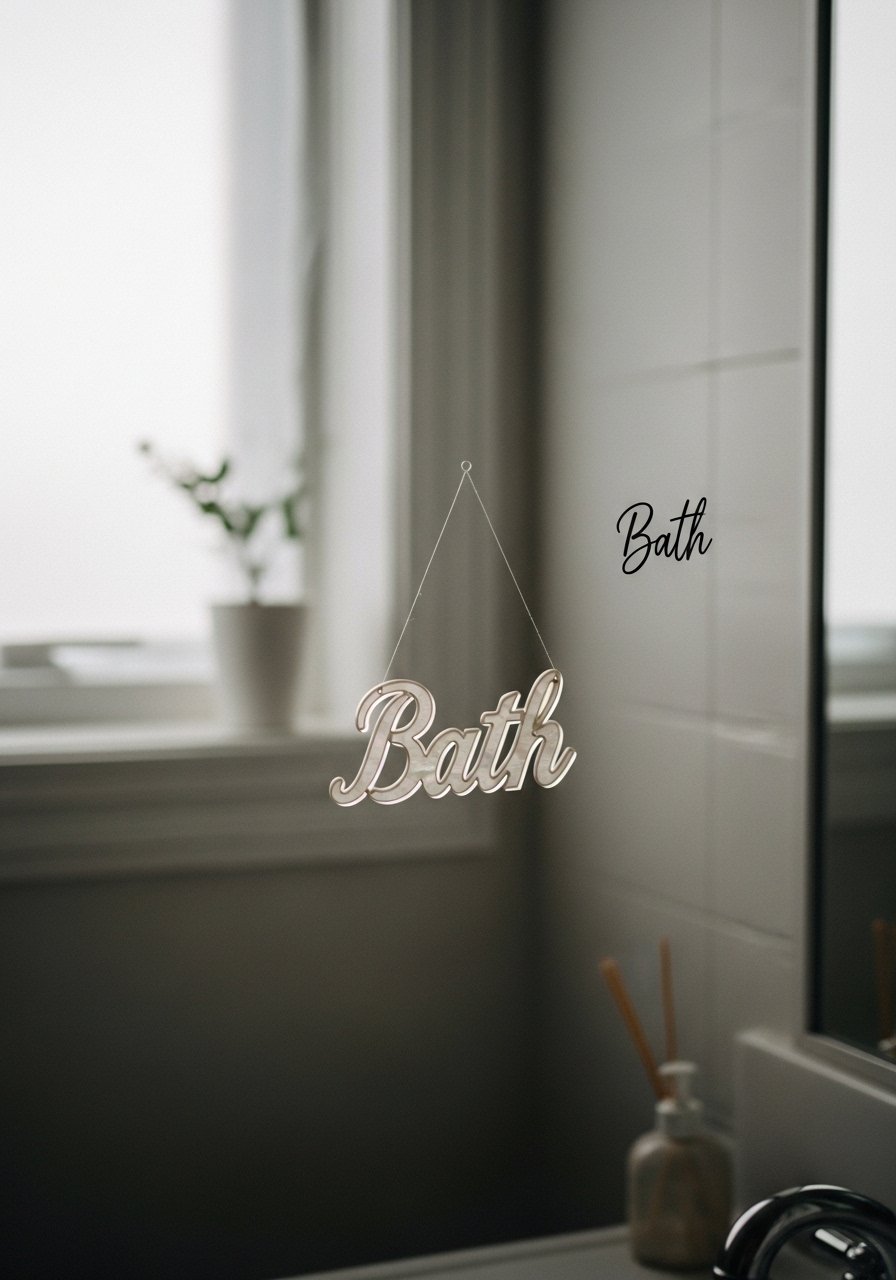
Capiz is thin, uniform, and perfect for delicate script. Glue lightweight shells to a thin wooden base and use a silver paint pen for names. Seal with a UV-clear coat so sun exposure by windows does not fade the ink. One detail most tutorials skip is working on the shell flat side only, which keeps letters from warping. For bathrooms, swap screws for twist-off mounts to avoid holes in tile. A 2×6 inch run of shells looks crisp over towel hooks. I ordered a small capiz shell pack to get matching pieces.
Twist-Off Mount Micro Signs, Rental-Friendly Coastal Apartment
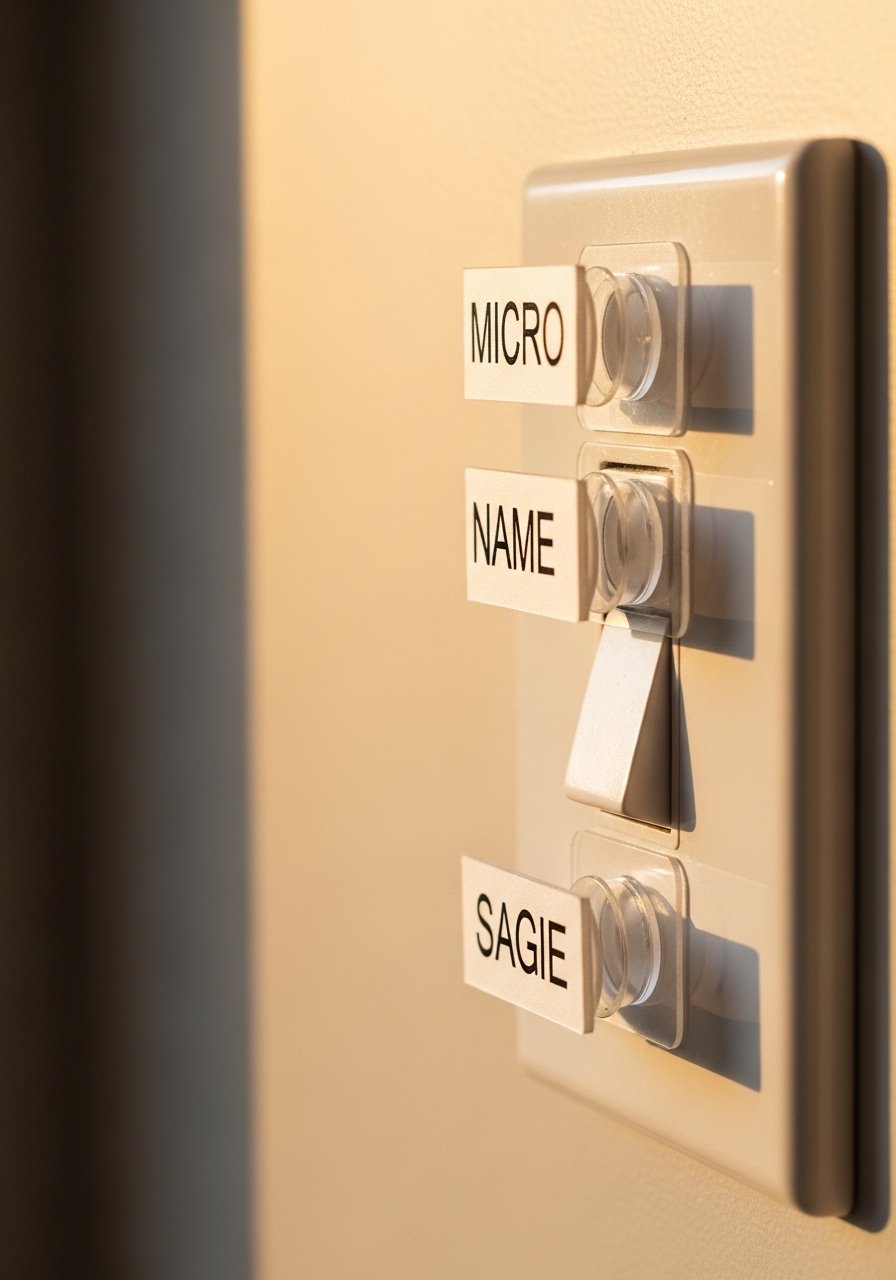
For renters, micro signs that use twist-off mounts are a lifesaver. They stick strong and remove cleanly with no paint damage. Most people automatically reach for screws and then curse it when they move. I size mine 3×1.5 inches for hooks and switches. A practical trick is to mark level lines with painter's tape before applying. If you worry about sliding layers, use a tiny bead of hot glue between layers before sealing. Buy a pack of twist-off adhesive mounts and keep extras in your drawer.
Mini Message Stones For Planters, Casual Coastal Balcony
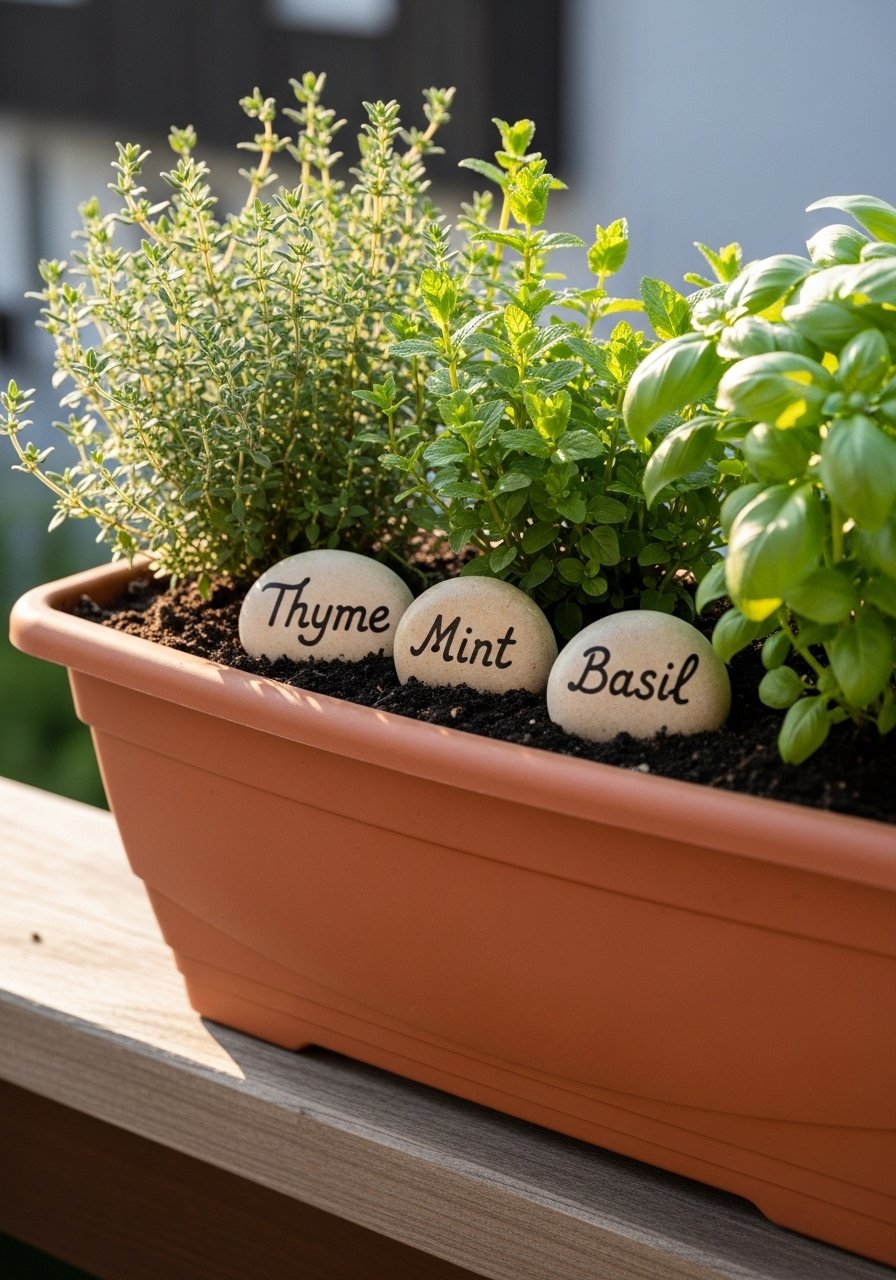
These small stones are simple, useful, and weatherproof if sealed properly. Pick stones 2-3 inches wide, paint a base, and write names with a fine paint pen. I tuck them into planters to label herbs and to add a coastal touch on balconies. A common mistake is not sealing paint between coats, which leads to fading from watering. Two thin clear coats keep the names readable through spring and summer. For scale, do six stones on a wide planter for a balanced look. I keep a fine-tip paint pen for tiny script.
Your Decor Shopping List
Textiles
- Honestly the best $40 I have spent. Chunky knit throw in cream (50×60 inches) dresses down a coastal sign and warms the room
Wall Decor - For the acrylic tricks, grab acrylic name plate kits in 3mm thickness, clear and easy to swap
Tools And Finishes - Clear spray sealer (~12 oz) for protecting paint and shell scripts
- Clear casting resin kit (pint size) for glossy nameplates
Letters And Stencils - Letter stencils set in 1-2 inch heights for neat names
Hardware - Twist-off adhesive mounts for renter-friendly installs
Markers And Pens - White chalk marker and fine-tip paint pen for shell and stone scripts
Natural Finds - Capiz shell pack for uniform shells in several sizes
Similar finds for some items are usually available at Target or HomeGoods if you prefer to see texture in person.
Shopping Tips
White oak beats dark wood in 2026. Design feeds have shifted, and white oak floating shelves look current, not dated. Use them to display small name plates.
Grab letter stencils for $10. They make a rushed weekend project look measured and you can reuse them forever.
Curtains should puddle or kiss the floor, never hang halfway up. 96-inch linen panels are the right call for standard 9-foot ceilings and visually anchor door plaques nearby.
Swap screws for twist-off mounts when you rent. Twist-off adhesive mounts remove clean and save your deposit.
If you plan to use shells or rocks outdoors, add two light coats of clear spray sealer and let each cure fully to avoid peeling.
Frequently Asked Questions
Q: How do I stop paint from peeling on a name plate hung outside?
A: Prime with gesso if you are using MDF or cheap wood, paint two full coats and let each coat become touch-dry. Finish with two thin coats of a clear UV sealer like Aquaclear or the clear spray sealer linked above.
Q: Can I make a name plate without drilling into a rental door?
A: Yes. Use twist-off adhesive mounts or heavy-duty Command strips. Over half skip screws for stick-on mounts that peel off clean. For extra security, size the plate so weight is under what the adhesive recommends.
Q: What surface is best for writing neat script?
A: Flat surfaces only. Flat shells, smooth rocks, or a primed wooden plaque will keep letters from wobbling. Masking tape for straight lines helps on uneven surfaces like stones.
Q: My layered acrylic insert keeps sliding, what did I do wrong?
A: Check stack order, it should be foil, printed film, then the acrylic cover. Trim the print slightly smaller than the backing so edges cannot catch. Use a level when seating the holder to keep things straight.
Q: Are resin name plates worth the effort for outdoor use?
A: They are striking and weatherproof when cured properly. Cure fully and seal edges. Avoid direct sun for prolonged periods unless you used a UV-stable resin. Use suction cups or twist-off mounts for renters.
Q: What marker works best on shells and stones?
A: For shells, a fine-tip metallic or white paint pen works well then seal. For stones, waterproof paint markers hold up through watering and rain after sealing.
Q: How do I keep textured gesso layers from staying tacky in humid rooms?
A: Dry each gesso layer with a heat gun on low until touch-dry. That prevents later tackiness and helps texture paste adhere. Let the piece rest for 24 hours before adding delicate elements.
Q: Can I swap names seasonally on an acrylic plate?
A: Absolutely. Using printable film or thin card stock inside an acrylic holder is the easiest swap method. Print at 300 dpi and trim carefully for a crisp fit.
