


My friend walked into my apartment last month and said "this looks like a real adult lives here." Highest compliment I have ever received. I had been fussing over frames and prints for weeks until I learned to layer things and accept a little imperfection. That is exactly what these DIY celebration of life photo displays are about, small, intentional touches that make a corner feel like it belongs to memories.
These ideas lean modern farmhouse with a touch of boho. Most projects sit under $50, with a few splurges around $100 for things you will reuse. They work on mantles, entry consoles, dining tables, and small apartment walls where nails are not an option.
Boho Mantle String Lights for Living Room
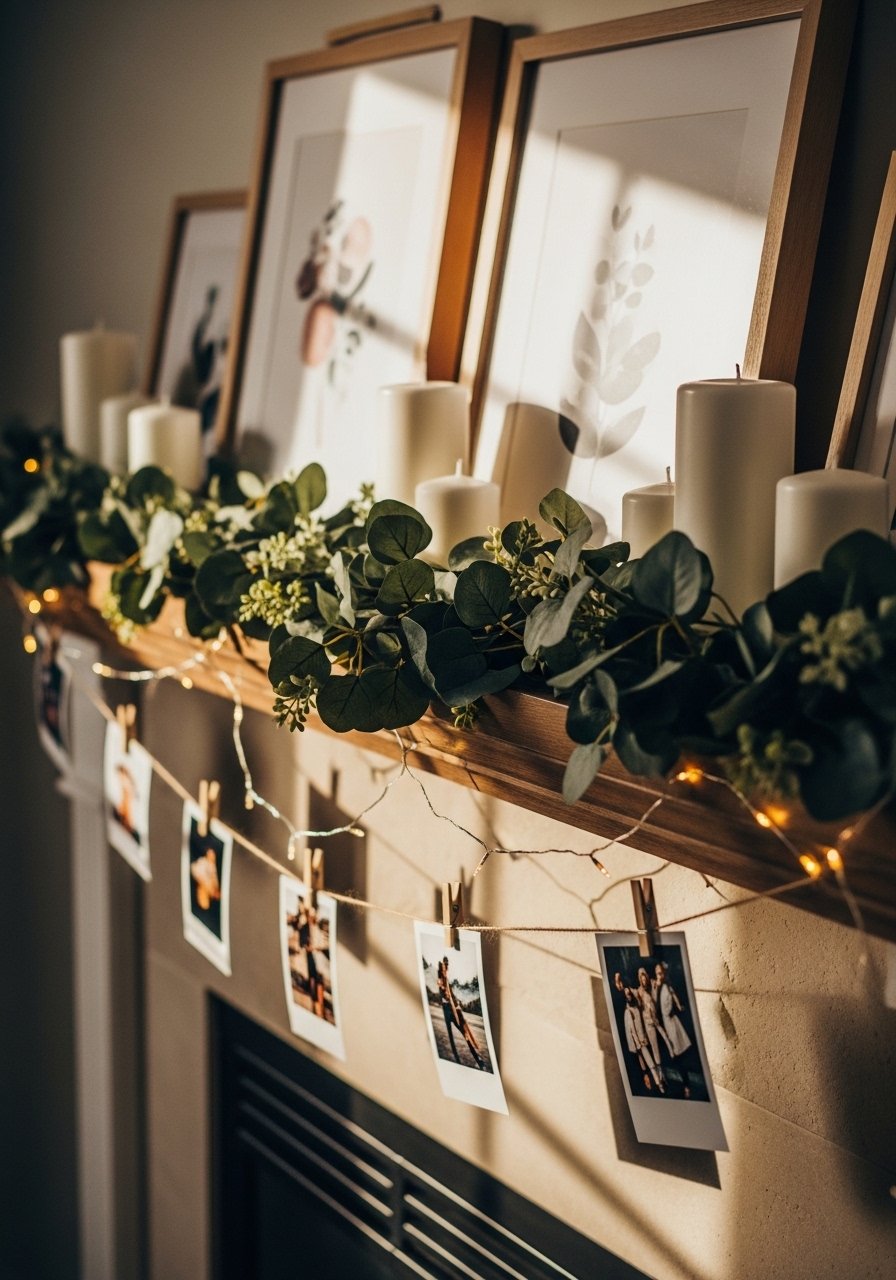
If your photos keep falling off strings in the breeze, start by stretching the twine extra taut and place clips every 4-6 inches for 4×6 or wallet-size photos. I strung a 10-foot strand of fairy lights and clipped 12 family shots upside down so faces read better from across the room. It reads casual and personal in a living room, budget under $30 if you use dollar-store lights and thrifted frames. I use a pack of small wooden clothespins and painted half matte black to hide the clip when you view the line from a distance. Try fairy lights-10ft and a bundle of mini-wooden-clothespins for this setup. Avoid clipping too close together or the line looks like a braid. Pair with Idea on a ladder lean if you need a taller anchor.
Leaning Picture Ladder for Hall or Entry
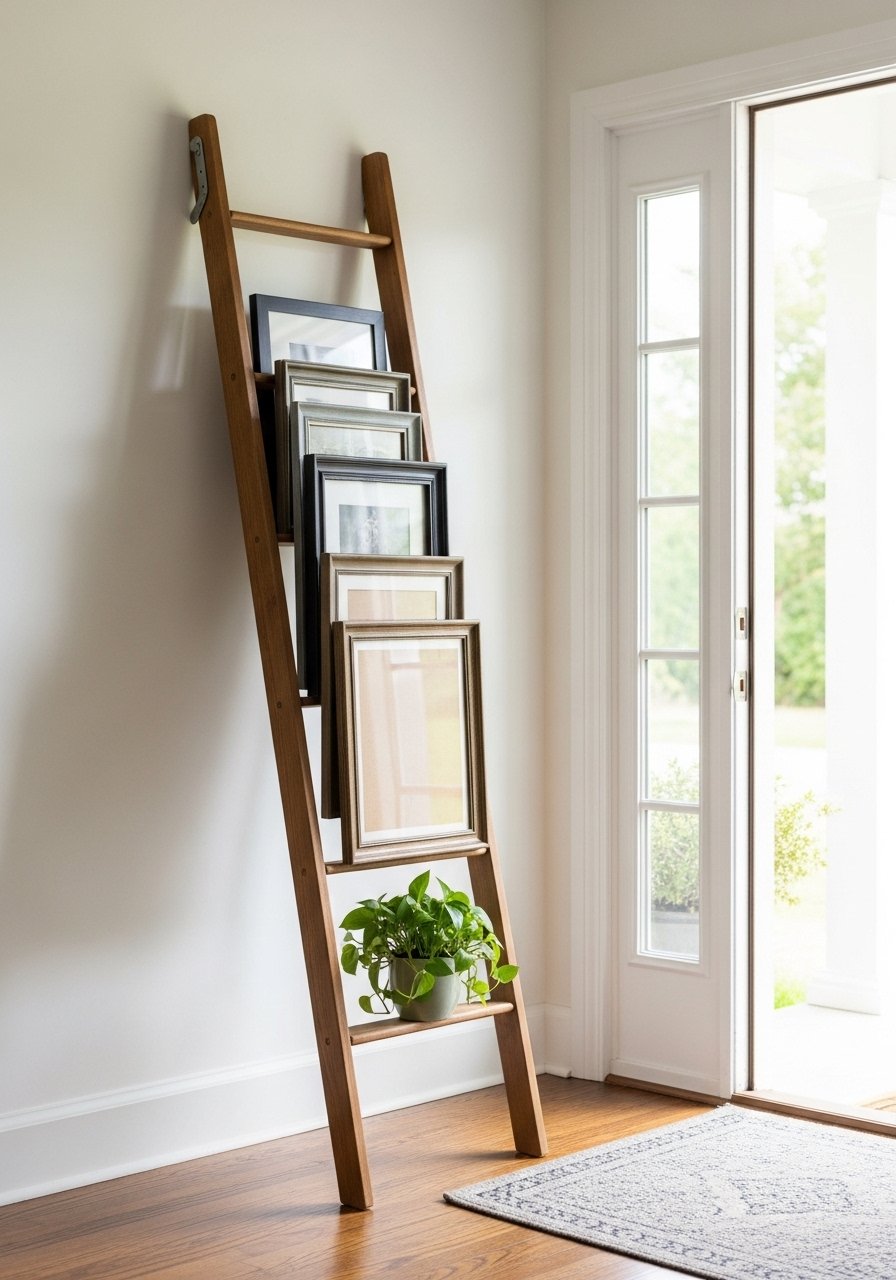
I found a pine picture ladder that solved my blank entry wall without a single hole in the drywall. Lean it with the largest frame at the bottom and vary heights by at least 12 inches between larger pieces for flow. This works great for modern farmhouse or transitional entries, budget $50 to $90 depending on the ladder. For renter-friendly hanging try a 5-foot ladder like wooden-picture-ladder-5ft. A common mistake is clustering frames all the same height which reads flat. A detail most articles skip is using tabletop risers or books under the smallest frames on a rung to keep an odd number grouping, three or five, which looks natural and avoids the "kid project" vibe.
Corkboard Memory Grid for Small Rooms
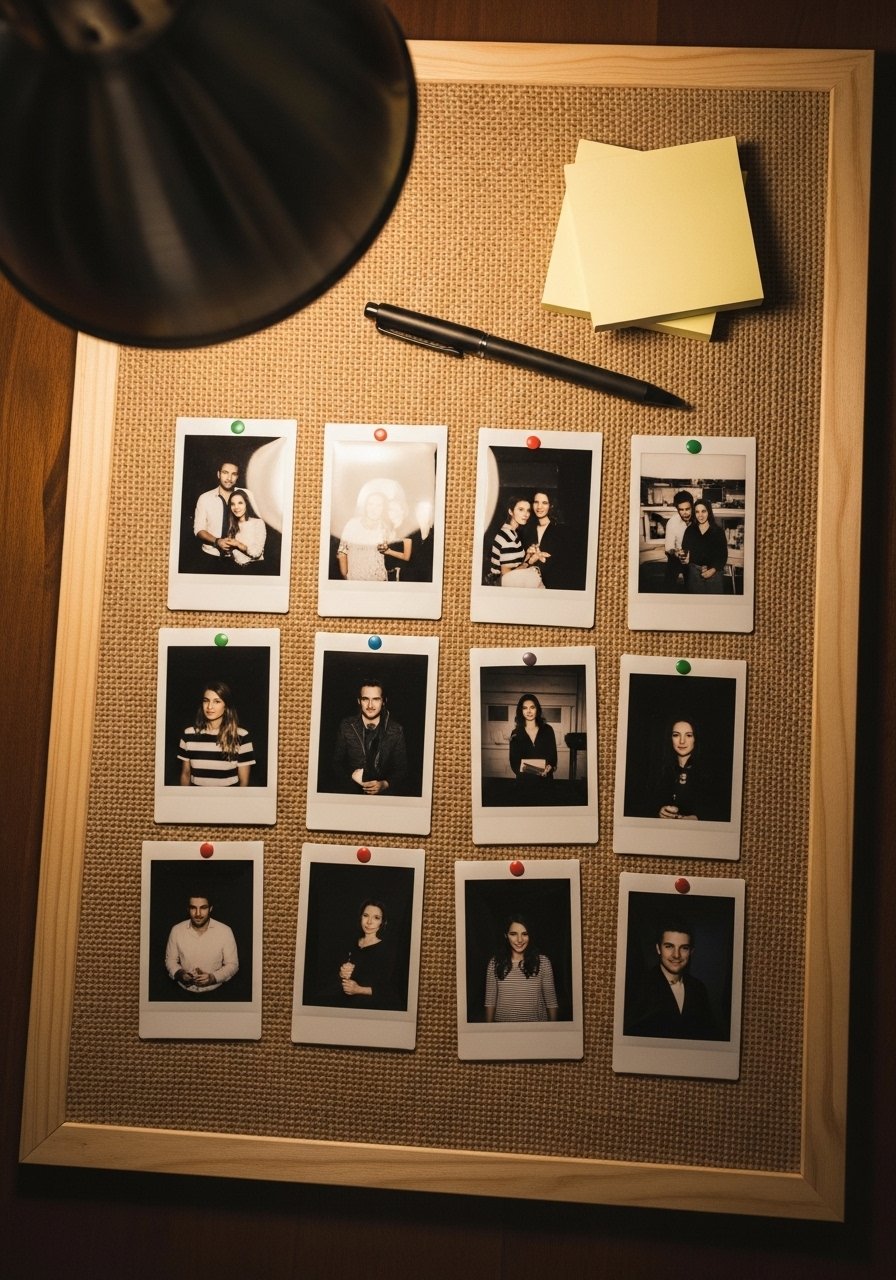
If you are short on wall space a 20×30 corkboard covered in burlap gives structure and a tidy look. Polaroids max out visually at about 20 per board, so limit yourself or it looks crowded. I pin 16 wallet photos in a 4×4 layout with flag pins and leave a 2-inch margin around the edge. This is a minimal look that reads as intentional in a bedroom or hallway and keeps price under $30. Try burlap-craft-fabric and a pack of mini-flag-pins. Avoid hammering nails into frames that will shift. A real-life note, write short captions on the corner of polaroids with a fine-tip pen so guests can read quick stories without crowding the board.
Tabletop Easel Trio for Dining or Tribute Table

This is the trick I use when space is tiny and people still want to get close to the photos. Three bamboo easels on a table create a small focal area for a celebration. Use risers like stacked books under one easel so the tallest sits about 12 to 18 inches above the table surface, and keep the front row photos slightly overlapping for depth. It feels intimate in a dining room or on a memory table and stays renter-friendly. I like bamboo easels such as bamboo-easels-3pack. A frequent mistake is using frames that are too small for the space which forces everyone to lean in. Make prints at least 5×7 so faces read across the table.
Rustic Wire Basket Hanging Cluster for Backyard

For an outdoor or barn-style celebration this vintage-inspired wire basket hangs from a beam and holds clips through its mesh. Use S-hooks and binder clips to be wind proof and space clips 4-6 inches apart. If you plan outdoor photos remember prints fade faster in sunlight so laminate or put them in plastic sleeves. The basket gives an industrial-meets-rustic vibe and runs $35 to $70 depending on size. I used a galvanized-wire-basket and heavy-duty black-binder-clips. Avoid light-weight clothespins outside unless you weigh them down. This also doubles as a sheltered display when paired with the string-light idea from earlier.
Washi Tape Wall Gallery for Rentals or Dorms

When nails are off the table washi tape is a forgiving option and it peels clean. Tape photos in an asymmetrical grid and stick to one tape color to keep things cohesive. I use black-and-white prints to avoid clashing colors since black-and-white pics lead searches now. Keep at least 2 inches of negative space between clusters so the wall breathes. For prints that need to be visible from across the room scale up to 8×10. Try mt-washi-tape-pastel for gentle color. People worry that tape rips paint when they remove it. Use a low-tack washi and test a corner first. This is a fast, budget-friendly trick under $20.
Driftwood Photo Mobile for Ceilings or Porch

I made a driftwood mobile in an afternoon and it immediately added movement and a tactile feel above a table. Use natural branches at least 18 inches long with photos tied on monofilament so they can spin. Keep an odd number of hanging strands and vary lengths by 4 to 6 inches so they do not tangle. This is boho leaning and great above a dining table or in a covered porch, budget around $15 to $30 if you forage driftwood. A simple clear-fishing-line-mono does the trick. One overlooked detail is weight balance, so add a tiny washer where lines meet the branch to stop flipping. Avoid hanging where direct sun will bleach the photos.
Vintage Suitcase Table Display for Travel Memories
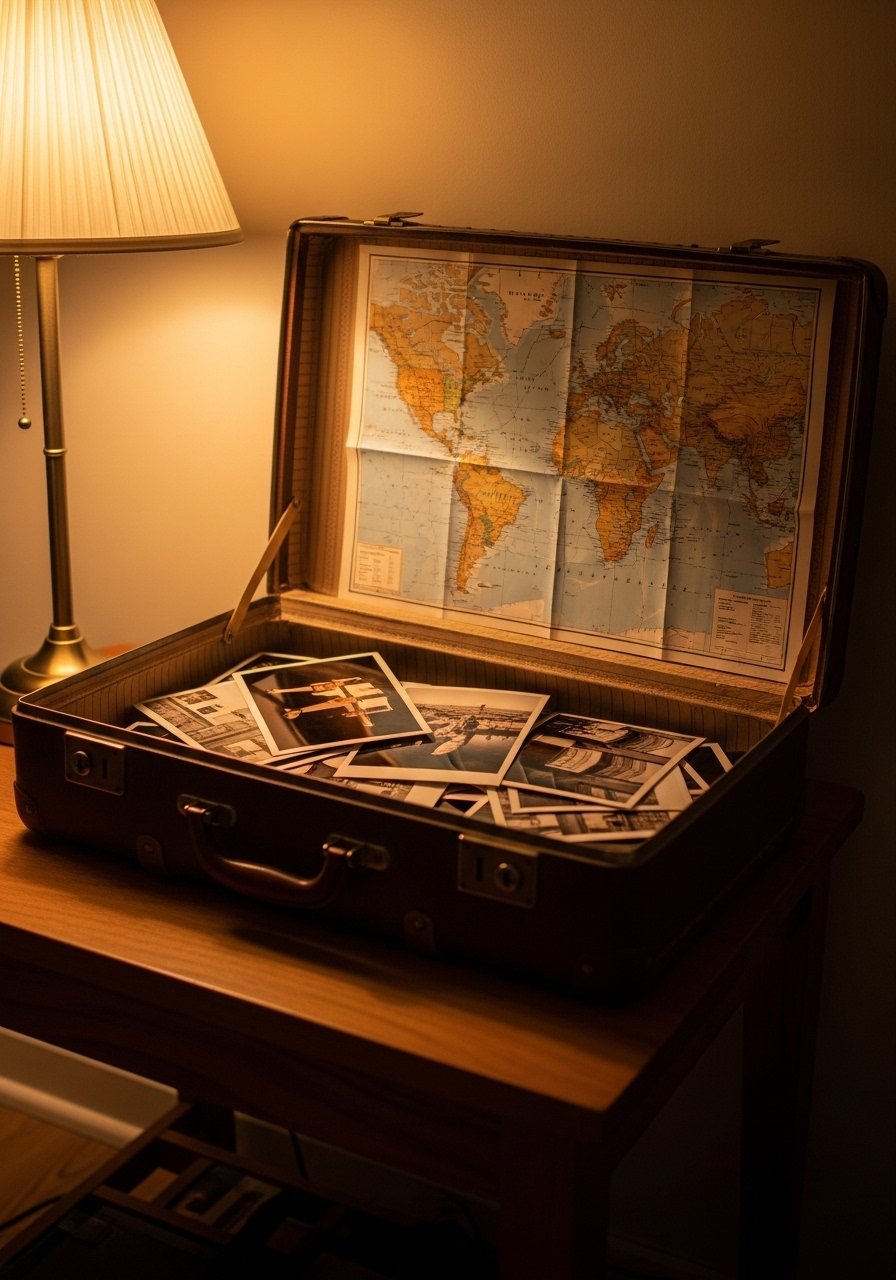
If the person loved to travel this is a sentimental and tactile option. Thrift a small suitcase and prop it open on a console table with 8×10 photos both inside and around it. Use foam core inserts to create a slanted background so photos sit at a readable angle for guests. My thrifted suitcase cost under $35 and felt far more intentional than a flat board of pictures. I used a small self-adhesive-foam-core-sheet cut to size. A common mistake is stuffing too many photos in one case. Keep an odd number visible and swap them during the event to share different stories.
Tiered Cake Stand Tribute for Buffet Tables

I used a tiered cake stand the last time we had a family gathering and it gave guests room to circulate without crowding a wall. Place mini 4×6 easels on each level and leave 1 to 2 inches between each easel so photos do not look crammed. Tiered displays are perfect for buffet tables or guestbook stations, and they keep everything at eye level. The setup is budget friendly under $50 if you pick a metal stand. Try three-tier-cake-stand-metal and mini-photo-easels-pack. One thing I learned the hard way is to anchor the bottom tier with a non-slip mat so the stand does not wobble when people reach in for food.
Enclosed Birdcage Cluster for Indoor Displays

For a protected, slightly formal look try hanging photos inside a decorative birdcage. It keeps curious kids from pulling things apart and gives a French country vibe if you use an iron cage. Clip photos to monofilament and hang them at varied heights, keeping the longest about 24 inches for visual flow. I put battery tea lights inside the cage around dusk and the shadows make the photos feel tender without needing candles. A medium birdcage runs $45 to $75. I used decorative-iron-birdcage-medium and battery-tea-lights-24pack. A detail others skip, tie a small sprig of faux eucalyptus 18 inches long between photo clusters to hide clips and soften metal edges.
Your Decor Shopping List
- Honestly the best $25 I have spent. Fairy lights 10ft for twine photo lines
- For the mantle and ladder, mini-wooden-clothespins 50-pack, natural finish
- For renter-friendly walls, mt-washi-tape-pastel-3pack in soft neutrals
- Found these while looking for something else. Bamboo-easels 3-pack small for tabletop displays
- For framed ledges and leaners, brass-picture-ledges-24inch (~$18-25)
- For outdoor or rustic hangs, galvanized-wire-basket-large and black-binder-clips-small
- For mobiles, clear-fishing-line-mono-100ft and a pack of small-washers-100pack
- Budget print solution, photo-print-paper-matte-100sheets for quick in-home prints
- For the suitcase idea, self-adhesive-foam-core-20×30 to prop photos
- For table tiers, three-tier-cake-stand-metal
Similar finds are often available at Target or HomeGoods if you prefer to touch things before buying.
Shopping Tips
"White oak beats dark wood in 2026. Design feeds have shifted completely. White-oak-floating-shelves-24inch look current, not dated."
Grab mini-wooden-clothespins-50pack for $5. Paint half matte black and half natural. You will get two looks from one pack.
Curtains should puddle or kiss the floor, never hang halfway up. Linen-curtains-96-inch are the right call for standard 9-foot ceilings and help anchor a wall display.
Everyone buys five small succulents. One single artificial-fiddle-leaf-fig-6ft has ten times the visual impact and does not need light.
Frequently Asked Questions
Q: Can I mix black-and-white photos with color prints in these displays?
A: Yes. Black-and-white photos tie mismatched color prints together. If you are worried about clashing, convert a handful of images to monochrome so clusters read cohesive from across the room.
Q: How do I stop photos from blowing off a string outside?
A: Space clips 4 to 6 inches apart and use binder clips or small S-hooks for outdoor setups. Add tiny washers or a small weighted card behind the photo to keep them from flipping in wind.
Q: What if I have a small apartment with no mantle or big wall?
A: Tabletop solutions like the bamboo easel trio, a tiered cake stand, or an open suitcase on a console work well. Most folks go DIY for these displays. Use vertical height and risers to make a small area feel intentional.
Q: Are there quick ways to make everything look cohesive for a one-day event?
A: Print in black-and-white or sepia and stick to a single frame color or washi tape palette. People drop around $45 getting these set up, so pick one cohesive finish and run with it.
Q: How do I protect prints from fading during an outdoor celebration?
A: Laminate prints or use plastic sleeves and keep displays in shade when possible. Avoid direct midday sun and swap in fresh prints for multi-day events.
Q: Can I make these kid-proof for family events with children present?
A: Use enclosed displays like a birdcage or hang items out of reach. You can also anchor tabletop stands and use acrylic frames that do not shatter.
