

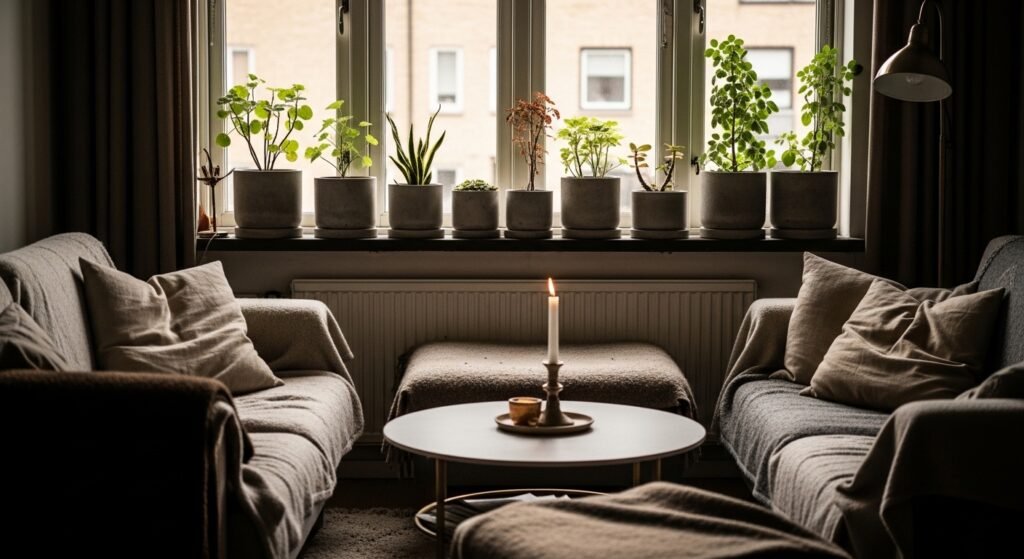
My living room had nice furniture and decent lighting but it still felt like a waiting room. Took me embarrassingly long to figure out it was missing texture. Every surface was smooth, every color was flat, and nothing invited you to actually sit down. Swapping in a few concrete planters changed the rhythm and added weight without cluttering corners.
These planters lean modern farmhouse and boho, with most builds under $50 and a few around $100 for mixed-material pieces. They work for living rooms, bedrooms, windowsills, and narrow balconies where floor space is tight.
Modern Farmhouse Footed Planter For Living Room
What makes this work is the lift. A pedestal keeps a small plant from disappearing on a low table. I used Quikrete 5000 concrete mix for the pour and wrapped the form in burlap for texture. If you want a lighter pot, mix 1 part cement, 2 parts sand, and 1/2 part perlite. Most folks crack their first batch, so cure under plastic and mist daily for 3 to 7 days. Common mistake is making walls too thin. Go for 2 to 3 inch thickness and drill 4 small drainage holes after 48 hours.
Boho Hanging Sphere Cluster For Window Nook

I hung three different sized orbs and it instantly read like a focal point instead of clutter. Balloons make the best molds for asymmetry. Use a 1:2 cement to sand mix and add 10 percent leaf mold for a smoother finish that looks organic. Hang with macrame so renters can remove them later. People drop about $35 a pot usually, but these spheres were a $20 project. Tip: drill drainage holes after 48 hours, then seal the inside after seven days so water does not leech onto the sill.
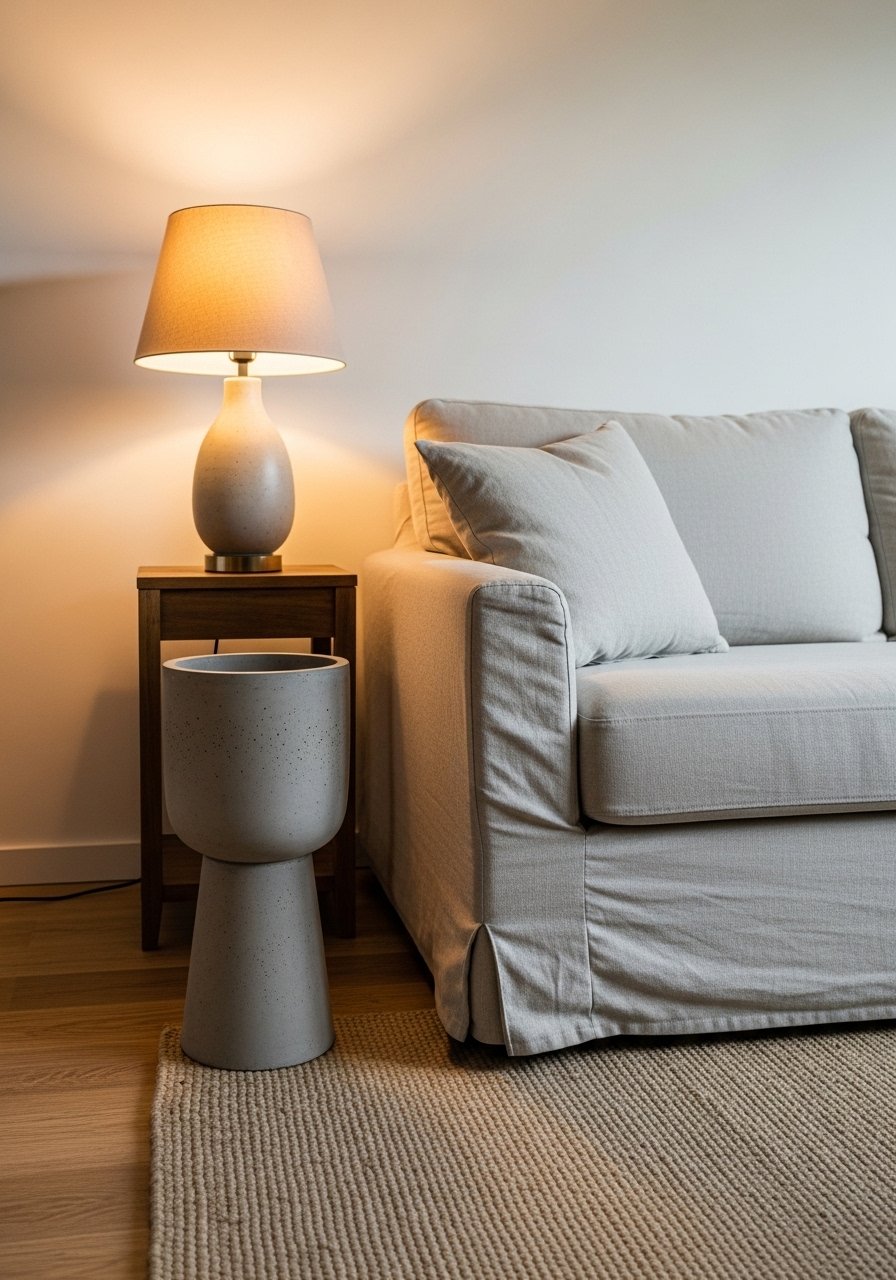
Minimalist Tapered Duo For Bedroom Nightstands

Pairing two tapered vases of different heights gives a balanced bedside vignette. I added iron oxide pigment, about 5 drops per small batch, to avoid stark gray and get that warm greige everyone seems to prefer. Use cardboard tube forms and smooth with a damp sponge before the first misting. A rookie mistake is making both pots the same height. Height ratio of 1.5 times base diameter keeps them stable. These are renter-friendly and weigh less with a perlite mix.
Hanging Macrame-Wrapped Orb For Boho Desk Corner

I wrapped one orb in macrame after it cured and the cords hide minor imperfections. Use a balloon mold, add leaf mold at 10 percent to the mix for fewer bubbles, and let cure under plastic for a week. Common problem people mention is bottoms that trap water. Drill tiny holes and line the interior with an inexpensive planter liner before filling. This is a small-space trick that reads boho without taking up desk surface area.
Succulent Stack Of Cylinders For Narrow Balcony
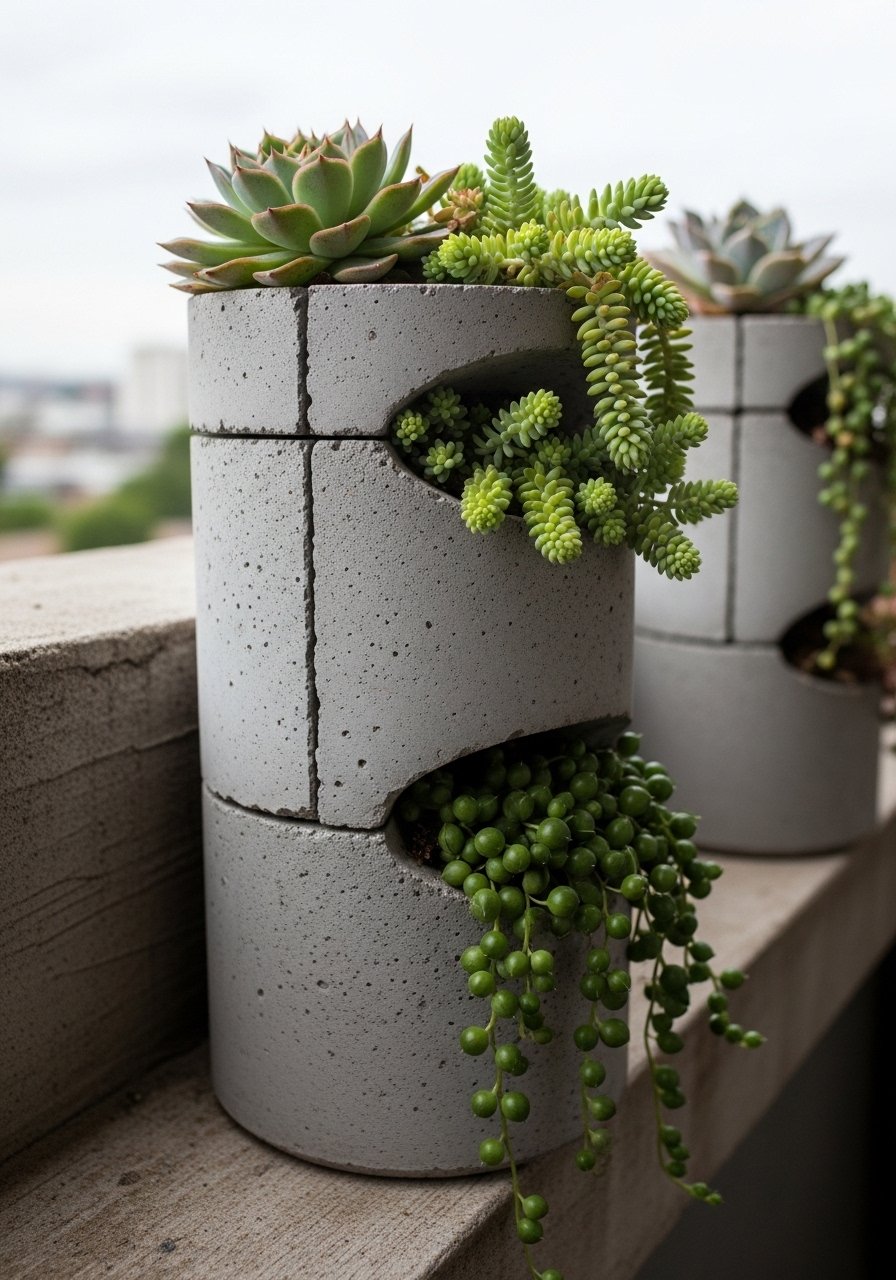
Stacking cylinders maximizes vertical real estate. I used PVC pipe forms and fiber-reinforced cement so the stack does not sag. Start with larger diameter at the bottom and keep the height about 1.5 times the base diameter for each tier. Drainage holes every 4 inches across tiers keep roots healthy. A mistake I made was skipping perlite. Almost half go for light mixes you can shift easy. Add perlite to the mix and keep filler under 20 percent volume so you can move the tower.
Coastal Wave-Edge Bowl For Bathroom Window
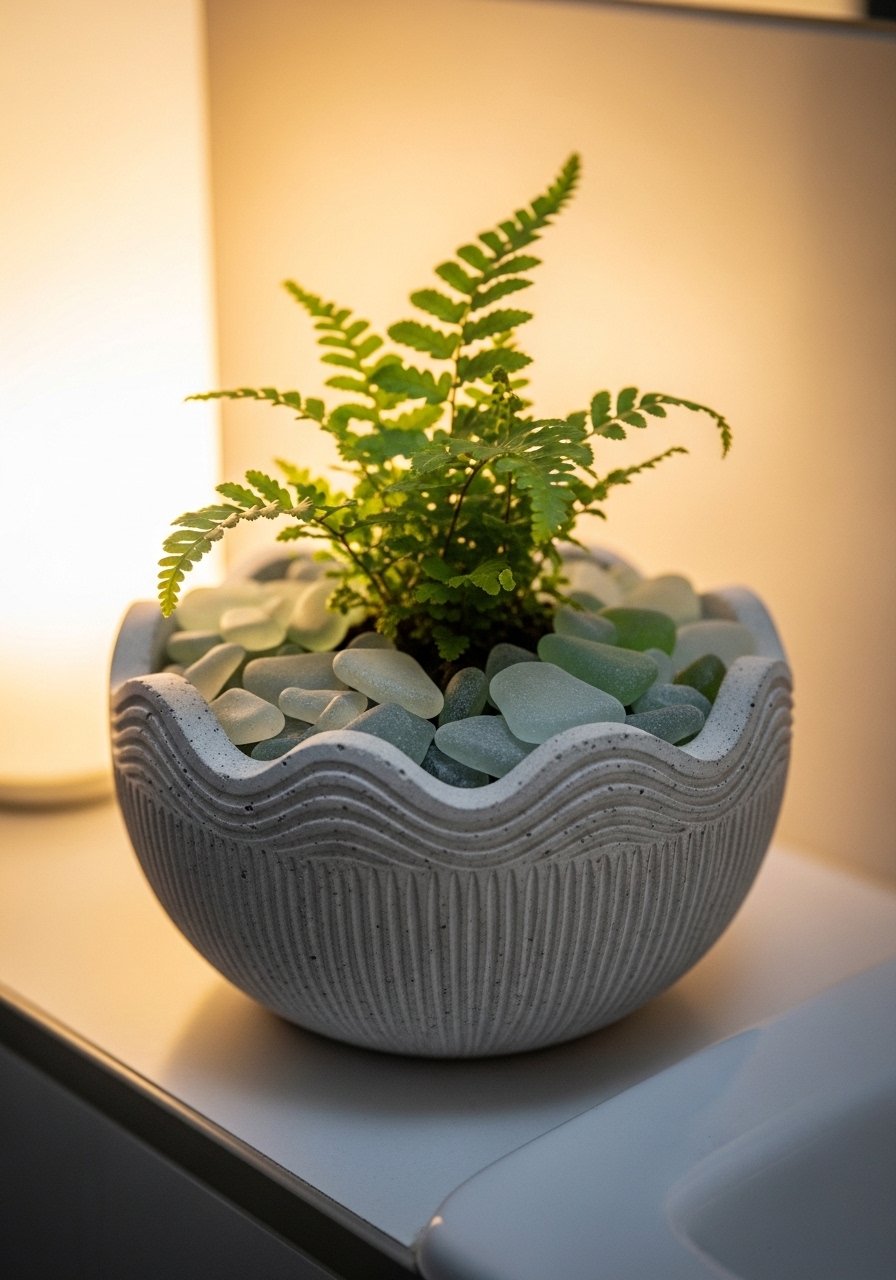
Soft, beachy curves soften tile edges and make a tiny plant feel luxurious. I used a flexible plastic tray as the form and smoothed edges with a wet sponge once the mix set but before it fully cured. Use the 1:2:1/2 ratio and mist daily. Seal the inside after seven days to stop mineral stains. Photo tip: bowls look shallower in photos. Make them 1.5 to 2 inches deeper than you think for real-life potting.
Industrial Pipe-Legged Box For Entryway Plants
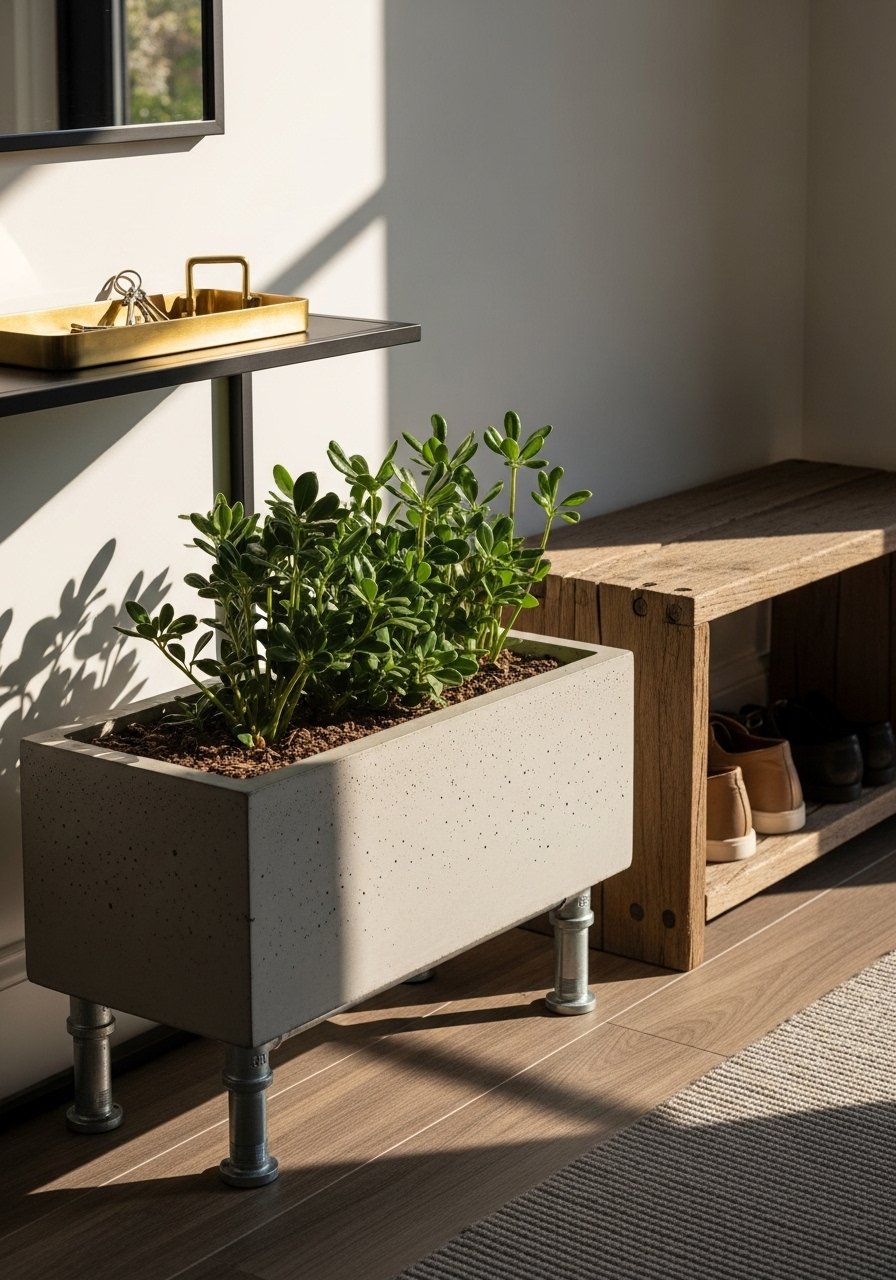
This one anchors an entryway and feels like furniture, not a plant pot. I cast a box form and bolted galvanized pipe legs to the underside after cure. Use rebar grid inside if you have pets that like to nudge things. Rebar adds dog-proof stability that many tutorials skip. Common mistake is underbuilding the walls. Use three coats to reach roughly 2 to 3 inch thickness for durability.
Scandinavian Tapered Trio For Shelf Styling
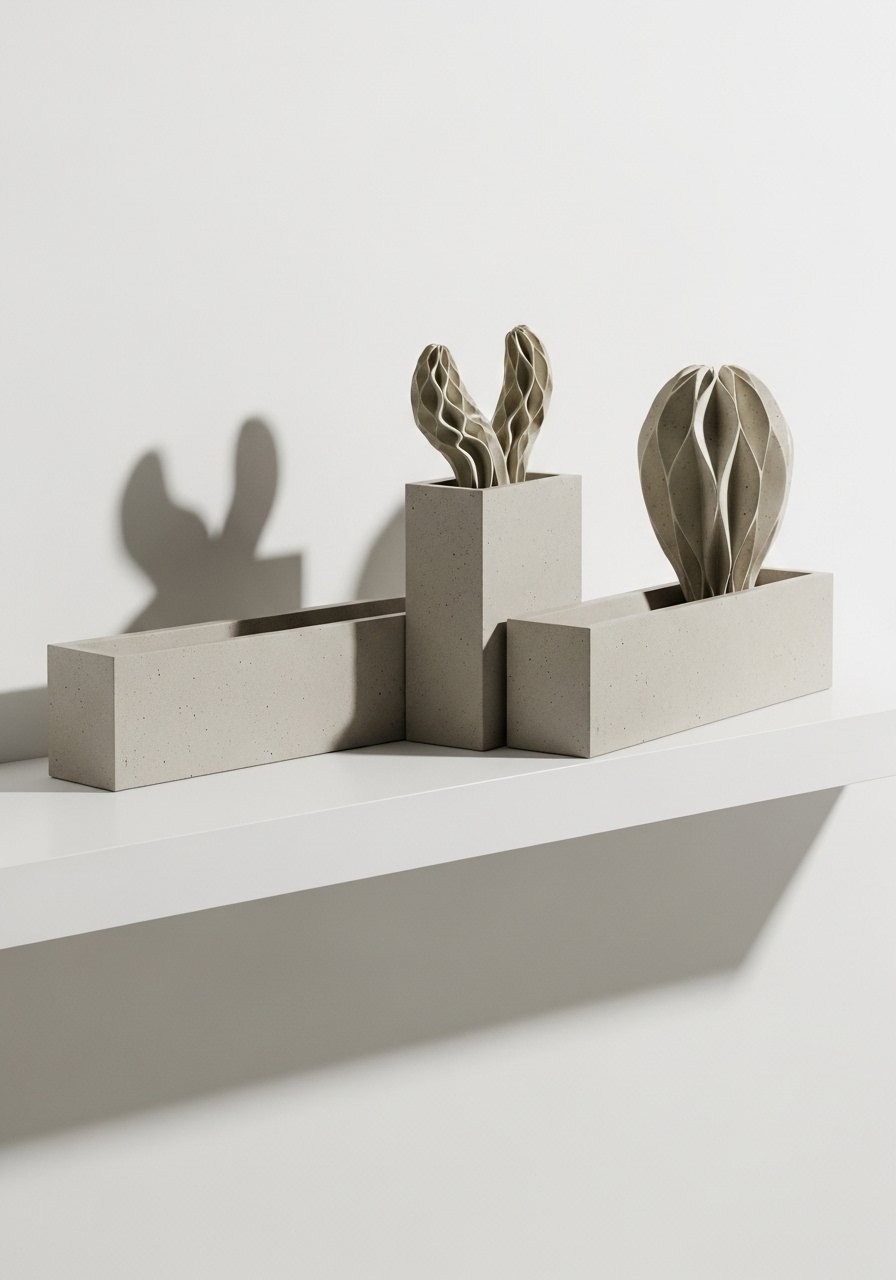
Small planters on open shelves give sculptural points without clutter. I tinted batches with greige pigment, 4 to 6 drops per cup of mix for subtle tone. Use cardboard tubes for forms and sand the outside lightly after cure for that dry Scandinavian look. Avoid overplanting. A single snake plant or small succulent reads better than crowded soil in photos. Pair this with the minimalist trough idea for window continuity.
Matte Black Trough For Window Sill Herb Garden

Long low troughs are perfect for narrow sills. I used a gutter section as a mold and added black pigment to the mix. Keep troughs lower than the sill depth so you can open the window. Drill multiple 1/4 inch drainage holes and use gravel at the base. A common slip is pouring walls too thin. Aim for 2 inch walls and cure under plastic, misting daily. If weight is a concern, drop perlite into the mix at 20 percent.
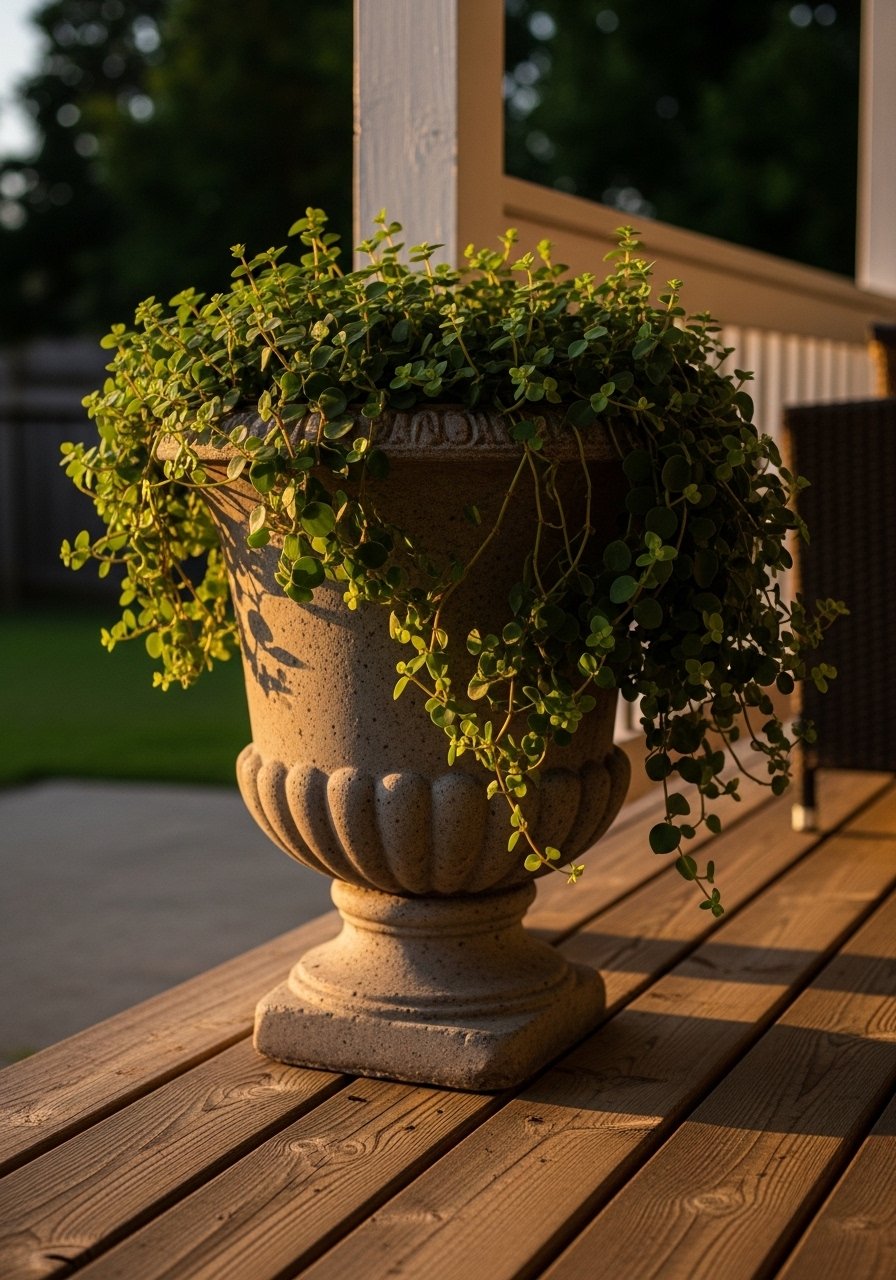
Grandmillennial Fluted Urn For Corner Statement
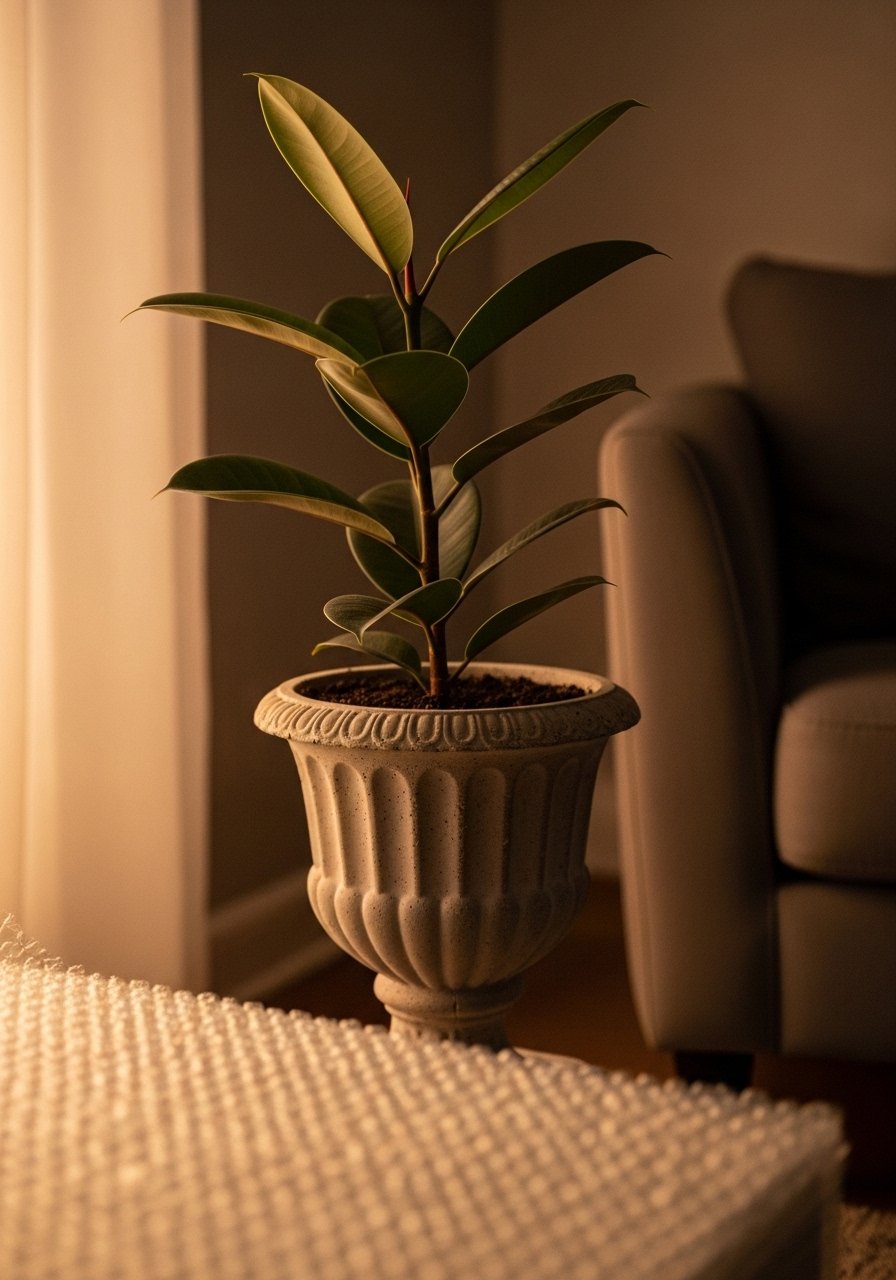
Flutes give that antique nod without being literal. I wrapped my form in bubble wrap to get the ridges and used white cement dye to keep it light. Fluting concentrates stress, so reinforce the base and use a fiber mix. Common mistake is making the urn too heavy to move. Keep the mix lighter by adding perlite and a hollow interior. This reads grandmillennial next to layered textiles and a vintage rug.
Geometric Cube Stack For Kitchen Herbs
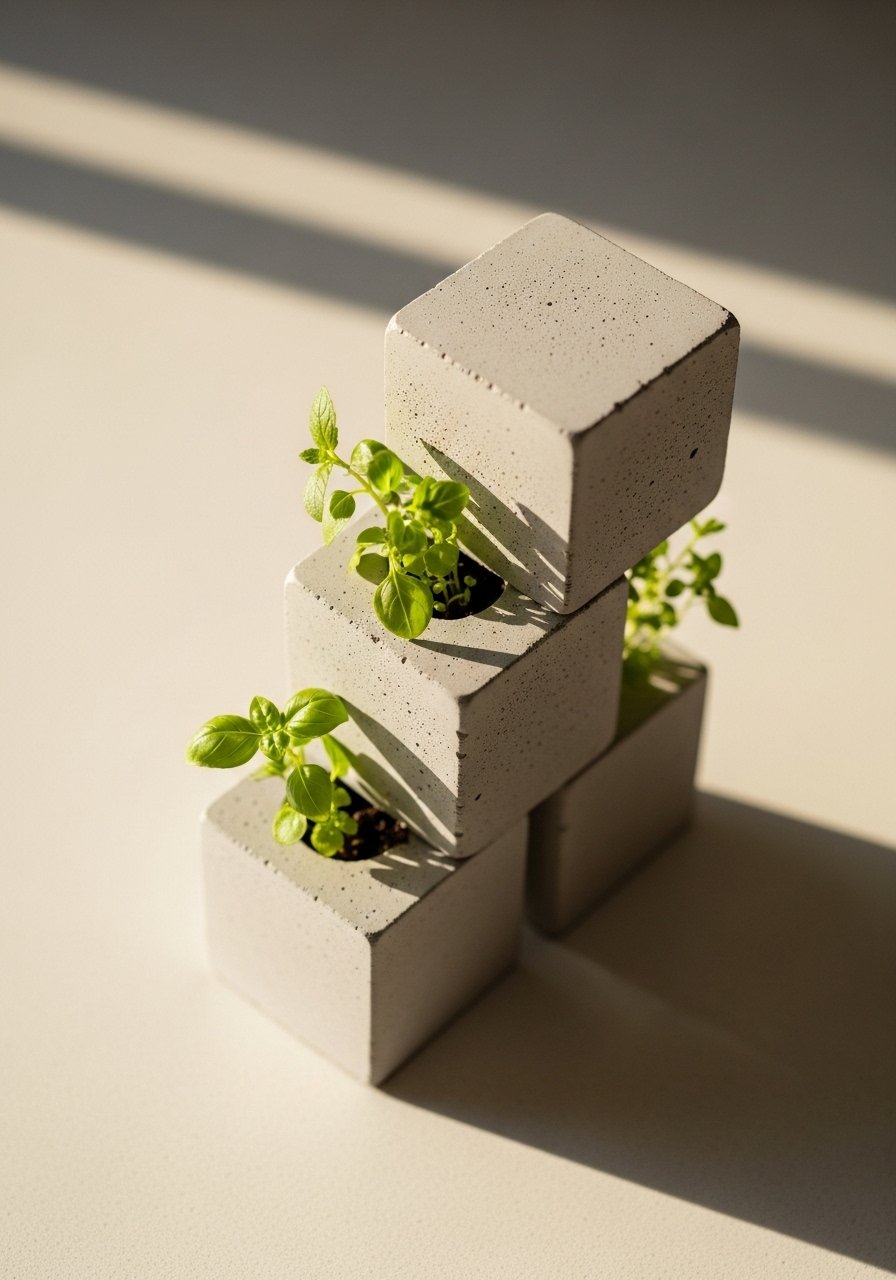
Cubes stack like building blocks and make a playful herb station. I cast cubes in reused wood boxes and left one corner raw for a textural pop. Use the 1:2 mix and drill drainage holes after two days. Be careful with edges. Sand them lightly to avoid scratches when moving. Stack small to medium cubes so the total height follows the 1.5 times base diameter rule or else the top tier tips.
Hexagon Cluster For Modern Shelving
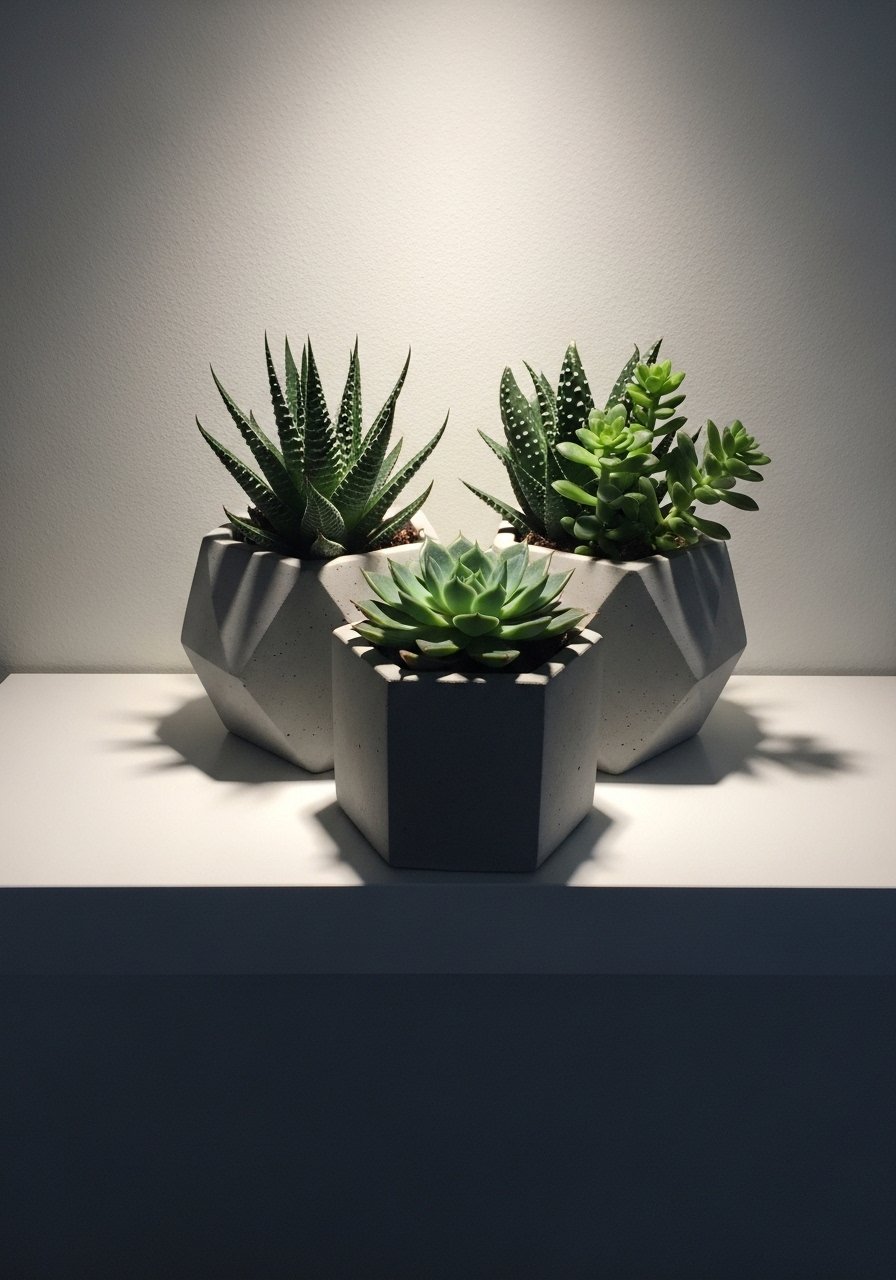
Hexes tile visually and feel modern without being cold. I carved foam forms and used a fiber-reinforced mix for strength. Hexes show seams, so sand and use a small bead of silicone inside for extra water protection. People often make drainage mistakes with odd-shaped forms. Drill holes before you un-mold so you do not crack the edges. Pair with the Scandinavian trio for contrast.
Driftwood-Based Planter For Coastal Bedroom

Mounting a concrete bowl on driftwood instantly makes it look collected. I glued driftwood legs after the pot cured and sealed the glue points with a marine epoxy. The mix was sand-heavy with a touch of peat for a softer finish. Watch out for uneven legs. Test and shim before the glue sets. This is one of the more affordable coastal looks I did for about $30.
Pebble Textured Bowl For Bathroom Counter
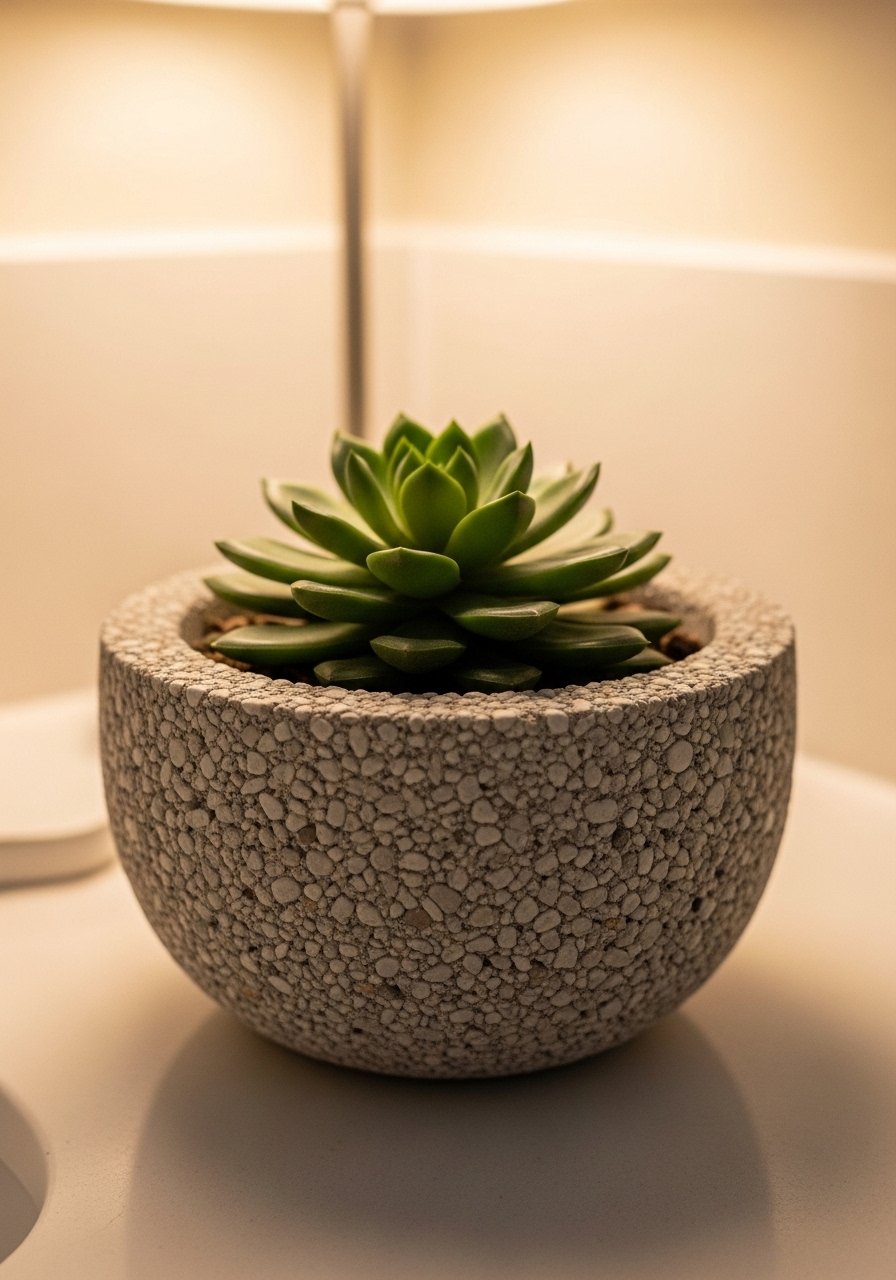
Adding pebbles to the outside of a mold gives that stone-like finish and hides imperfections. I pressed smooth river stones into the form before pouring a wetter mix that included 10 percent leaf mold. Cure under plastic and mist daily. Remember to seal only the inside after seven days to avoid darkening the outer pebble surface. Small bowls look great grouped in odd numbers.
Footed Indoor-Outdoor Planter For Porch Transition
A footed planter lifts plants off damp floors and makes an outdoor porch feel intentional. Use a slightly coarser mix and make the pedestal hollow to cut weight. Drill multiple drainage holes and use gravel under the soil. I made mine with a reinforced ring and it survived a busy season. The mistake people make is skipping a drainage layer. Add it and you will avoid root rot.
Asymmetrical Orb For Mid-Century Nook
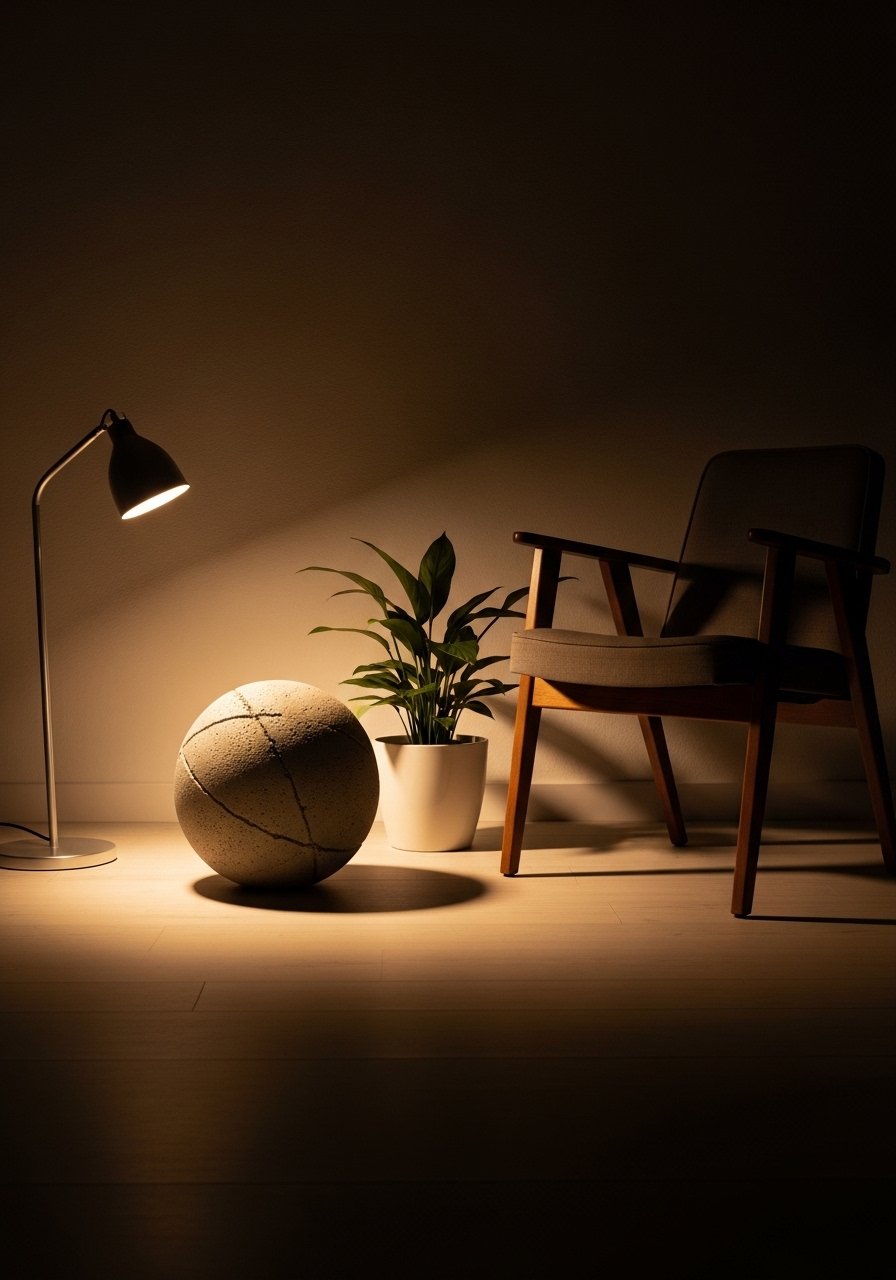
I embraced imperfections and used a balloon to make an off-kilter shape. Add leaf mold at 10 percent for a smoother outside surface and sand lightly after cure. An asymmetrical orb reads handmade in photos. A rookie error is trying to force symmetry. Let the balloon do the work. Hang it low with macrame to create a layered mid-century corner.
Tiny Modular Cubes For Windowsill Herb Lab
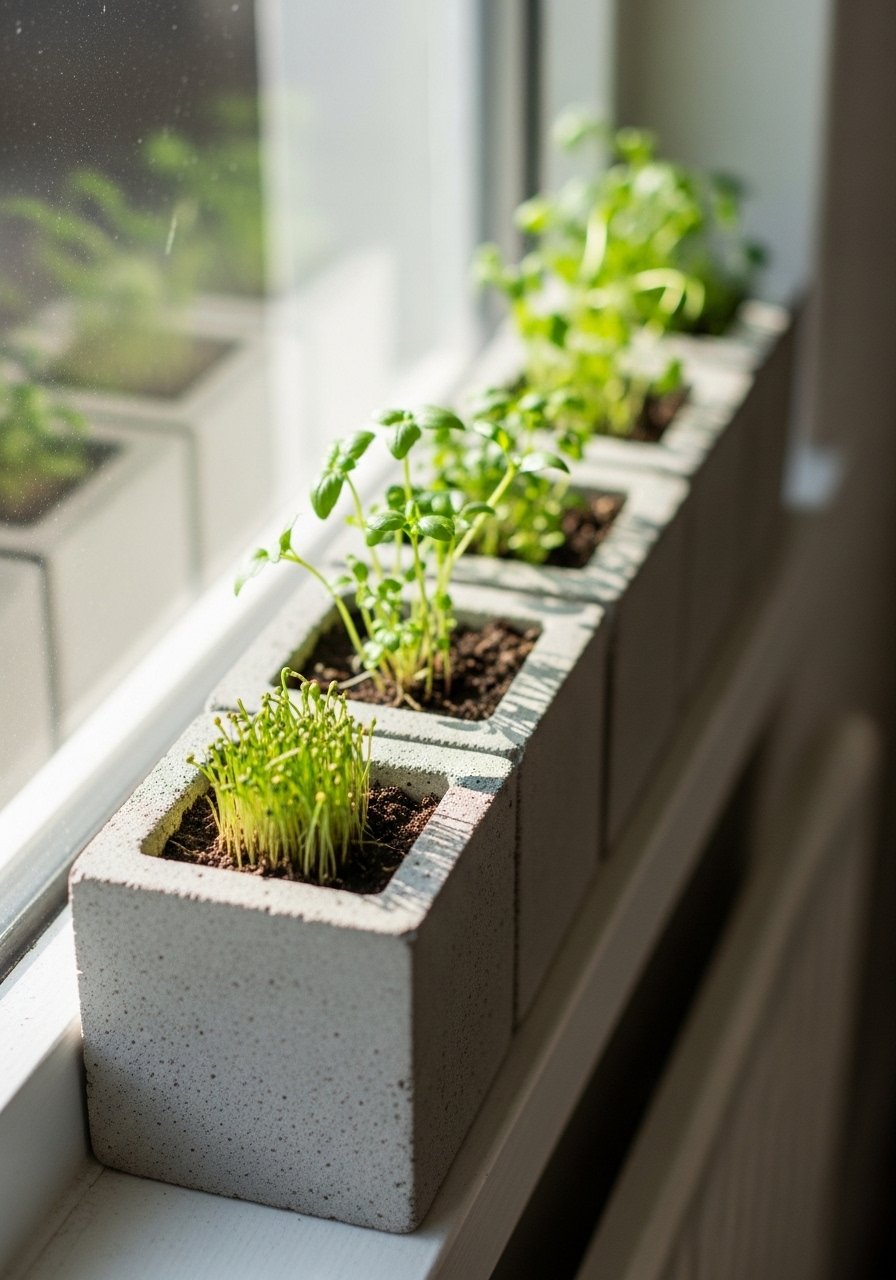
Modular cubes let you rearrange herb groupings by need. I kept each cube under 4 inches so they fit compact sills. Use the 1:2 mix and make the height 1.5 times the base diameter for stability. Almost half go for light mixes you can shift easy. Stack and stagger them for depth. The trick most tutorials skip is fitting a thin tray underneath to catch extra water.
Polished Concrete Mini Planter For Office Desk
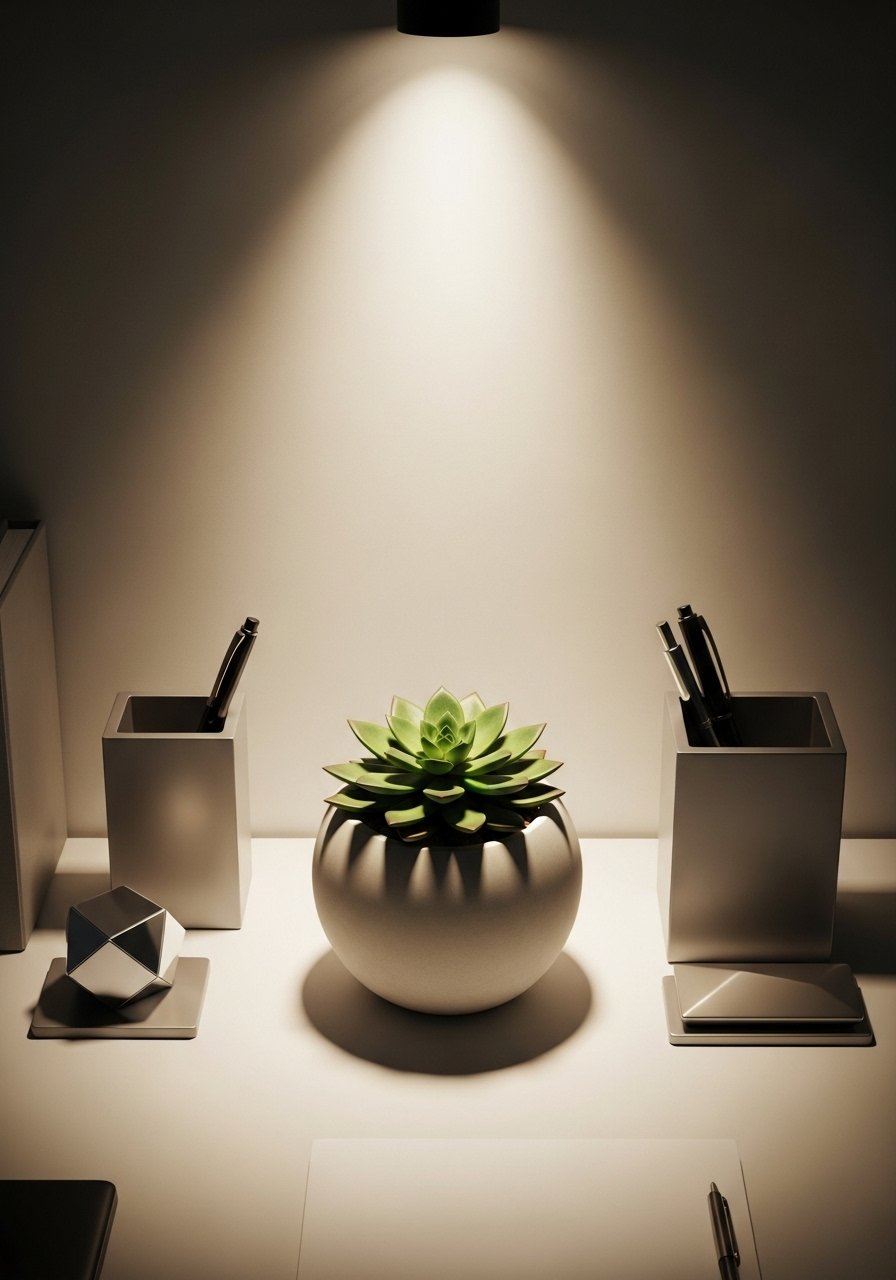
Polished planters read sleek and minimalist. I smoothed the surface with a wet sponge before the initial set and sanded lightly after seven days. Polishing takes patience but it stops soil from clinging. A common misstep is not sealing the inside. Use a concrete sealer inside after seven days to protect the desk from staining. Keep it small for compact workstations.
Rustic Burlap-Wrapped Planter For Dining Table

Wrapping the form in burlap before pouring adds rustic ribs and texture. I used the 1:2:1/2 ratio and misted during cure. The burlap also helps the planter feel lighter visually. People often expect smooth finishes. Embrace texture. A detail I learned is to remove loose fibers gently after cure to avoid shedding on the table.
Tall Column Planter For Hallway Statement

Tall columns draw the eye up and make a narrow hall feel intentional. Keep the height about 1.5 times the base diameter for stability. Use fiber reinforcement and a thicker wall build of 2 to 3 inches. A common mistake is making it hollow but too light at the base. Add a small interior weight chamber with gravel to lower the center of gravity. This was one of my few splurge pieces at around $100 in materials.
Painted Greige Vases For Shelf Styling
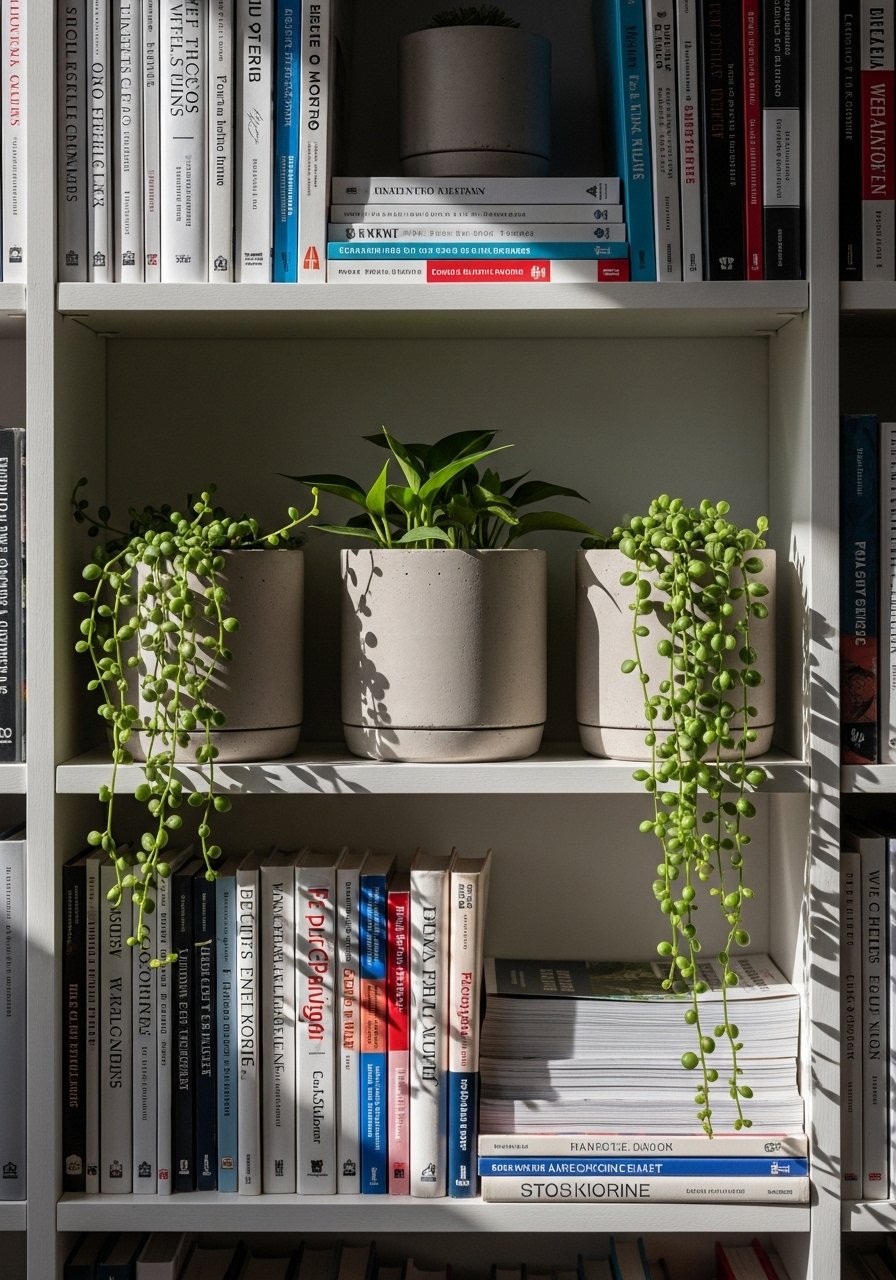
Instead of stark gray, I mixed iron oxide pigment for greige tones that warm shelves. Pigment count matters. For small batches use 4 to 6 drops per cup of mix. Seal the inside after seven days and leave the outside raw for a lived-in look. The mistake most people make is overpainting. A light wash gives depth. These work great next to framed photos and ceramics.
Low Profile Trough For TV Console Greenery
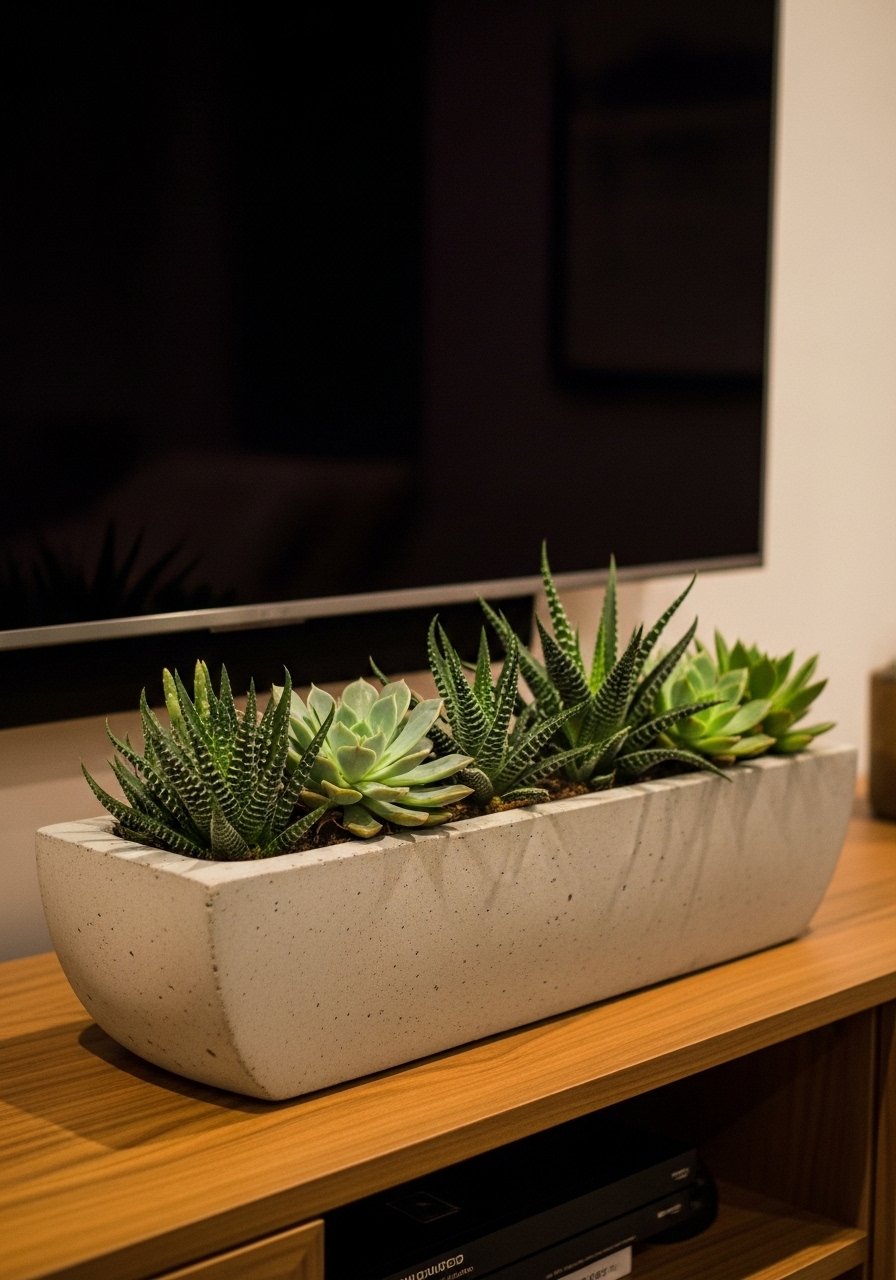
A low trough fills the visual span under a wall-mounted TV without blocking sightlines. Use a gutter mold and keep height less than half the console depth. Drill multiple drainage holes and add gravel for drainage. Most beginners pour a single thick batch. Instead, layer three thinner coats to avoid cracks. This miniature garden reads like a continuous design element across the room.
Pocket Planters For Vertical Frame Garden
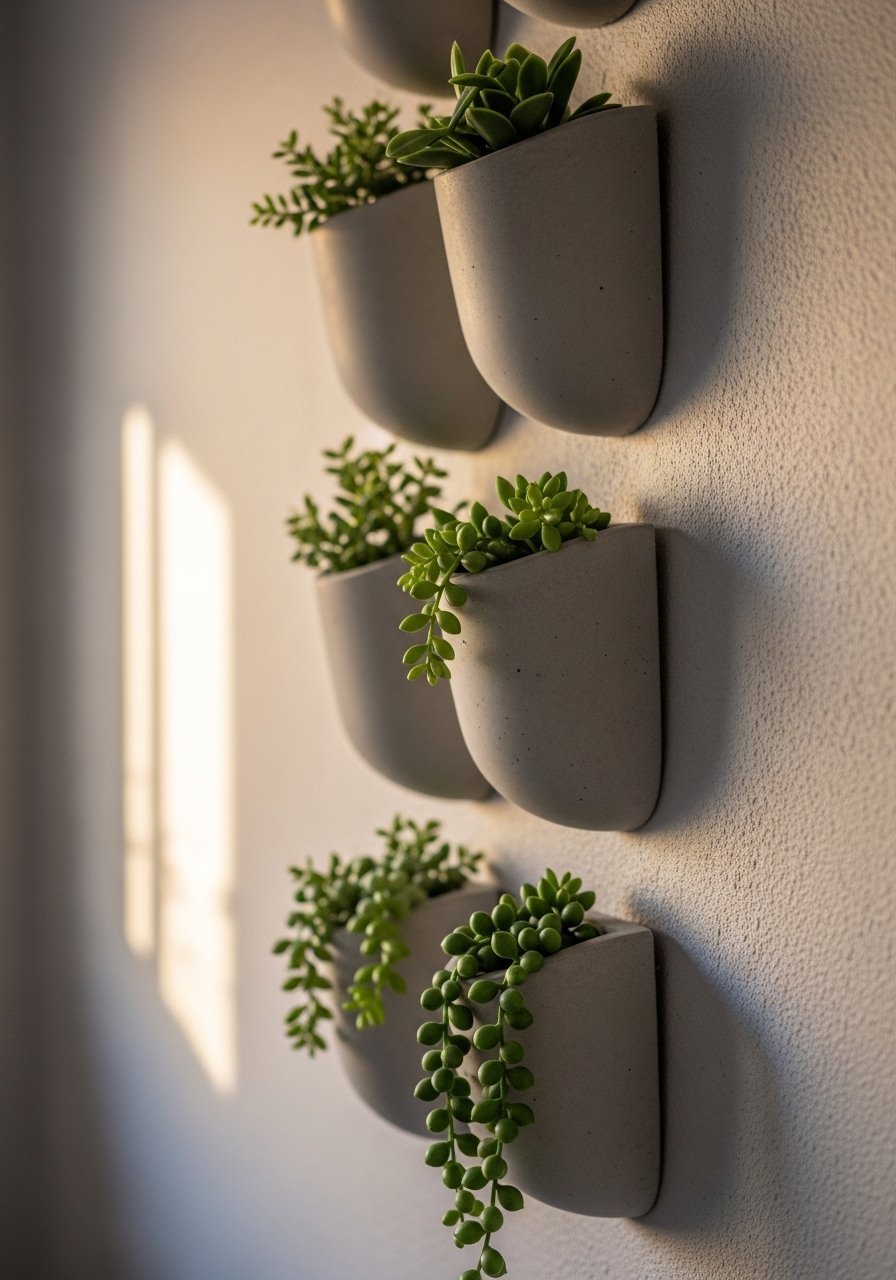
Pocket planters give living wall texture without heavy shelving. I cast small half-shell forms and mounted them on a lightweight frame using screws and washers. Use a fiber mix for flexibility and drill drainage holes. A common oversight is not planning for watering access. Make sure each pocket is reachable or use drought-tolerant plants. These are perfect for tiny apartment walls where floor space is limited.
Raw Stone-Look Bowl For Entry Table

I wanted something that felt found, not made. Adding small gravel to the outer face of the mold produced a stone-like skin. Use a sandier mix with 1:2 ratio and mist during cure. Seal the inside to protect the table finish. A tip others miss is to line the bottom with a thin cork disk to prevent scratching when you move it. This was an easy under-$25 weekend project.
Your Decor Shopping List
Textiles
- Honestly the best $40 I have spent. Chunky knit throw in cream (50×60 inches) to layer with planters on low tables
- 22-inch linen pillow covers, set of 2 in warm greige, down-filled insert optional
Tools & Mixes
- Quikrete 5000 concrete mix (40 lb bag), must-have for sturdy planters
- Perlite bag 8 quarts to keep planters lightweight
- Concrete sealer, 1 quart to seal only interiors after seven days
Forms & Fixtures
- Balloon mold pack for hanging spheres, use varied sizes
- PVC pipe sections, pack for stacked cylinders
Styling Extras
- Jute macrame hanger set for renter-friendly hangs
- Driftwood legs, pair to lift bowls, similar at HomeGoods
- Mixed metal picture ledges for shelf styling, brass and black mix
Plants & Potting
- Assorted succulent starter pack for small planters
- Cactus and succulent soil, 4 lb for fast drainage
- Small gravel bag for drainage
Budget Finds
- Set of 6 small river stones to press into molds for texture
- Sponge sanding block pack for finishing edges
Shopping Tips
White oak beats dark wood in 2026. Design feeds have shifted completely. These white oak floating shelves look current, not dated.
Grab Quikrete 5000 concrete mix for structural pieces. It lets you build taller planters without sagging.
Curtains should puddle or kiss the floor, never hang halfway up. These 96-inch linen panels are right for standard 9-foot ceilings.
Swap full cement for a perlite blend if you move pots often. Perlite bag 8 quarts keeps weight down.
Found these while looking for hardware. Balloon mold pack is cheap and makes hanging spheres feel professional.
Frequently Asked Questions
Q: How do I stop my first pots from cracking?
A: Most folks crack their first batch. Cure under plastic for 3 to 7 days and mist daily. Use a 1:2 cement to sand mix with 1/2 part perlite for lighter pots. Make walls 2 to 3 inches thick by layering three coats.
Q: Can I make lightweight planters that still feel sturdy?
A: Yes. Almost half go for light mixes you can shift easy. Add perlite and keep filler under 20 percent volume. Reinforce tall pieces with fiber or a rebar grid if pets or kids might bump them.
Q: When should I drill drainage holes?
A: Drill 4 to 6 holes with a 1/4 inch bit after 48 hours of cure. Waiting prevents cracking. For odd shapes, drill before final sanding so edges do not chip.
Q: Do I need to seal the outside?
A: Seal the inside after seven days only. Leaving the exterior raw keeps the cement patina. If you paint or pigment, test a small patch first.
Q: How do I avoid heavy planters I cannot move?
A: People drop about $35 a pot usually. Use perlite in your mix and consider hollow chambers or lighter footed designs. For very large pieces, plan to place them before final planting.
Q: Can I hang concrete planters in a rental?
A: Yes if you use macrame hangers and command hooks rated for the weight. For larger or heavier pieces, use ceiling anchors. Balloon molds give the most renter-friendly shapes.
Q: What should I do with planters over winter?
A: Store fragile or porous pots indoors to avoid freeze-thaw cracking. Empty soil if you cannot move them and wrap in breathable fabric. A detail many skip is adding a few inches of gravel to the base before storage to reduce moisture contact.
