

I had a pile of mismatched jars and candles on my kitchen counter for a week. Everything looked half-done. The pieces were fine. The way I was grouping them made them feel accidental and cheap.
I learned to treat a gift like a small vignette. That shift made cheap supplies look considered and small efforts feel special.
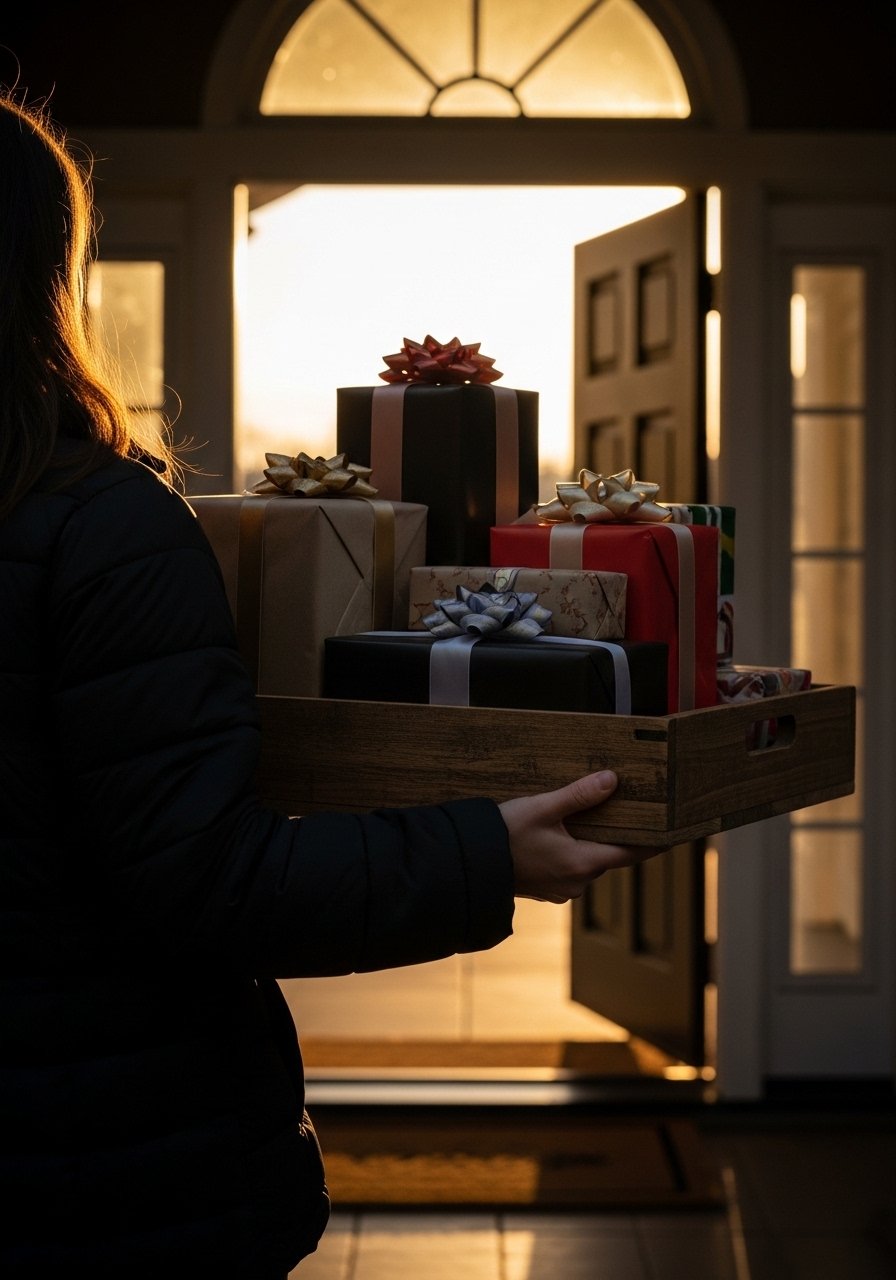
This is the method I use when I need a batch of gifts that look thoughtful fast. It works for kitchen counters, mantel groups, or a carryable tray for delivery. You can finish one in 20 minutes.
What You'll Need
- Chunky knit throw, 50×60 ($40 to 65). Folded under a gift, it reads cozy and substantial
- Worth every penny: set of 3 ceramic bud vases, matte white ($25 to 40). Perfect for a single stem or a sprig
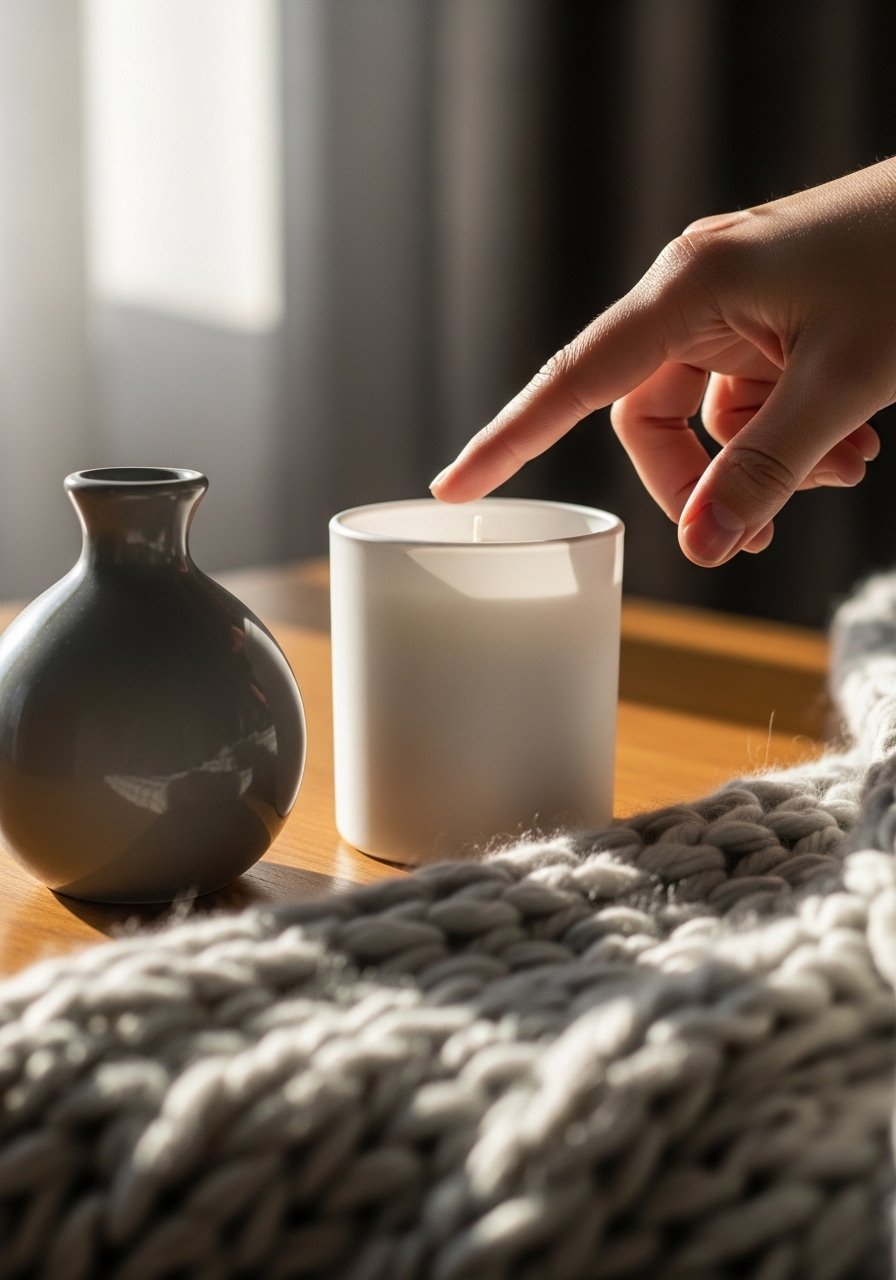
- Hand-poured soy candle, 8 oz ($12 to 28). Clean scent, long burn time
- I grabbed glass apothecary jars, set of 4 ($18 to 35). Use for candies, bath salts, or cookie mixes
- Small kraft gift boxes, pack of 20 ($12 to 20). Simple, neutral, stackable
- Muslin drawstring bags, set of 10 ($8 to 15). Great for jewelry and small soaps
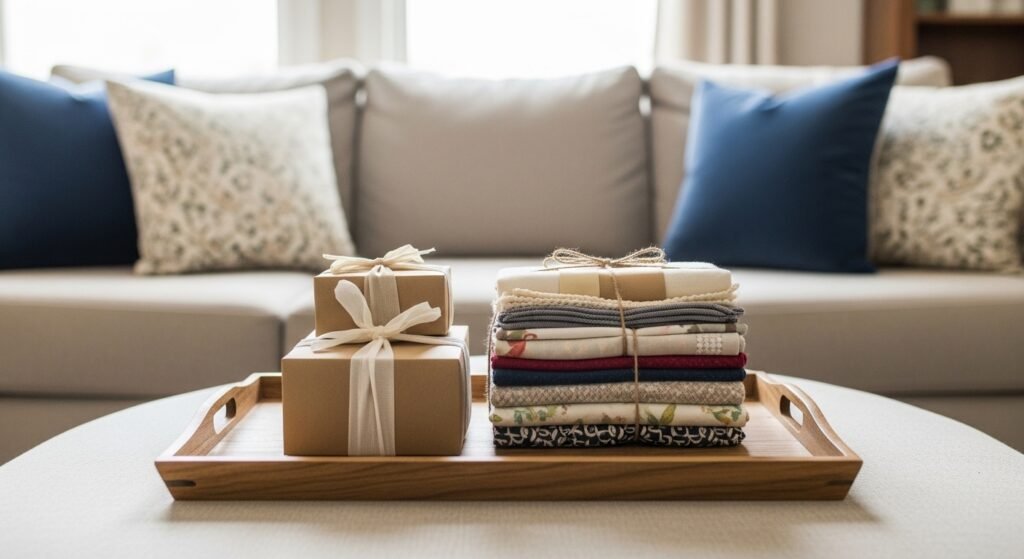
- Wooden serving tray, 16×10 ($25 to 45). Makes packaging feel like one complete gift
Step 1: Pick a simple theme and anchor item
Start by choosing one anchor item. I usually pick the candle or the throw. The anchor sets scale and tone. If the candle is 8 oz, plan smaller items around it so nothing looks lost.
Visually, the group goes from random to intentional. One missed detail people make is mixing too many finishes. Keep two finishes maximum, for example matte ceramic and natural wood. The common mistake is adding every trinket you find. Resist that urge. Less space between items reads cohesive. Leave 2 to 3 inches between objects when placed on a tray.
Step 2: Build in odd-numbered groupings
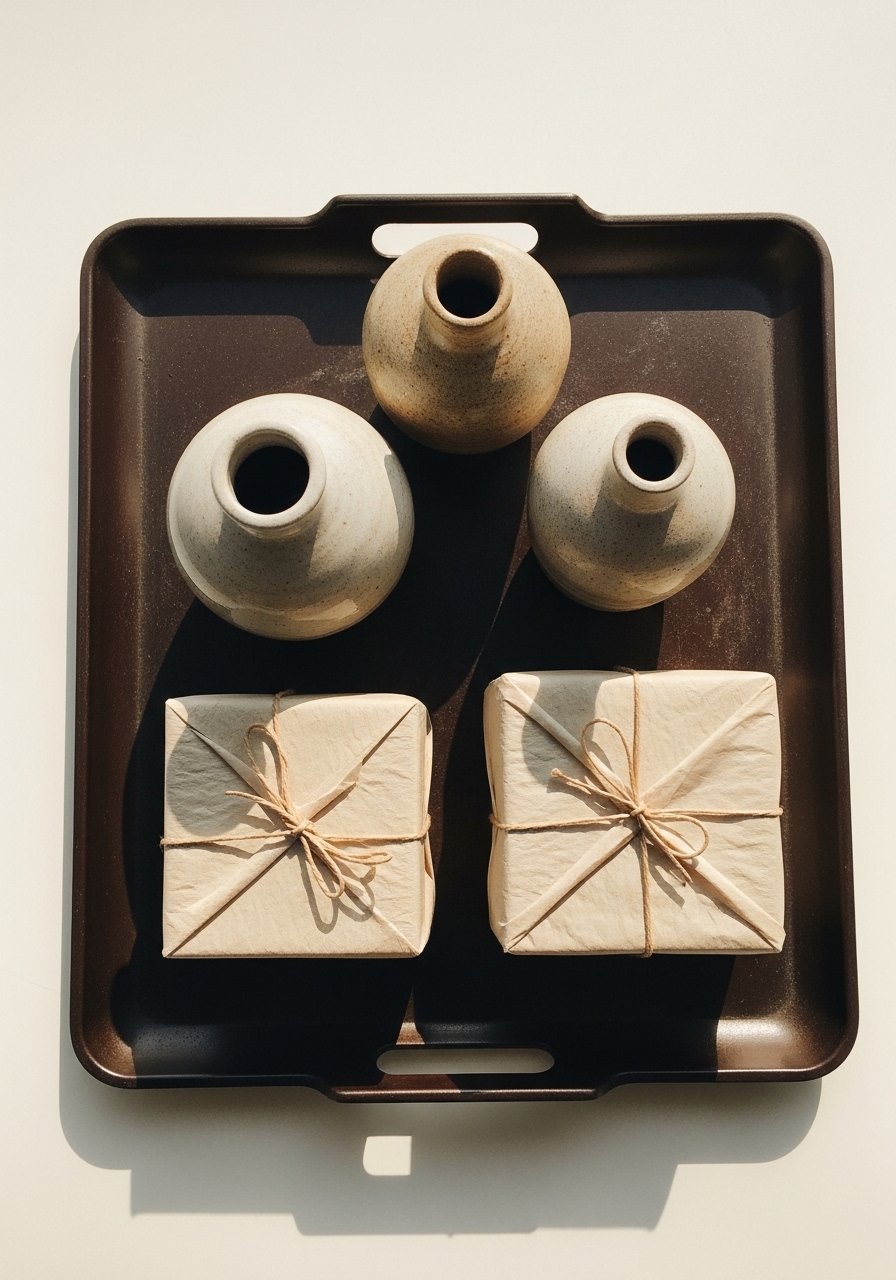
This is when the bundle starts to look like a set. I group items in odd numbers. Three vases, one candle, and a small box creates rhythm. Odd numbers feel balanced without being symmetrical.
People often try to mirror things exactly. That makes gifts look staged. Instead, vary heights and shapes. Use a single tall item, a medium item, and a small item. For a small space like a bedside table, scale down to two items but keep the odd feel by adding a small sprig in a vase. Avoid making everything the same height. That flattens the composition.
Step 3: Add texture and a handmade touch
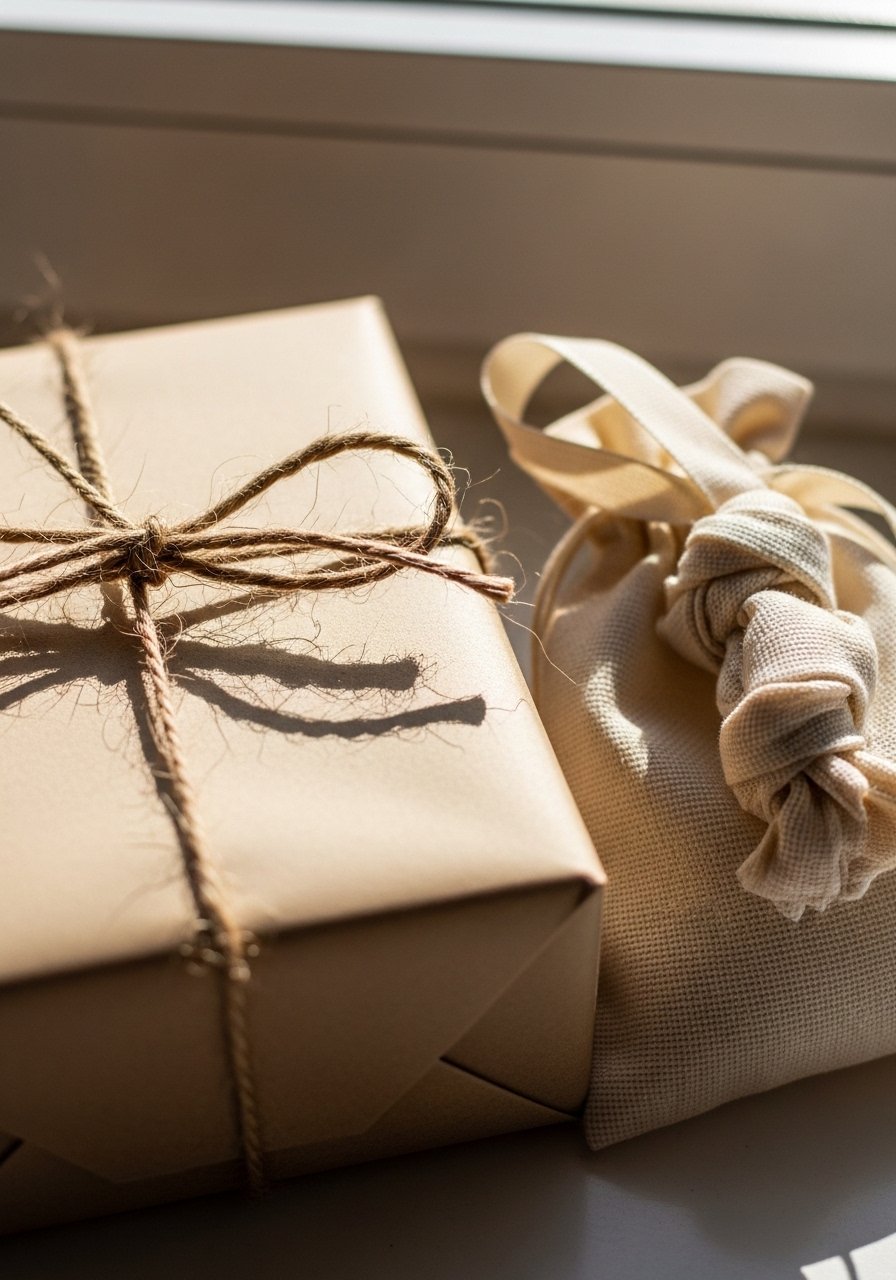
I used to skip this step. Now it is the one that makes homemade gifts read as curated. Add texture with a knit throw corner, a swatch of linen, or a muslin bag. A simple knot in twine looks better than fancy bows.
Visually, texture provides depth and invites touch. One insight people miss is matching paper weight to the gift. Lightweight items look sloppy in heavy boxes. A common mistake is over-embellishing. Keep one decorative element per package. If you use a strip of jute, skip ribbons.
Step 4: Think of presentation as a place setting
Most people wrap gifts like shopping bag cargo. Treat the tray like a place setting. Imagine a plate at the center and place items so the eye moves left to right. I set the tray so the largest item sits two-thirds off center.
This changes how the recipient experiences the gift. The wrong approach is lining everything up against the tray edge. That feels crowded. You will be tempted to overfill the tray to look generous. Instead, remove one item and notice how it breathes. A smaller tray often looks richer than a too-large one.
Step 5: Finish with a label and a tiny card
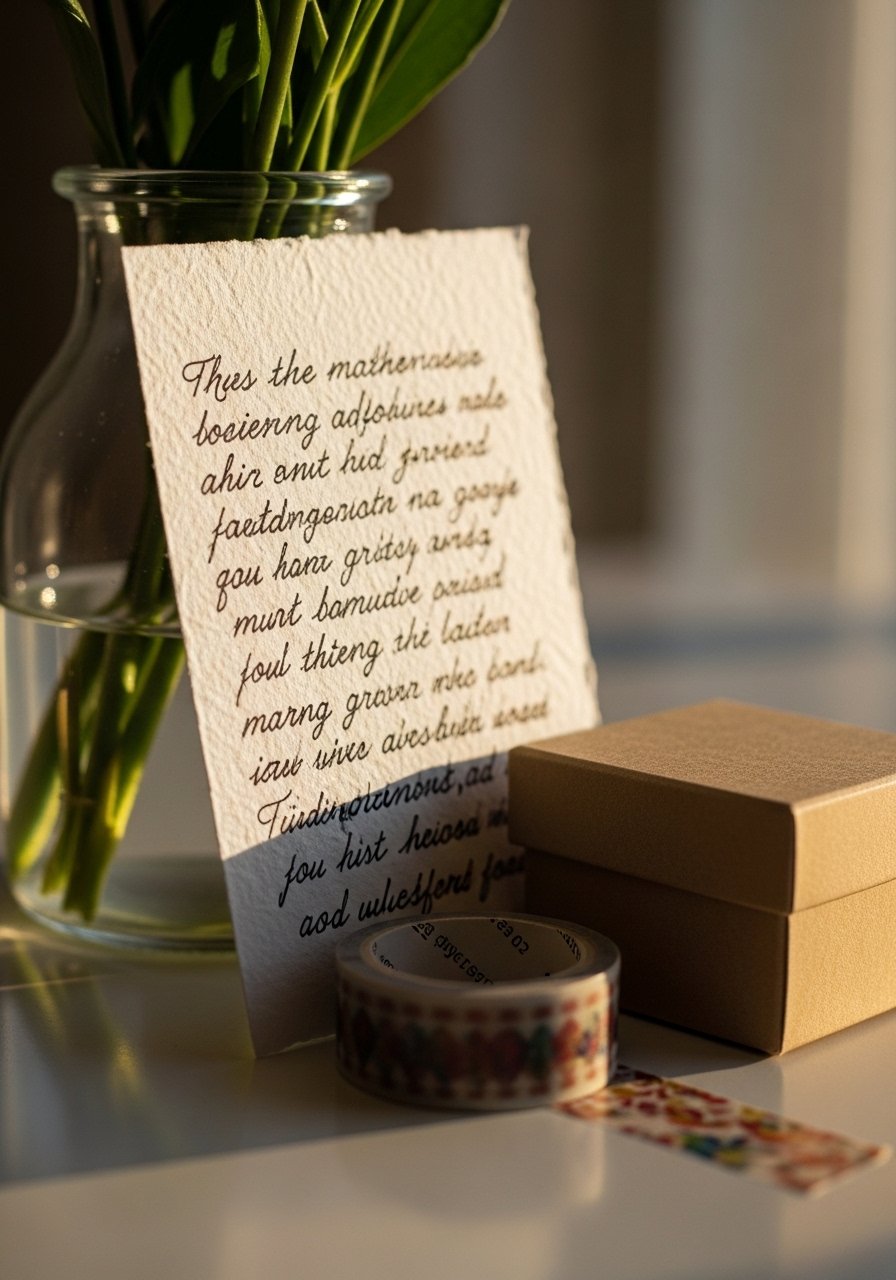
Finish with a personal label or short handwritten card. I use a postcard-sized card for a sentence or two. Handwriting matters more than stationery. A three-line note reads thoughtful and keeps the focus on the gift.
What visually changes is the bundle gains intention. People forget to tie the note into the overall palette. If you used natural kraft and white ceramic, match ink color and twine. A common mistake is over-writing the card. Keep it brief. Slip a tiny extra, like a sprig or a buttery cookie, into a muslin bag for a final surprise.
Why Your Handmade Gifts Still Look Homemade
I've noticed small changes make gifts read more grown-up. Start by limiting palettes to two colors. Neutrals and one accent color work well.
- Use matching boxes or bags for a cohesive look
- Repeat one material across the set, for example wood or ceramic
- Keep labels uniform, same pen and same size
When you make ten gifts, consistency pays. If you switch paper types for every package, the batch looks busy. If budget is tight, use simple glass jars and muslin bags across everything. It pulls the collection together.
Making This Work in a Tiny Space or on a Tight Budget
I keep seeing people assume small space equals low quality. It does not. Use scale and smarter choices.
- Choose a compact anchor item, like an 8 oz candle
- Use muslin bags for jewelry, then nest them in a small kraft box
- Group items on a 16×10 wooden tray to create presence
Buy items in sets, for example a pack of apothecary jars. That keeps unit cost down and makes presentation consistent. For a tiny studio, make three compact bundles rather than one large one. They are easier to carry and look deliberate.
Seasonal Adaptations That Still Feel Personal
Everywhere I look this year, seasonal palettes are softer and quieter. A pumpkin spice candle will read different when wrapped in linen and paired with a white bud vase.
For winter gifts, add evergreen sprigs and a small textured throw. Spring gifts get a single bloom in a ceramic bud vase. Summer gifts feel fresh with citrus-scented candles and glass jars of preserves. A trap is chasing trends too hard. Keep the base neutral and add one seasonal accent. That way the gift still feels personal and not like mass-produced seasonal packaging.
Start with One Small Gift
Pick one easy combination and finish it tonight. A candle, a small vase, and a handwritten card on a wooden tray is enough.
Trust the eye. Keep two finishes, use odd numbers, and add one handmade touch. That is all you need to make something feel intentional.
