

I hate when a table feels cold and unfinished. Plates are set, but the middle looks empty and flat.
I learned small centerpieces change that. They add warmth, scent, and gentle light. I can make a table feel intentional without stealing the meal or the conversation. I usually start with a natural base.
How to Make DIY Centerpieces for Any Table
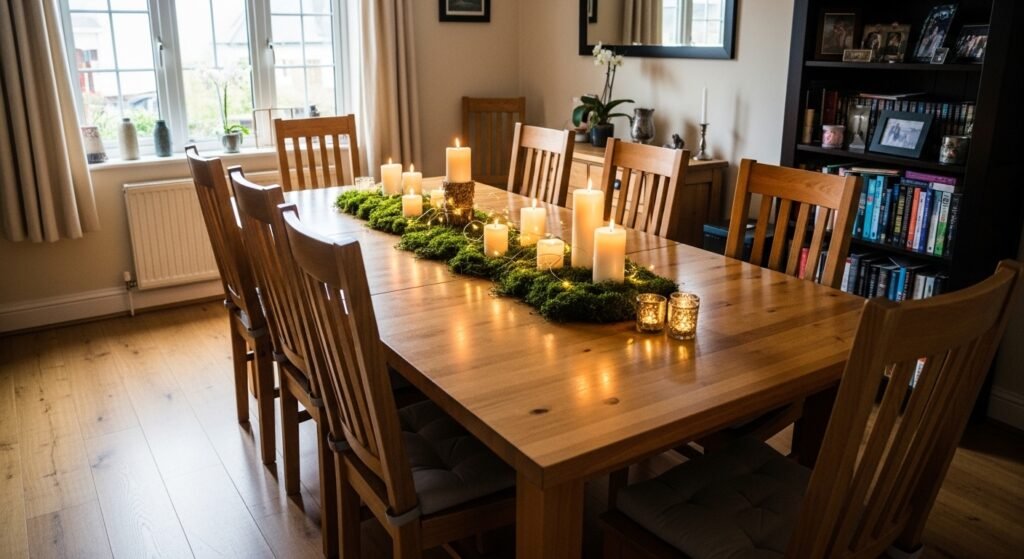
This is the method I use every time a table feels unfinished. You'll learn how to build a composed, lived-in centerpiece that works for any table size or season. The result reads organic modern or cozy farmhouse—balanced layers, thoughtful height, and a little reflected light.
What You'll Need
- Sheet of preserved green moss, 12×12 (~$20–50)
- Eucalyptus garland, 6ft, faux/real options (~$15–60)
- Battery-operated fairy lights, warm white, 6ft (~$10–40)
- Floating candles, small white, pack of 10 (~$15–40)
- Mercury glass votive candle holders, set of 3 (~$30–60)
- Unscented taper candles, set of 6, white (~$40–80)
- Rectangular mirrored serving tray, medium (~$50–100)
- Pack of dried orange slices for decor, 50 pieces (~$20–50)
Step 1: Choose the right base
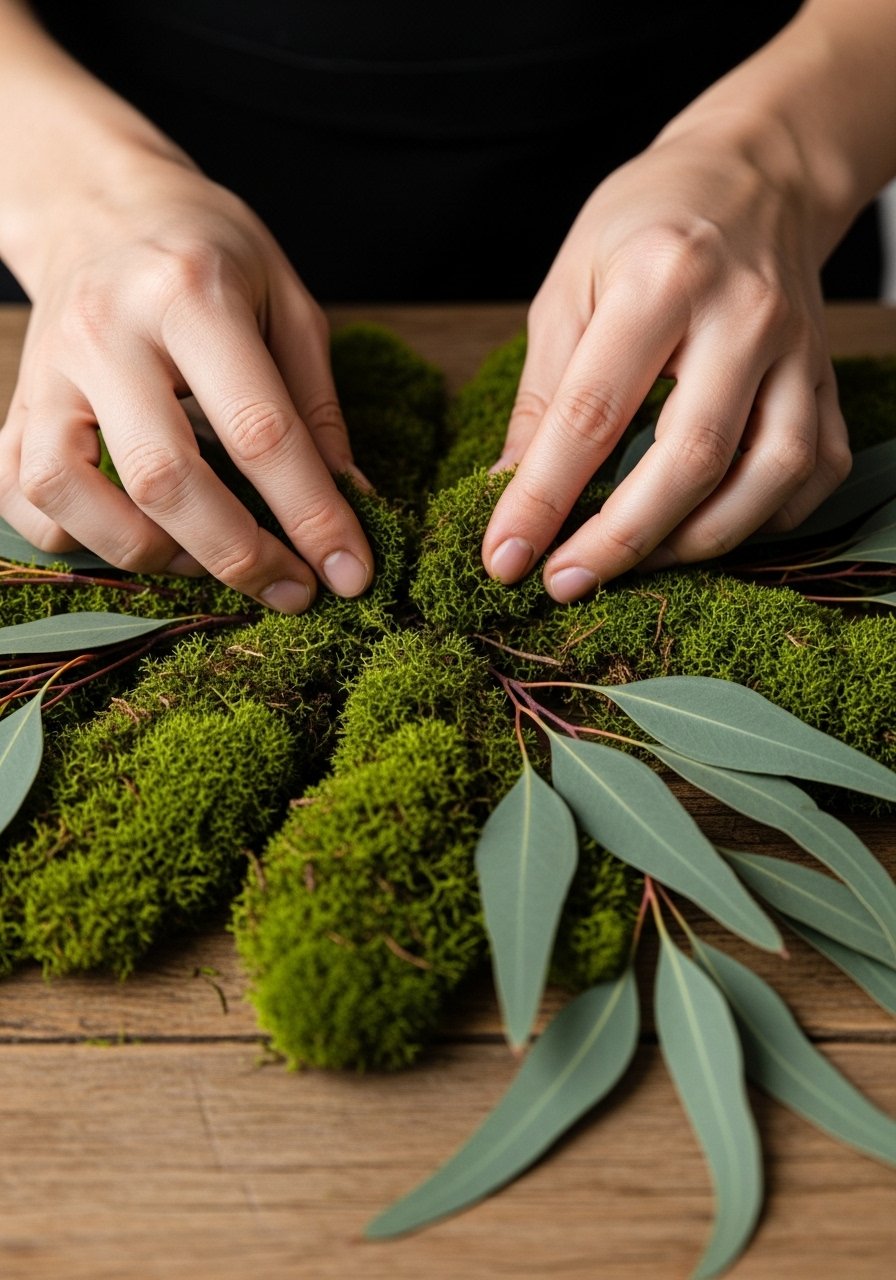
I start with a base that suits the mood: preserved moss for an organic modern feel or eucalyptus garland for scent and movement. The base changes everything—you’re setting the color story and texture.
Most people miss scale. A base should sit inside the table’s visual middle, not eat the table. Mistake to avoid: covering the whole tabletop so there’s nowhere to place plates or pass dishes.
Step 2: Place a single anchor
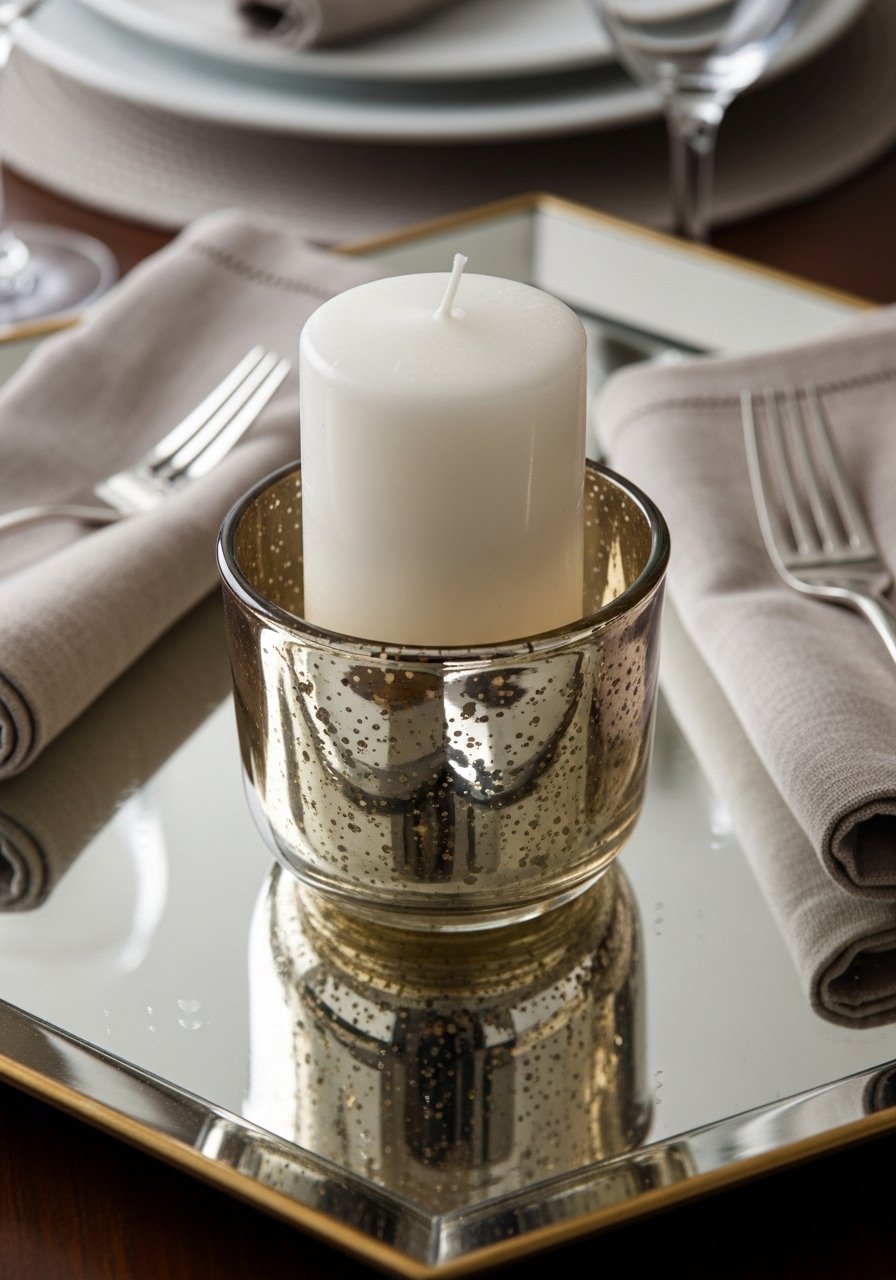
I pick one main object—a pillar candle, a small topiary, or a mercury glass vase—and give it a spot. I often place it slightly off-center on a mirrored tray for a relaxed, intentional look.
People usually center everything. One insight: nudging the anchor off-center feels more lived-in. Mistake to avoid: using an anchor that’s too wide for the tray or table; it should feel deliberate, not crowded.
Step 3: Add vertical movement with candles
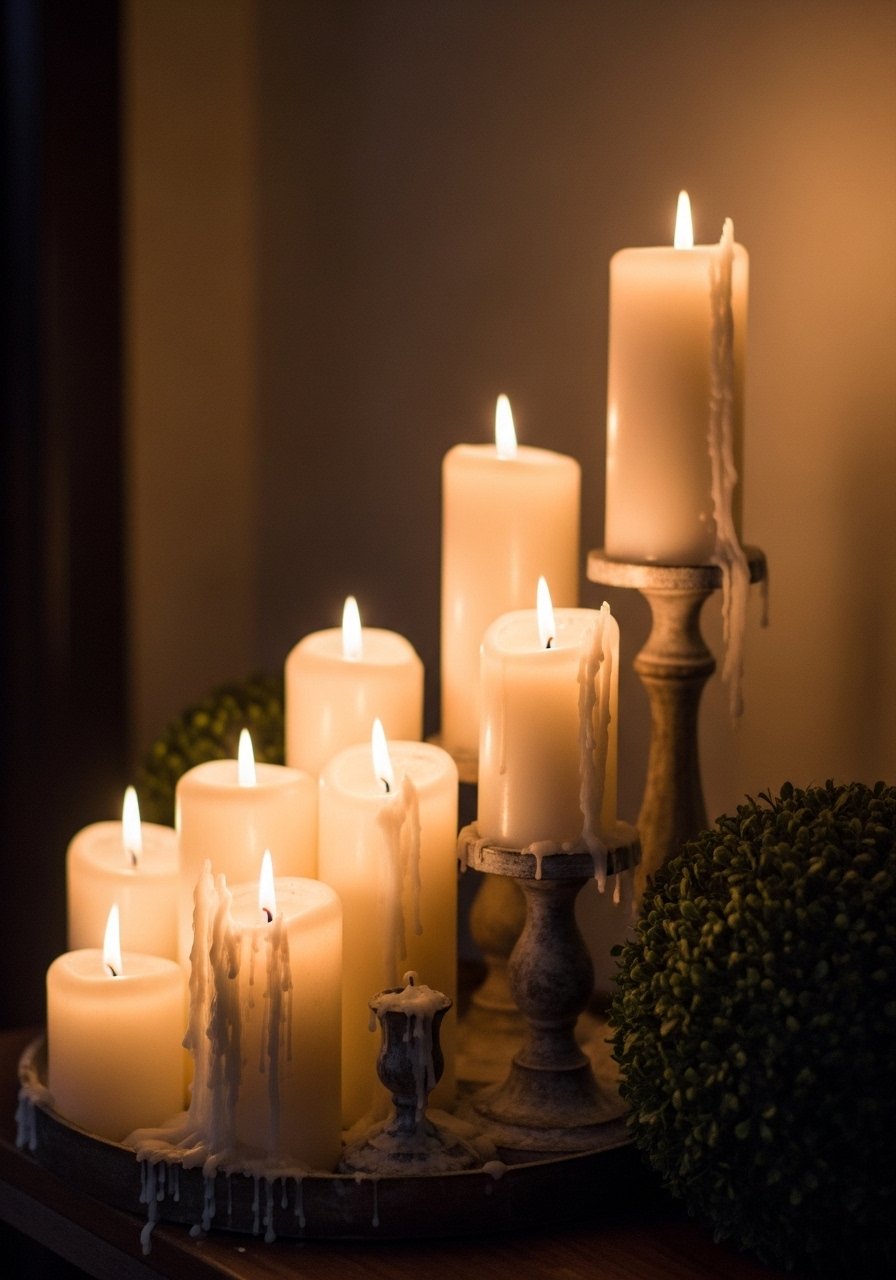
I work in height with a small cluster of tapers or a single tall piece like a topiary. That vertical rhythm keeps the eye moving and gives dinner a graceful silhouette.
One insight people miss: height doesn’t mean a single tall object—vary heights within a cluster. Mistake to avoid: placing tall tapers where they block sight lines between diners; keep the tallest pieces low enough to talk over.
Step 4: Layer texture and scent
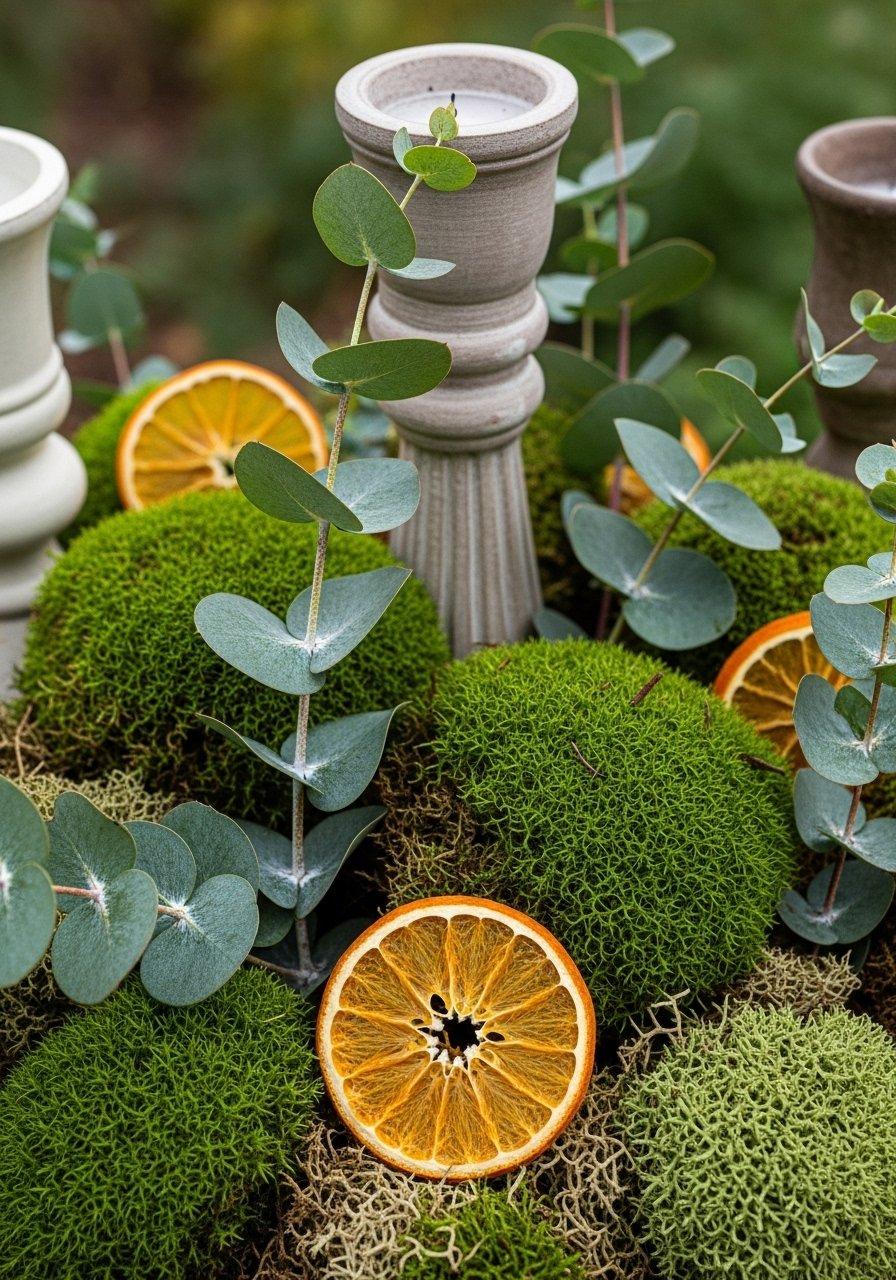
I tuck eucalyptus, moss, and dried oranges around the anchor to add texture and a subtle scent. Those small layers turn a flat arrangement into something that feels collected.
A detail people overlook: scent is part of hospitality—use it sparingly. Mistake to avoid: piling on fresh greenery that will shed or drip; preserved moss and dried elements are low-maintenance and kid/pet friendlier.
Step 5: Add soft light and reflections
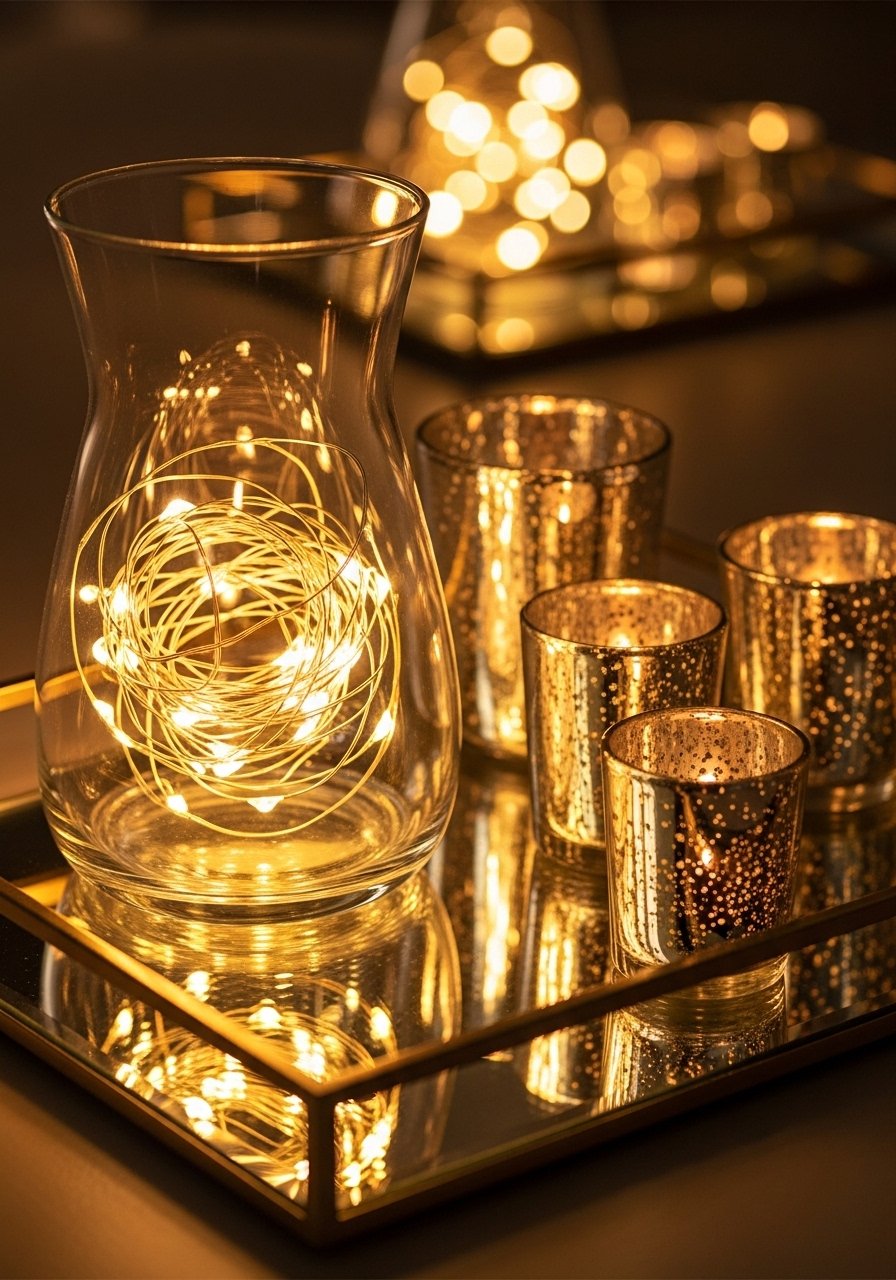
I weave battery fairy lights into clear vases or nest them under a mercury glass votive. Light makes a centerpiece read warmer and deeper than color alone.
Insight: LED lights reflect beautifully against mirrored surfaces—use both. Mistake to avoid: relying only on candles if you need safety or a long evening; battery lights give glow without the worry.
Step 6: Finish with scatter and negative space
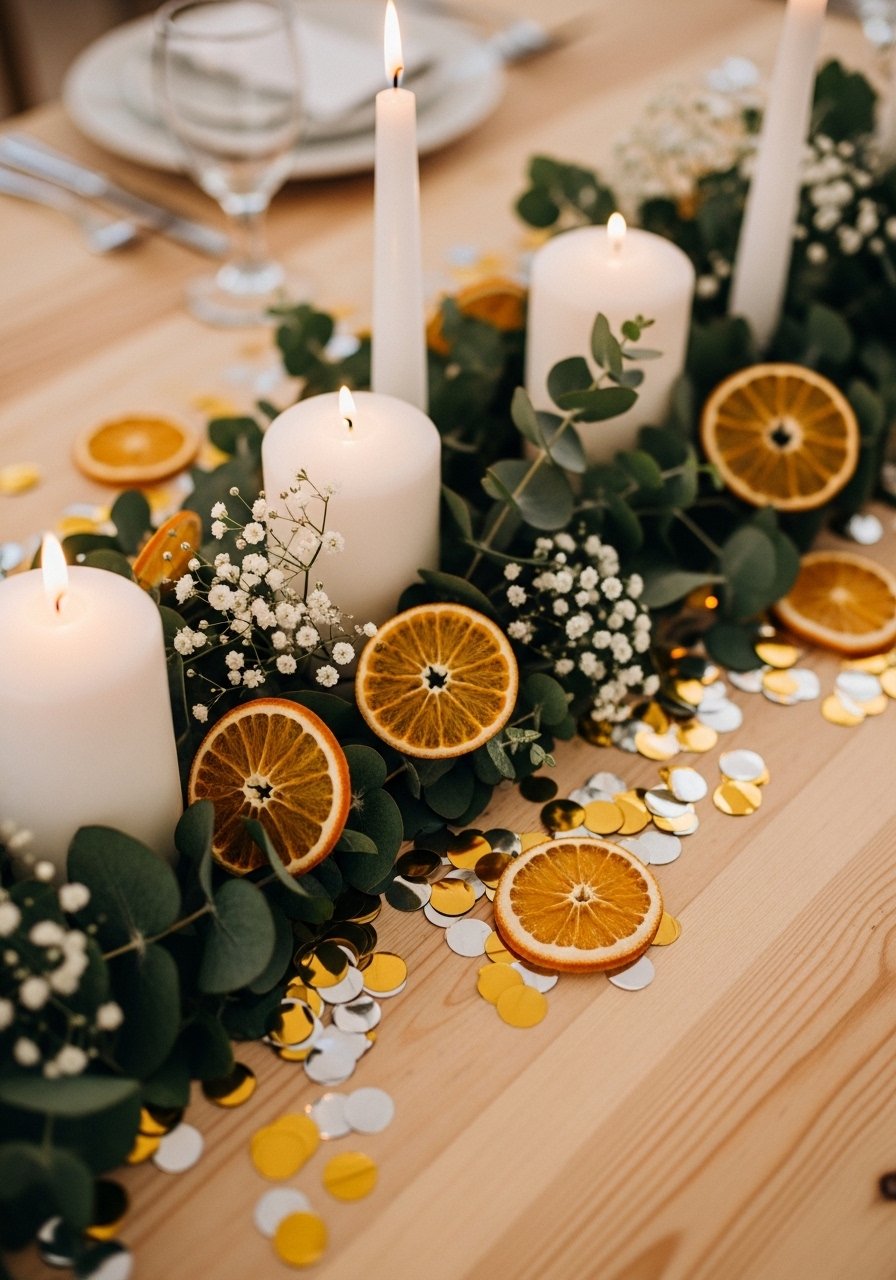
I finish by scattering a few small accents—metallic confetti, a couple dried oranges, or tiny votives—while keeping plenty of breathing room. Negative space makes the details read intentional.
Most people crowd the center. One insight: empty space is part of the composition. Mistake to avoid: spreading decorations so wide they interfere with plates or passing dishes.
Common mistakes and how I fix them
I see the same missteps: too big, too busy, or too uniform. Fixing them is mostly about editing.
- Problem: centerpiece takes over the table. Fix: scale down the base, or split the display into two smaller clusters.
- Problem: everything the same height. Fix: layer short, medium, tall elements.
- Problem: centerpiece feels decorative but not lived-in. Fix: add a scented sprig or a small personal object.
I edit like I’d edit a shelf—remove one thing, step back, and see if it breathes.
Small tables and budget-friendly swaps
I often need centerpieces that don’t crowd a narrow console or a breakfast nook. Here’s what I do.
- Use napkin posies with lemon thyme or rosemary for place-saving greenery.
- Swap a mirrored tray for a simple wooden board for less shimmer and more warmth.
- Choose a single jar of fairy lights inside a clear vase (~$10–40) instead of multiple candles.
Small touches—one candle, one sprig—do more than a complicated arrangement on a tiny surface.
Seasonal swaps and trends I’m trying
I like to nudge a single element each season rather than overhaul everything.
- Winter: preserved moss base, mercury glass votives, and tiny fairy lights.
- Spring: potted bulbs like cyclamen or a fresh eucalyptus runner.
- Holiday: add dried orange slices and a few metallic accents.
I switch one piece and keep the rest. It’s an easy way to stay current—organic textures and reflective surfaces are trends that last because they read clean and comfortable.
Final Thoughts
Start small and build from the center out. I usually begin with battery-operated fairy lights or a small moss base—both are low-commitment and instantly cozy. You don’t need perfect symmetry or expensive pieces. A few edited layers and a little light make a table feel lived-in and ready for conversation.
