


I used to stand at my table and wish it looked more deliberate. Often it felt flat or cluttered, or too cold for everyday life. I learned small edits that solved those exact frustrations.
This guide shows the simple look I use every day. No special skills. Just sensible placement, a few repeatable pieces, and an eye for balance so your table reads calm and lived-in.
How to Make DIY Table Decor for Everyday Use
This is the method I use when a table feels unfinished. You’ll learn how to frame the surface, layer low and tall elements, and add organic texture so the result is cozy, not cluttered. It works on coffee tables and dining tables in an “organic modern” or quiet-luxury way.
What You'll Need
- Wood serving tray, 16×12 (~$30–80)
- Striped linen table runner in bubblegum & pistachio, 16×72 (~$30–80)
- Preserved moss sheet pack, 12×12 (~$20–40)
- Two-tier serving tray, metal and wood (~$40–100)
- Set of 3 unscented pillar candles, ivory (~$20–35)
- Woven round placemats, set of 4, natural (~$20–40)
- Ruffle linen napkins, set of 4, white (~$20–60)
- Neutral-cover coffee table books (set or single) (~$15–50)
Step 1: Place a tray to frame the scene
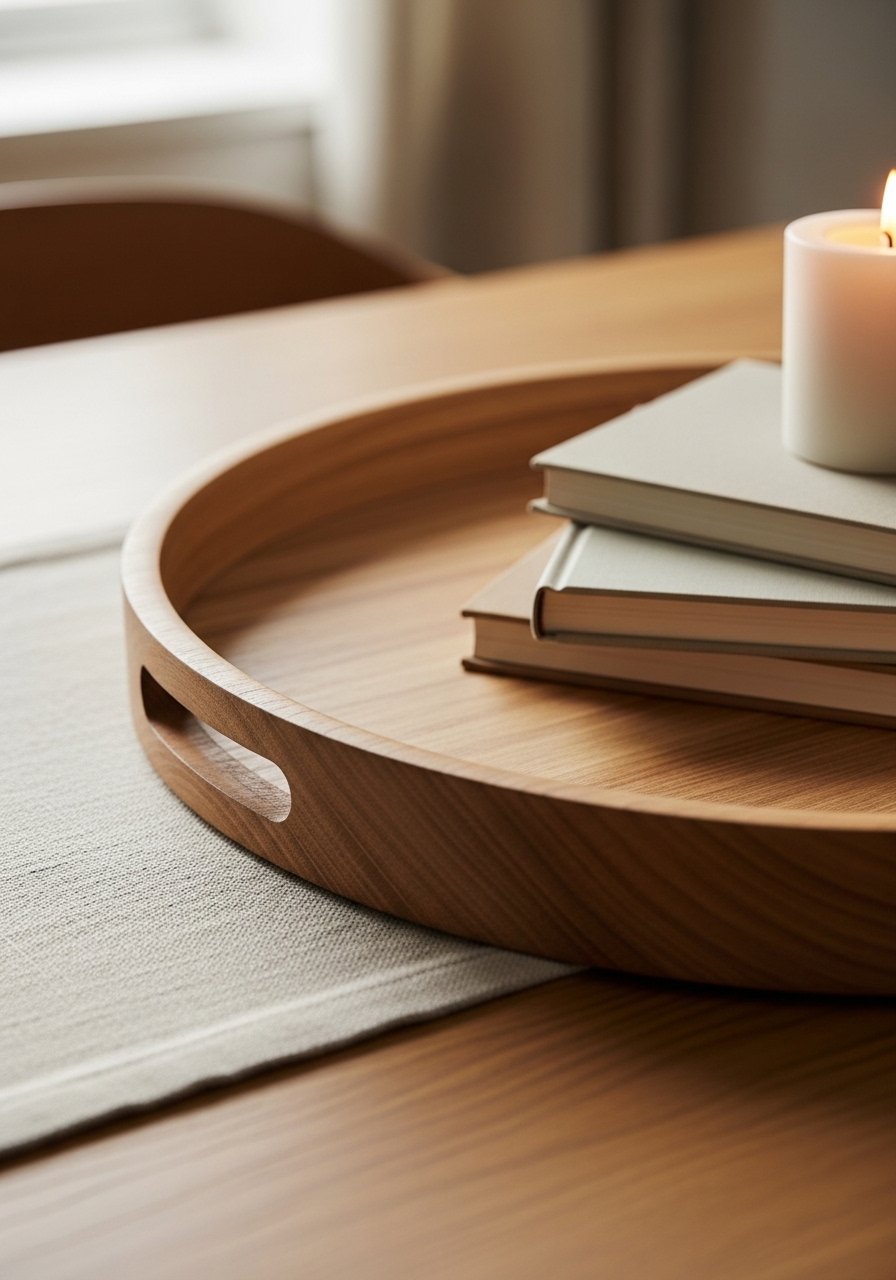
I always start with a tray. It becomes the frame that keeps the vignette from spilling across the table. A tray gives you instant containment and contrast against the tabletop.
Visually, it reads as intentional. The mistake I used to make was placing every item directly on the table. Insight: darker trays on lighter tables read more polished. Avoid overfilling the tray — it should hold a few purposeful pieces, not everything you own.
Step 2: Add a base layer with runner or placemats
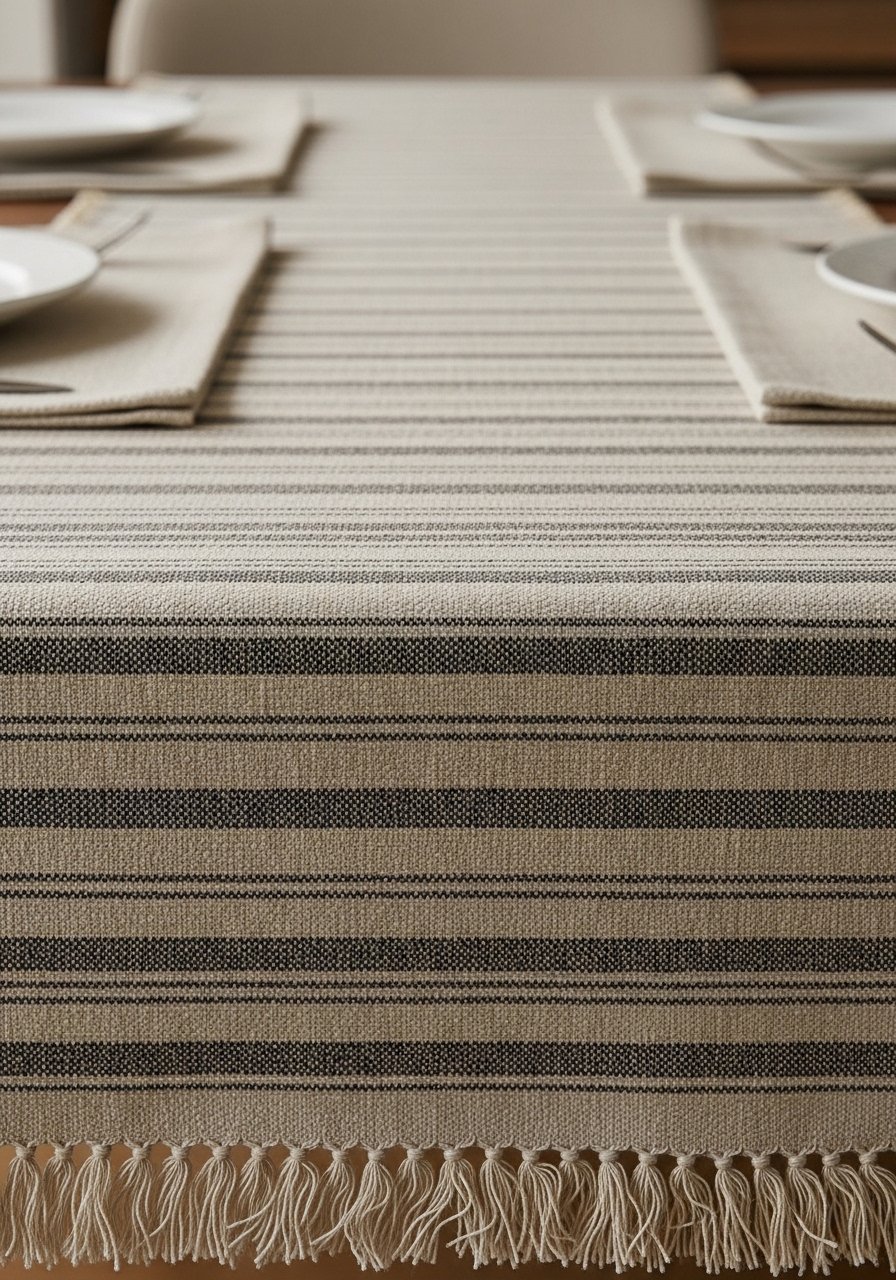
Put down a runner or woven placemats next. This is the quiet background that softens wood and gives the arrangement a mood — think candy-stripe runner for energy, woven mats for organic polish.
What changes is the table’s temperature: it goes from cold to warm. People miss scale here. Insight: match runner width to table — too narrow looks accidental. Mistake to avoid: using a loud pattern and competing with multiple focal pieces; let one pattern lead.
Step 3: Build low-to-high layers with books and a tiered piece
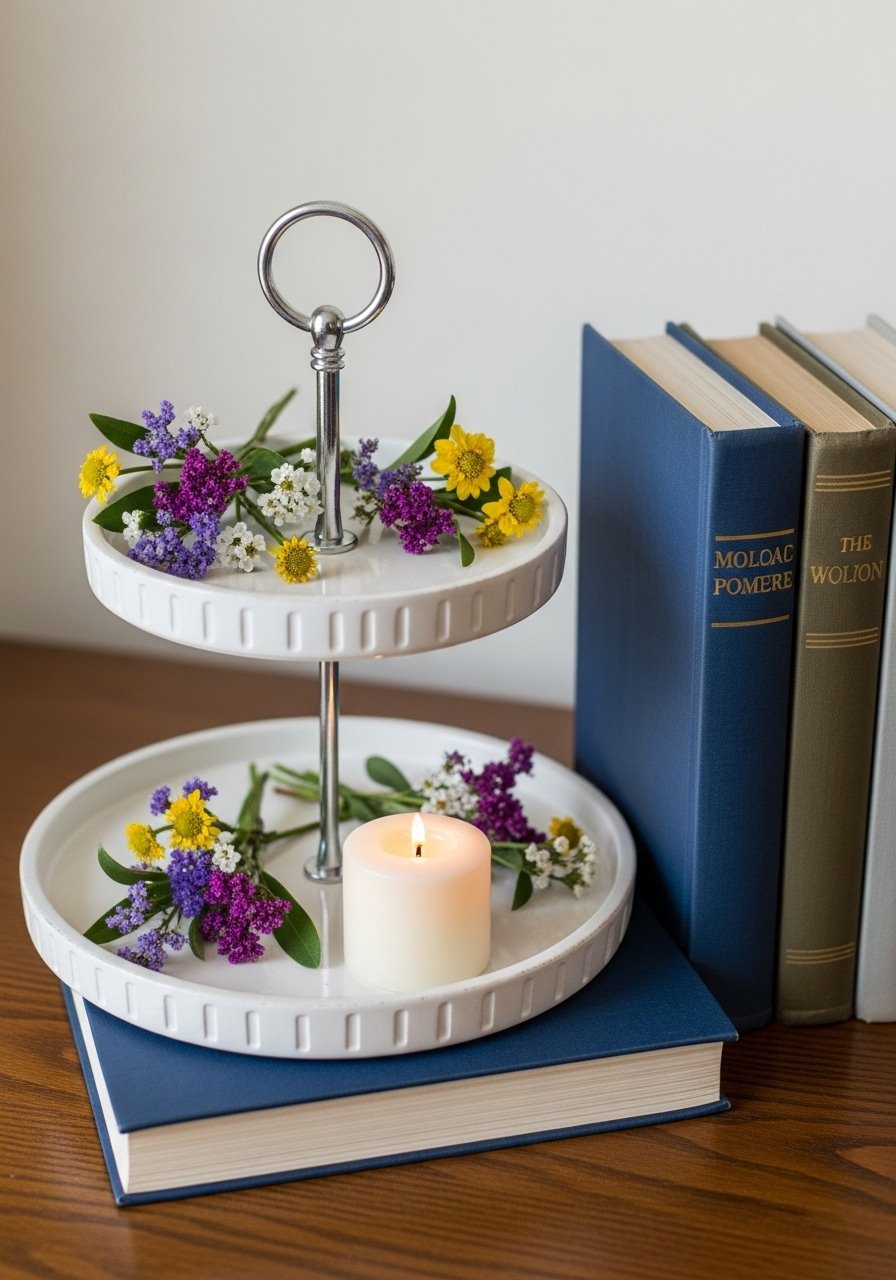
I layer low items like a 1–2 book stack, then add a taller element such as a two-tier tray or taller candle. The stepwise height creates depth without blocking sightlines.
Visually, the table reads curated, not flat. Insight: keep book stacks to 2–3 — any more looks like clutter. Avoid symmetry for every object; a slight offset feels more intentional and lived-in.
Step 4: Bring in organic accents for softness
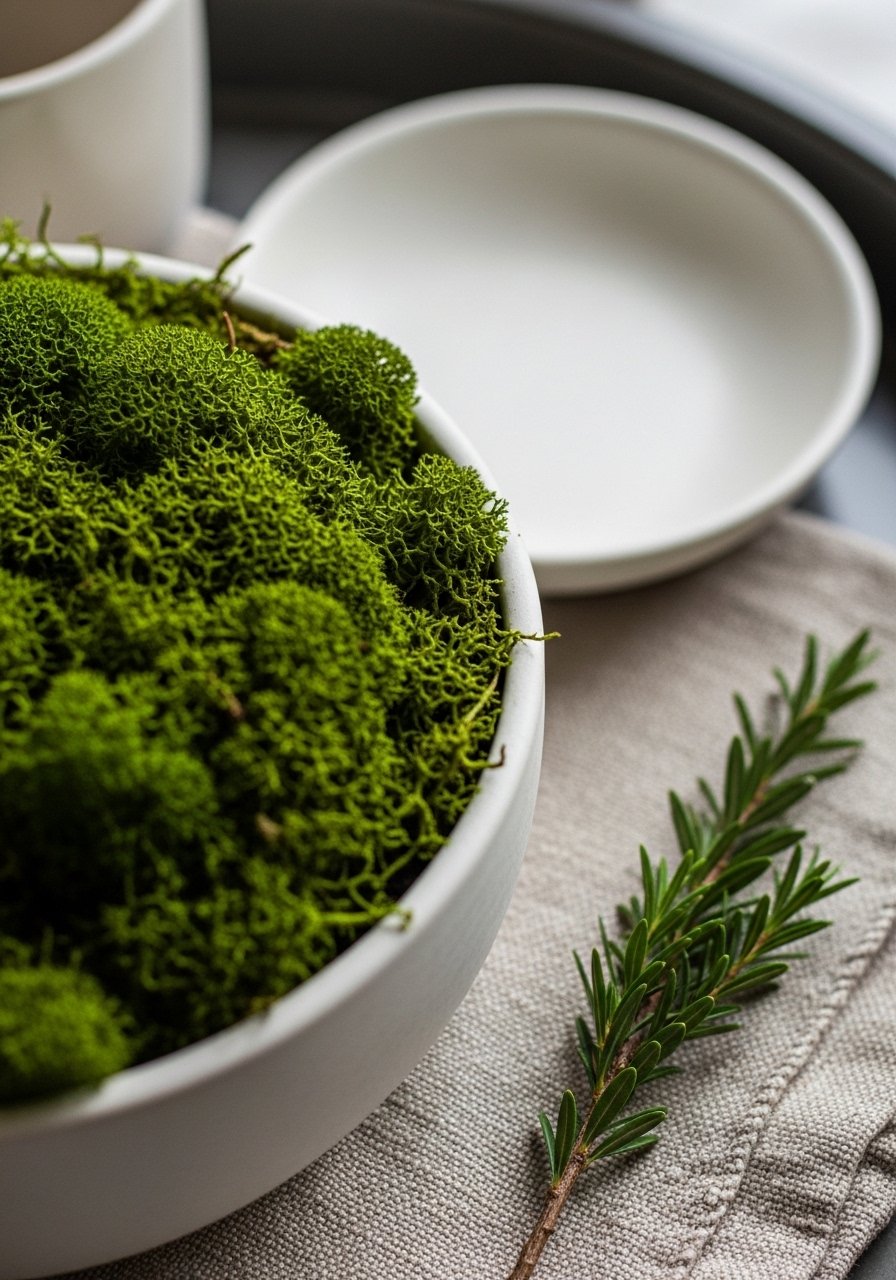
I always include an organic element. A preserved moss bowl or a few low stems adds texture and softens harder finishes. It solves the “cold table” problem faster than color alone.
The change is immediate — it feels warmer and more inviting. Insight: keep greenery low so conversation flows across dining tables. Mistake: putting tall branches in the center; they break the intimate scale and look holiday-specific.
Step 5: Finish with light and textiles for daily comfort
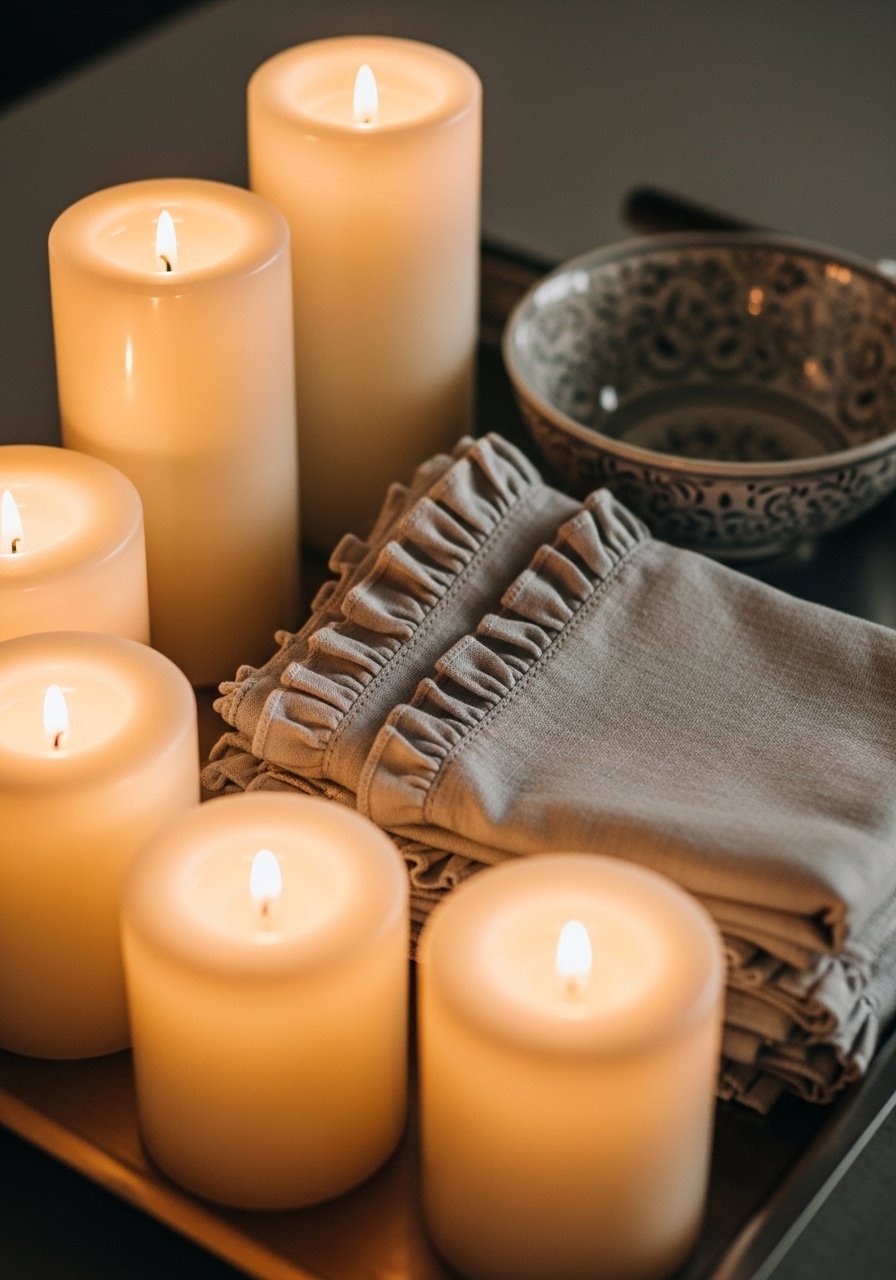
Finish with candles and a soft textile. Unscented pillars add warmth without fuss. Ruffle napkins or a small folded linen bring movement and a lived-in touch.
This final layer makes the table approachable for every day. Insight: spacing candles away from dried moss or fabrics keeps things safe and tidy. Mistake to avoid: lighting every candle at once — it’s overdone for daily use and risks hazard.
Common mistakes I see and how I fix them
I keep these quick fixes in mind when something still feels off.
- Too many competing patterns — pick one patterned linen and keep the rest neutral.
- Overheight centerpieces — keep centerpieces under eye level for dining.
- No containment — if items spread, add a tray to anchor them.
I also test the look by stepping back. If it reads chaotic from across the room, I simplify.
How to adapt this look for size and budget
Small table? Go low and asymmetric. Use a narrow runner, one book, and a single candle. For very small spaces, skip the tray and use a small shallow bowl as your frame.
On a budget, choose one quality piece (a wood tray or nice runner) and mix in thrifted books and faux moss. I often swap fresh flowers for preserved moss in winter — similar warmth, lower cost and lasts longer.
Seasonal variations and trend swaps
I stick to the same formula and swap small elements by season.
- Spring: pale blooms or potted bulbs, light striped runners.
- Summer: citrus and herbs on a wooden tray for an al fresco feel.
- Fall/Winter: tartan placemats, deeper linens, and clustered candles.
This keeps the table feeling current without a full redo.
Final Thoughts
Start with the tray — it’s the smallest change that makes the table feel finished. I promise the process gets easier each time you tweak placement.
Keep edits simple: one patterned linen, one organic piece, and careful height. A good wood tray is an easy, low-commitment place to begin.
