


I kept walking past that one shelf that looked like it was missing something. Bare surfaces, a cold center table, and the nagging feeling I’d bought the wrong accessories. I wanted small, cheap fixes that felt intentional, not cluttered.
So I started using scraps. It made rooms feel warmer and more personal — without spending a lot or buying trendy pieces I’d tire of.
How to Make Recycled DIY Crafts from Everyday Items
This is the method I use when a room feels unfinished. You’ll learn how to turn cans, jars, and scraps into cohesive accents that read as planned — think farmhouse and boho touches, but simple and calm. The result looks layered, lived-in, and budget-friendly.
What You'll Need
- Tin cans for crafts (~$0–5)
- Mason jars clear, set of 6, 16 oz (~$10–20)
- Warm white fairy string lights, 10 ft (~$10–30)
- Natural jute twine, 3mm x 200ft (~$3–8)
- Matte neutral spray paint (linen/cream) (~$6–12)
- Mod Podge decoupage medium, 8 oz (~$5–15)
- Coffee filters, pack of 100 (~$3–6)
- Craft wood boards, small project size (~$5–20)
Step 1: Collect and edit your scraps into palettes
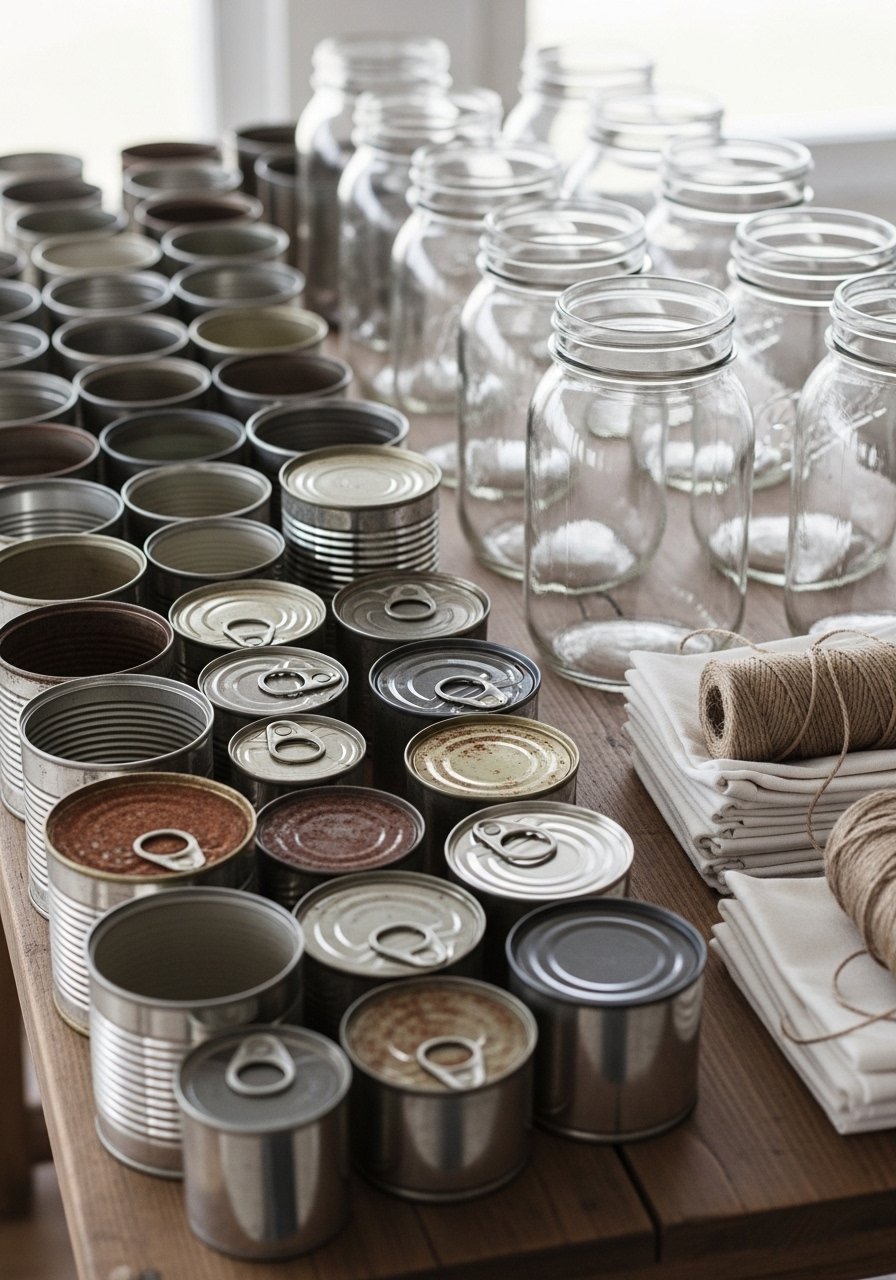
I lay everything out and pick a small palette — two neutrals and one accent. That keeps the look intentional instead of “random craft pile.” I often choose matte paint and natural twine for a quiet farmhouse feel or patterned napkins for boho color.
Insight: editing is the work. If you can’t imagine an item next to a vase or lamp, don’t use it. Mistake to avoid: keeping every scrap “just in case” — it makes the finished vignette look busy and accidental.
Step 2: Dress cans and jars for the room
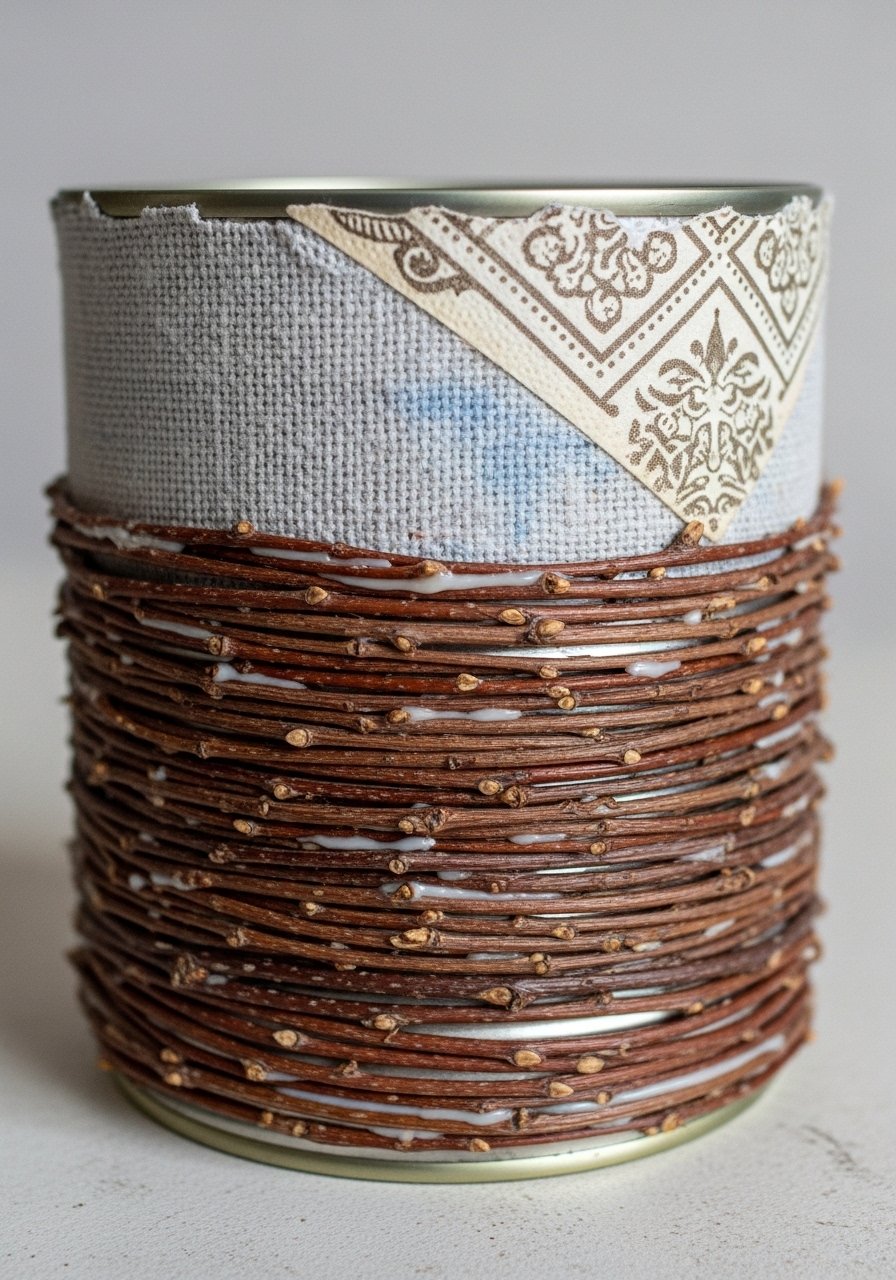
I decide whether each piece will be painted, wrapped, or decoupaged. A painted tin in a matte neutral reads modern; a twig-wrapped can reads farmhouse. Napkin decoupage on a jar gives boutique pattern without buying fabric. The visual change is immediate — flat metal becomes texture and tone.
Insight: choose one treatment per grouping so the eye rests. Mistake to avoid: mixing three heavy textures in one cluster; it competes instead of complementing.
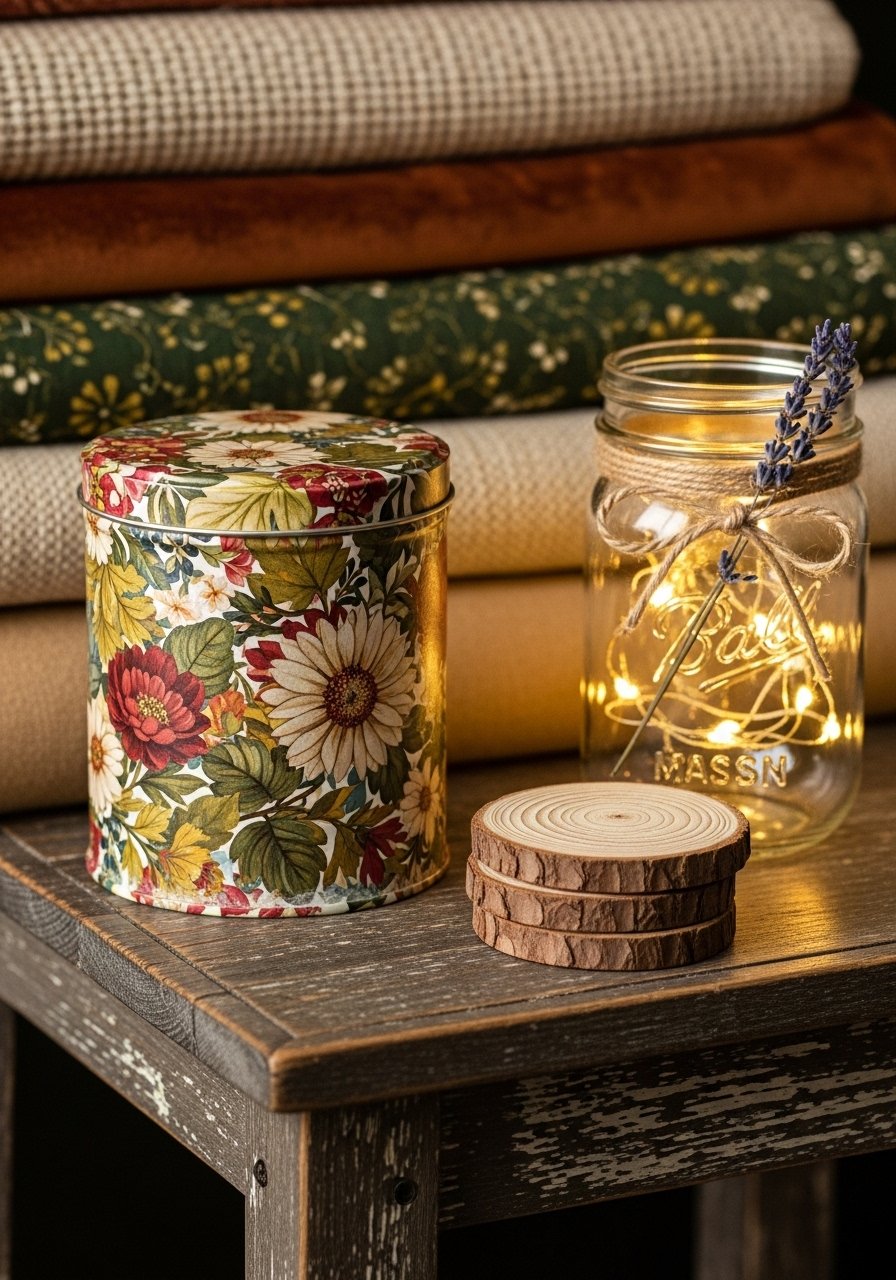
Step 3: Add light and soft glow

Mason jars with fairy lights are my go-to for adding soft warmth. I tuck battery lights into jars or behind a cluster of cans on a mantel. The glow changes a surface from empty to inviting, especially near textiles or plants.
Insight: light makes texture read richer — the same painted can feels more intentional at dusk. Mistake to avoid: placing lights where they’ll shine into a TV or mirror; test placement before committing.
Step 4: Build vertical life with planters

I mount cans to a small wood board or stagger them on a narrow pallet to draw the eye up. Vertical planters fix cramped balconies and small nooks by adding green without taking floor space. Group them at different heights for depth.
Insight: varying height (and plant size) tricks the eye into a larger space. Mistake to avoid: placing too many identical containers in a single line — it flattens the composition.
Step 5: Edit the vignette and balance
I step back and live with the arrangement for a day. Often one piece needs to move to a higher shelf or pair with a book. I aim for three focal points in a vignette: a textured object, a light, and a green or natural element.
Insight: spacing matters more than quantity — leave breathing room. Mistake to avoid: placing everything in the center of a surface; asymmetry feels more intentional and calm.
Common mistakes and how I fix them
Too many finishes is the main one. If you’ve painted, wrapped, and decoupaged everything, the eye gets lost. My quick fix: pick two finishes (matte paint + natural twine, or decoupage + clear glass) and repeat them.
Other fixes I use:
- Don’t overfill shelves — edit to 60–70% capacity.
- Avoid identical repetitions; vary height and texture.
- Keep fragile pieces out of high-traffic spots if you have kids or pets.
Adapting these projects for small spaces and rentals
In small rooms I prioritize verticals and lights. A single row of tin can planters on a narrow board feels intentional, not cluttered. For rentals, I use command hooks for mounting and skip permanent nails.
Budget swaps:
- Use free cans and jars first.
- Buy one jar light set and reuse it across rooms.
- Choose a small Mod Podge bottle instead of large for occasional use.
Seasonal swaps and staying on-trend
I change accents by season instead of redoing everything. In fall I wrap cans with burlap and twigs; in spring I switch to fresh herbs in the vertical planters. To nod to current trends, I’ll add one cork panel or a bamboo tray as a neutral backdrop without reworking the whole scheme.
Small seasonal ideas:
- Switch napkin patterns for quick color shifts.
- Swap fairy light color temperature for mood (warm for cozy, cool for crisp).
- Rotate a single accent pillow to tie the vignette into the room.
Final Thoughts
Start with one surface and one treatment — painted cans or a single mason jar lamp. Small edits build confidence faster than big projects.
You’ll be surprised how much warmth a few recycled pieces add; a set of mason jars is an easy, low-commitment place to begin.
