

I used to think every room needed a big statement piece. Then I learned small mirrors, placed right, make spaces breathe. I lived with awkward scale, returned two oversized frames, and finally found simple mirror hacks that actually feel grown-up and lived-in.
These are the projects I kept doing—fast, affordable, and fixable. No showroom fluff. Just real-life edits that make rooms look and feel bigger.
25 Stylish DIY Mirror Ideas That Make Rooms Feel Bigger
These 25 DIY mirror ideas are ones I’ve tried, messed up, and kept. They’re realistic for renters and homeowners alike, and many take under an hour. I’ll show what changed in each room and exactly what I used.
1. Clustered Thrifted Mirrors for Instant Depth
I taped up mismatched thrift mirrors across a skinny wall and it added depth without feeling matchy. I noticed how the different angles catch light at odd times of day. At first I hung them unevenly—big mistake—but stepping back and adjusting spacing fixed the awkward look.
This cluster makes the hallway feel wider and more intentional. I tended to overcomplicate placement; the trick was to put the largest mirror slightly off-center. A few Command strips later, that wall stopped disappearing.
What You’ll Need for This Look
2. Dollar-Mirror Foam Core Panels for Lightweight Art
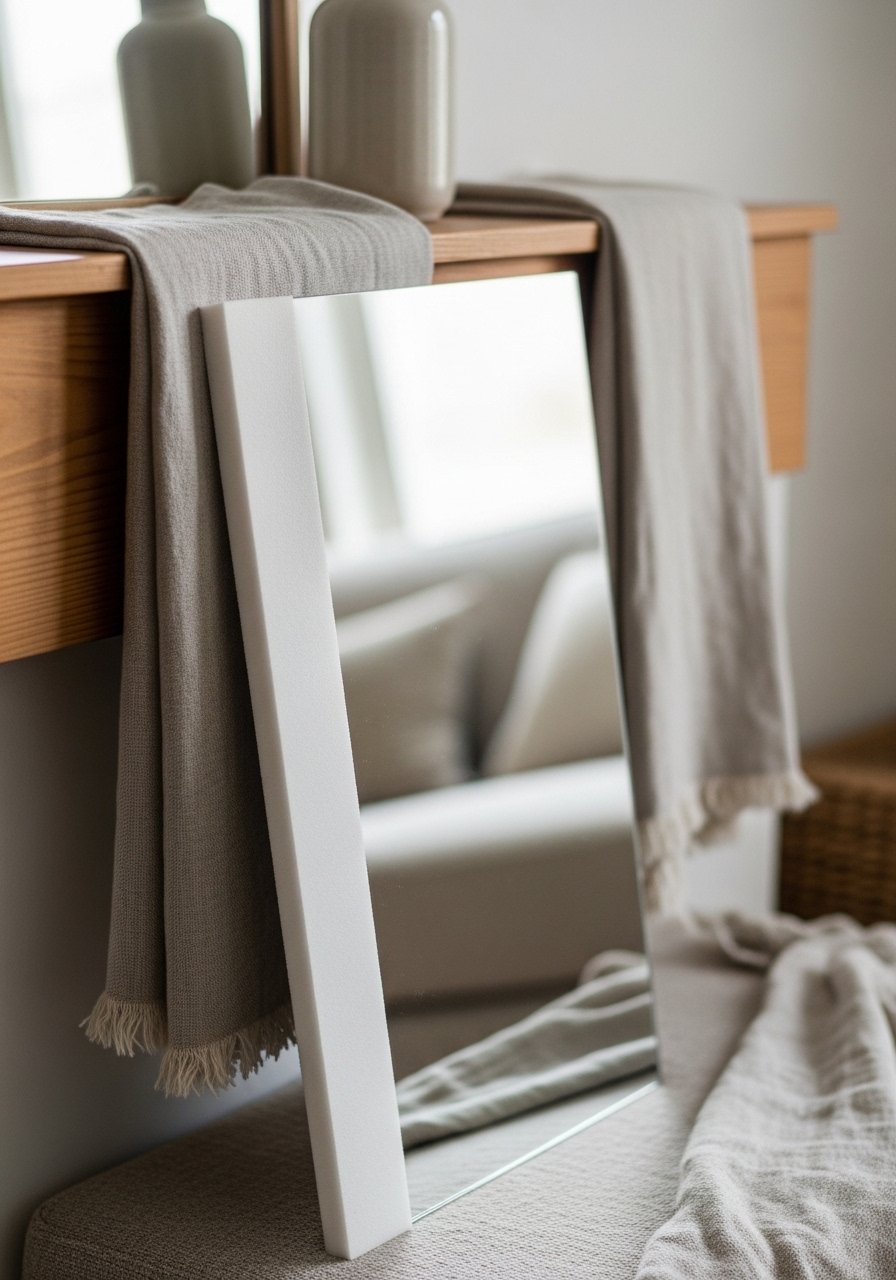
I made a foam-core-backed mirror panel when I needed art but not another hole in the wall. Foam core keeps the mirror flat and light. The first panel warped because I glued unevenly—lesson learned: press and weight while it dries.
Mounted with Command strips, it reads like affordable gallery art and pushes the eye outward. It’s ideal above a console where heavy frames felt wrong. I liked that it looked custom without a frame shop run.
What You’ll Need for This Look
3. Three-Panel Vanity Mirror on a Budget
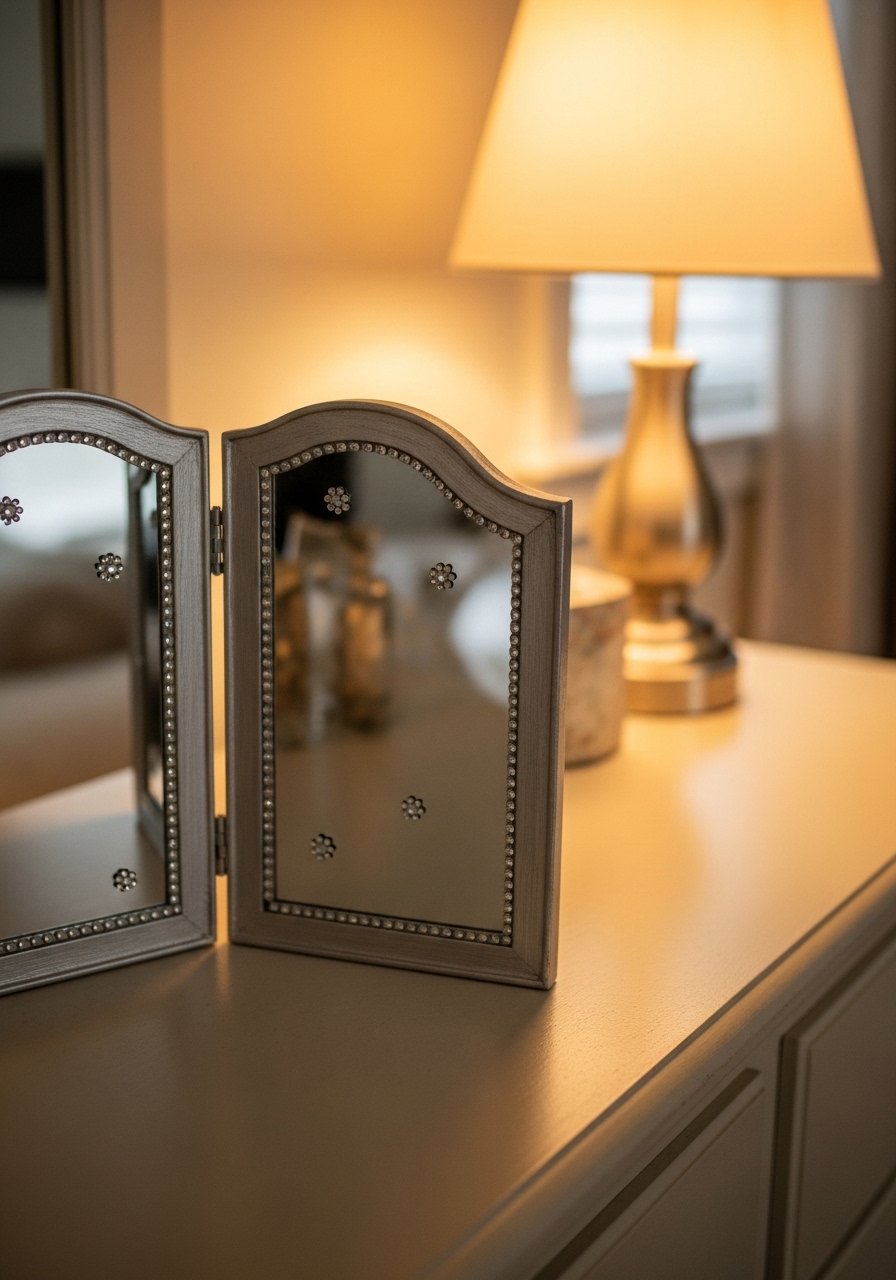
I built a hinged tri-fold vanity using small mirrors and cheap hinges. It made my dressing area feel like a proper vanity without the retail price. I initially used thin hinges and it wobbled—swap them for sturdier ones and it’s solid.
The side panels bounce light and make the dresser area brighter. Adding a row of glued gems made it feel intentional instead of dollar-store. It’s one of those projects that looks polished when you take the time to clean edges and paint the hardware.
What You’ll Need for This Look
4. Chalk-Painted Ceiling Medallion Mirror
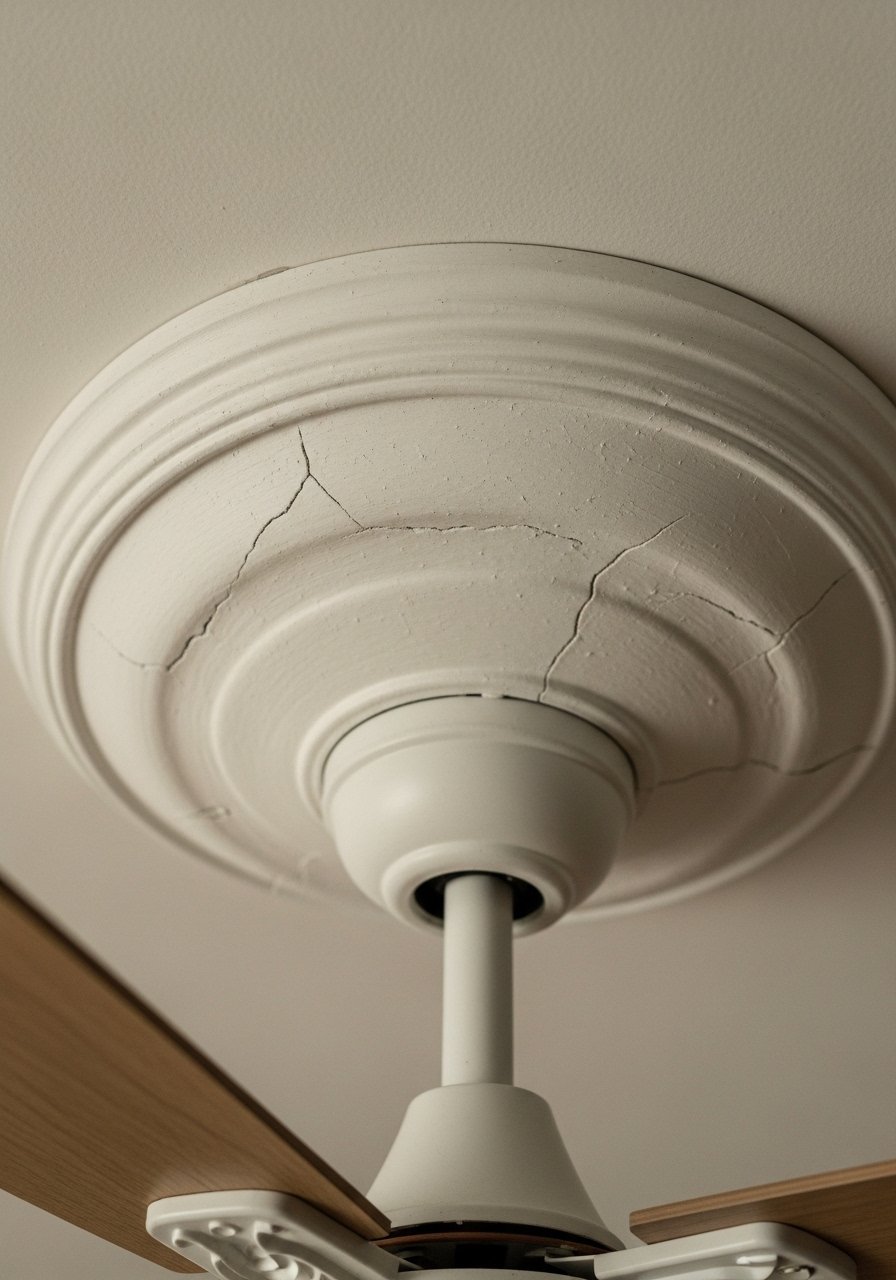
I cut mirror circles and glued them to a foam medallion, then chalk-painted the whole piece for a plaster look. It made my ugly fan less obvious and added height. The first coat peeled where I didn’t sand—don’t skip light sanding.
Hanging it under the fan gave the ceiling a focal point without rewiring. It reads like an architectural detail, which is funny because it cost under ten dollars. If your ceiling’s low, choose a flatter medallion so it doesn’t feel fussy.
What You’ll Need for This Look
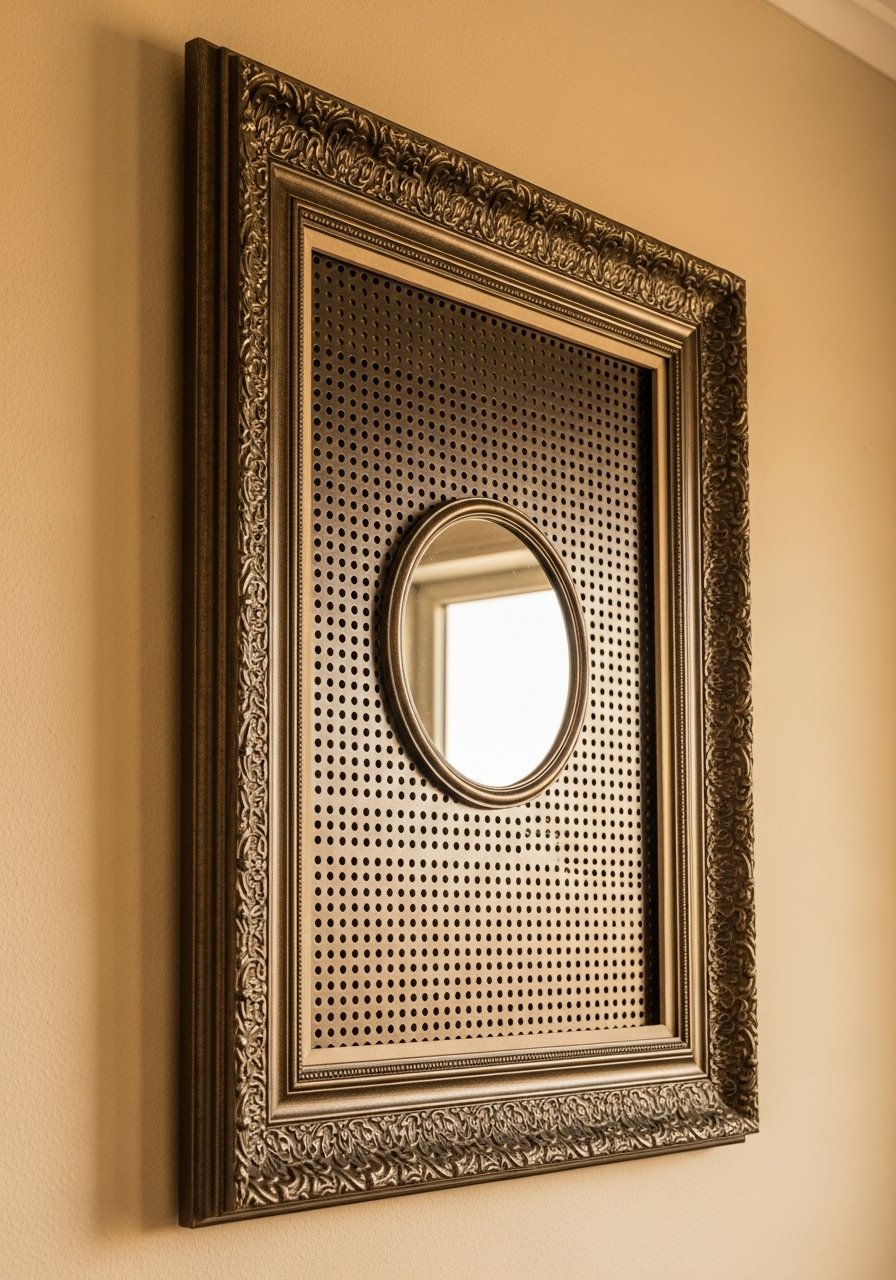
5. Punched Mirror Inserts for Thrift Frames
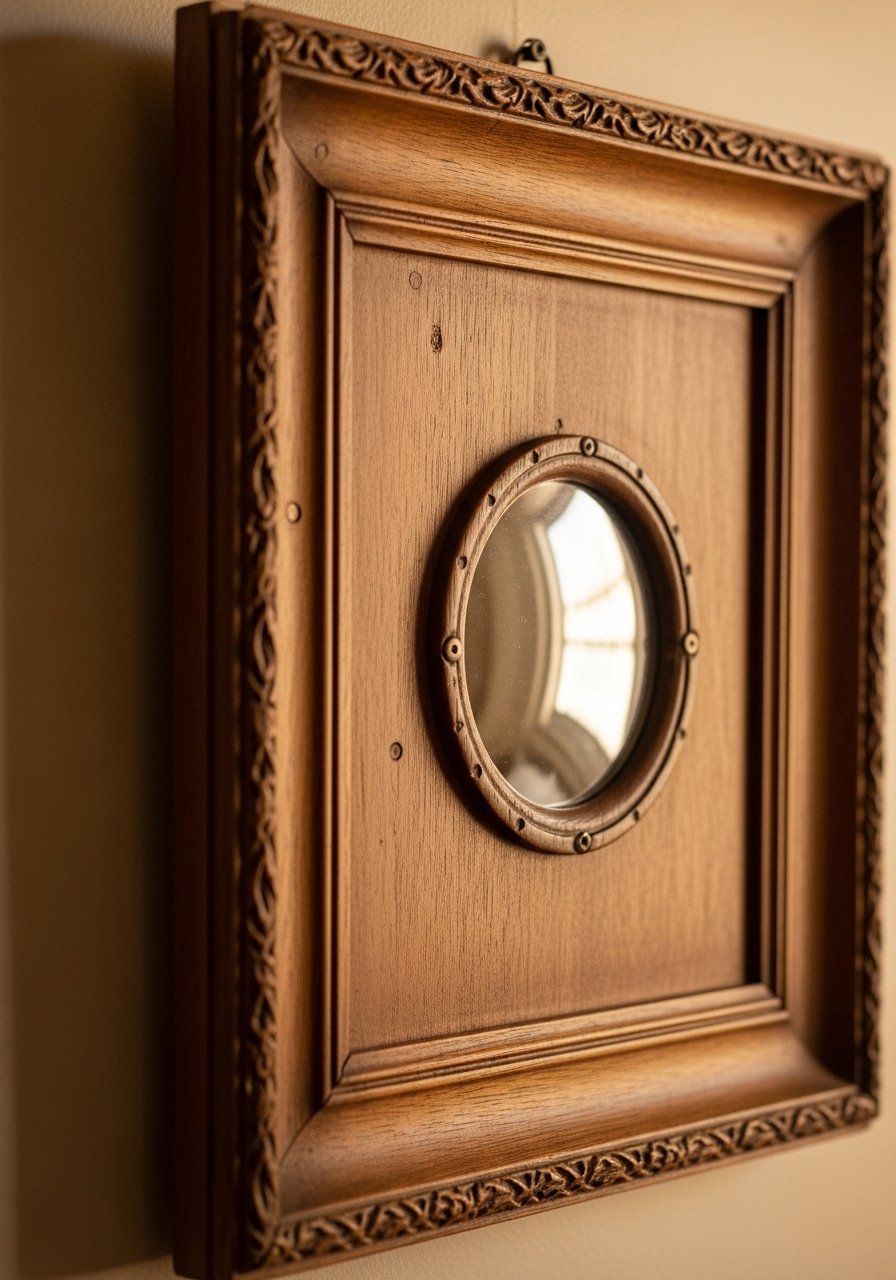
I pulled mirrors out of thrift frames and punched small mirror inserts to fill empty frames—cheap, personalized art. My first inserts were crooked because I eyeballed the center; use a ruler. Once I lined them up, the frame finally read curated.
This trick turned an ornate thrift frame into reflective art that made the room feel bigger. It’s renter-friendly and reversable, which I love. I often layer greenery in front to soften the look.
What You’ll Need for This Look
6. Craft-Stick Sunburst Mirror
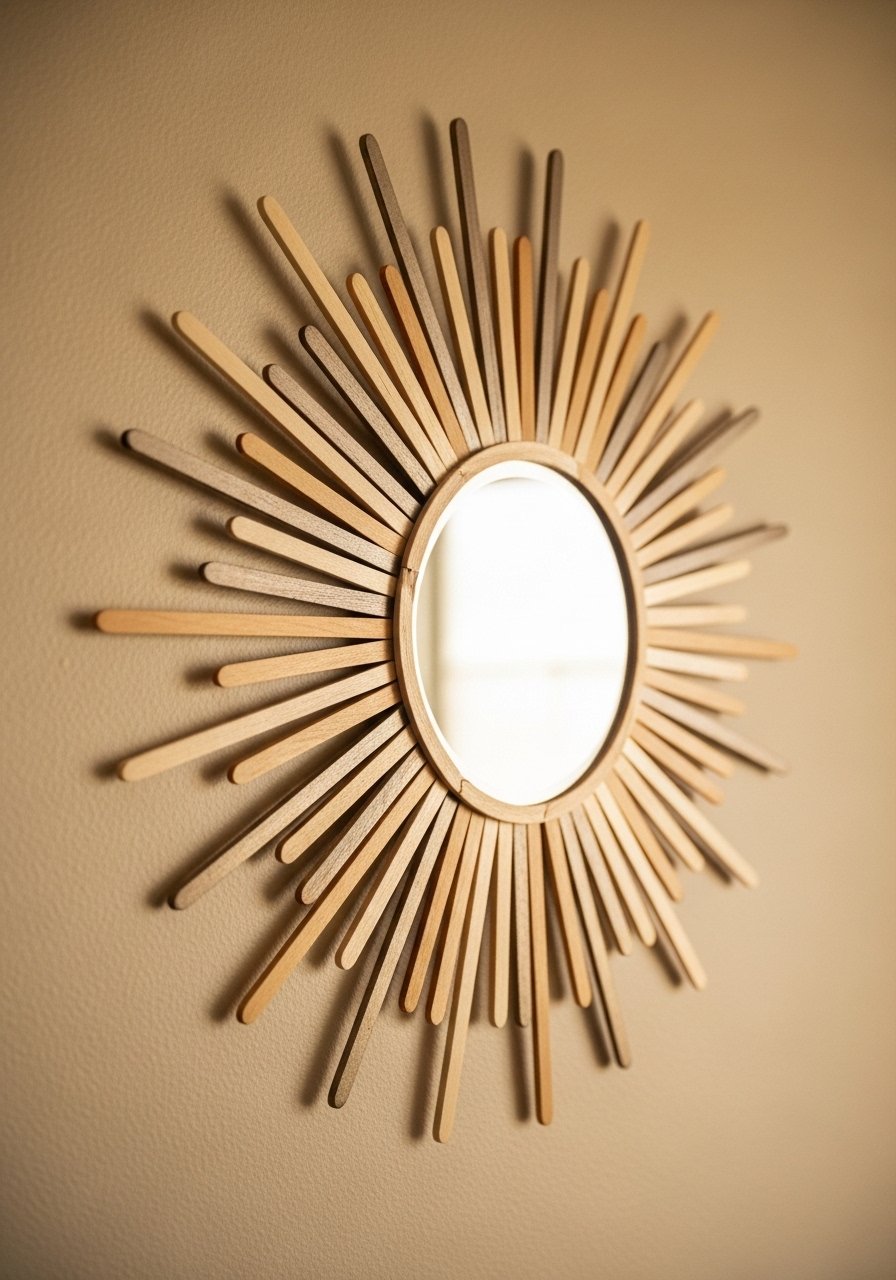
I glued craft sticks into a sunburst pattern around a small mirror and spray-painted them warm gold. It instantly read expensive on a plain wall. My mistake was using cheap glue that let a few sticks pop off—hot glue or E6000 was the fix.
This is great above a console or over a fireplace. The layered sticks catch light differently through the day and visually expand the wall. Keep the center mirror modest so the rays read like texture, not a disco ball.
What You’ll Need for This Look
7. Gem-Embellished Hinged Dressing Screen
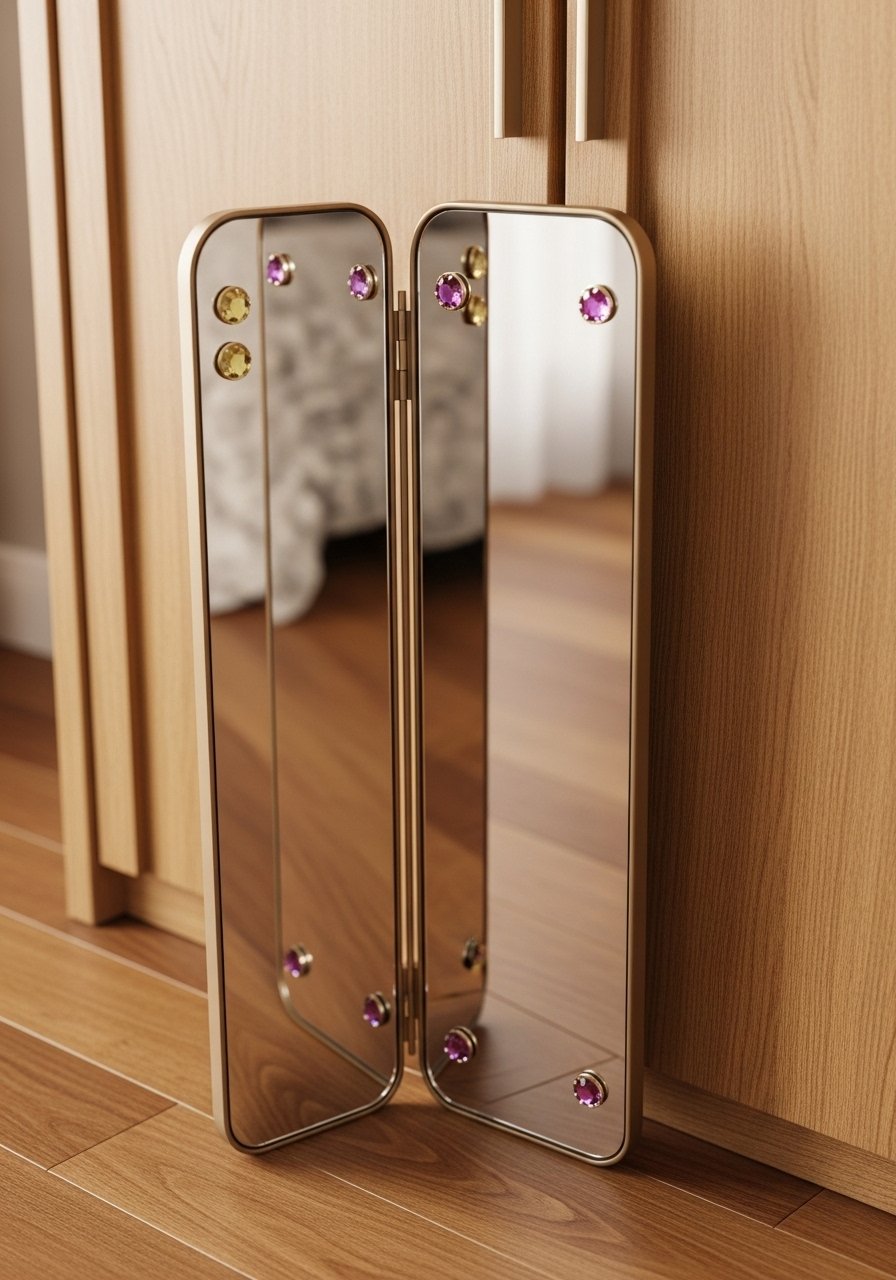
I made a hinged panel screen by gluing mirrors to lightweight panels and lining them with gems. It acts like a room divider and makes the bedroom feel larger. I confess I over-gemmed the first panel—less is more for a mild glam look.
When folded, it tucks behind a dresser and reflects more light. Hinges should be tight so the panels stand without sagging. This is my go-to when I want a portable, reflective statement.
What You’ll Need for This Look
8. Oval Mirror as Movable Room Divider
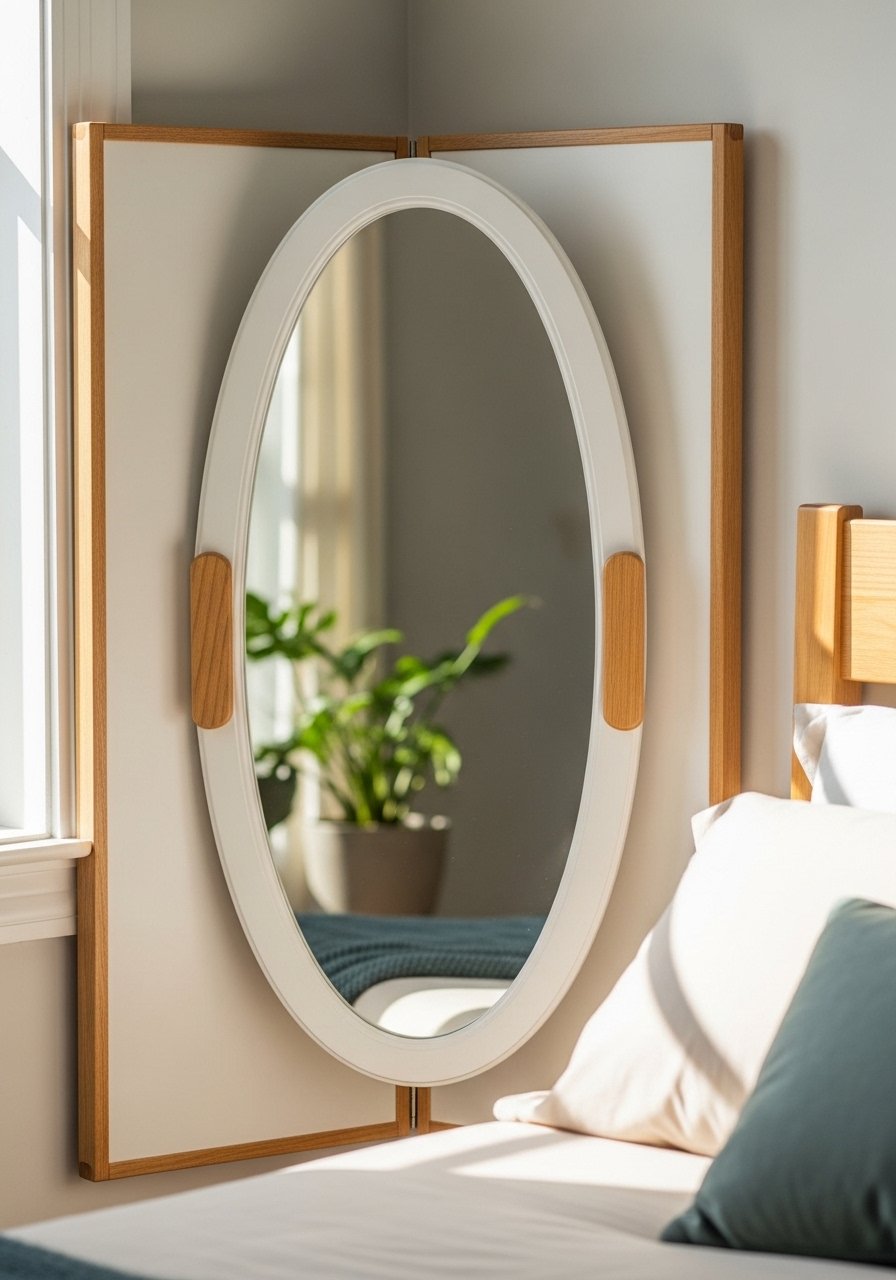
I hung an oval mirror on a slim folding screen to create a movable focal point. It brightened the corner and doubled as a dressing mirror. I initially used heavy panels and it was unwieldy—choose lightweight materials.
The oval softens the room’s boxy lines and the reflection adds perceived square footage. Moving it for photos or guests is easy and makes small rooms feel flexible. I like that it reads like furniture, not wall art.
What You’ll Need for This Look
9. Floral Stenciled Mirror Frame
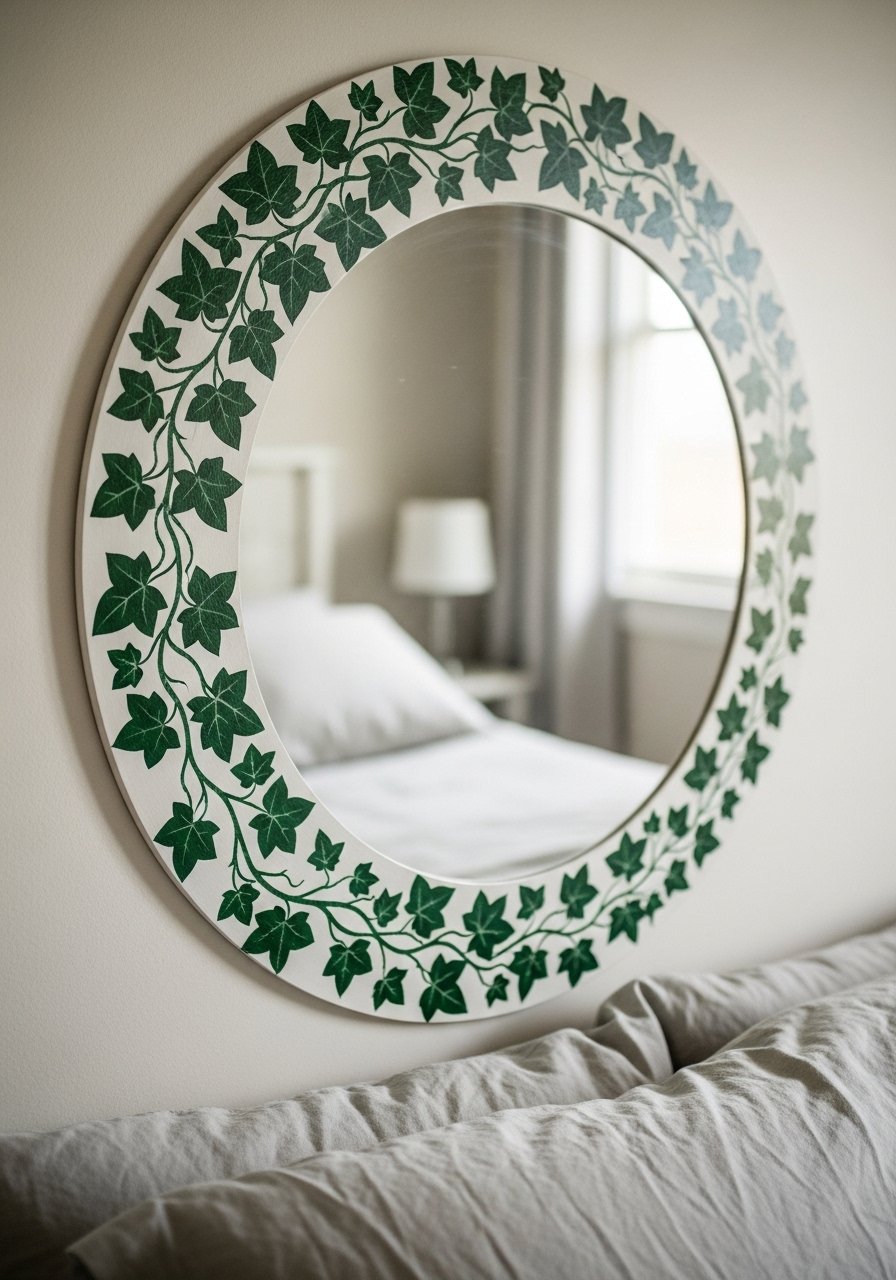
I painted ivy along a thrifted mirror frame with a stencil and watered-down chalk paint. It added a delicate layer of pattern without being busy. I ruined one attempt by using thick paint—the stencil bled—so thin layers are key.
This adds a cottage-y, cozy vibe and makes the mirror feel like part of the room’s story. The floral edge draws your eye, making the reflected space seem more curated. I usually seal it with Mod Podge for longevity.
What You’ll Need for This Look
10. Mirrored Tray Centerpiece for a Small Table
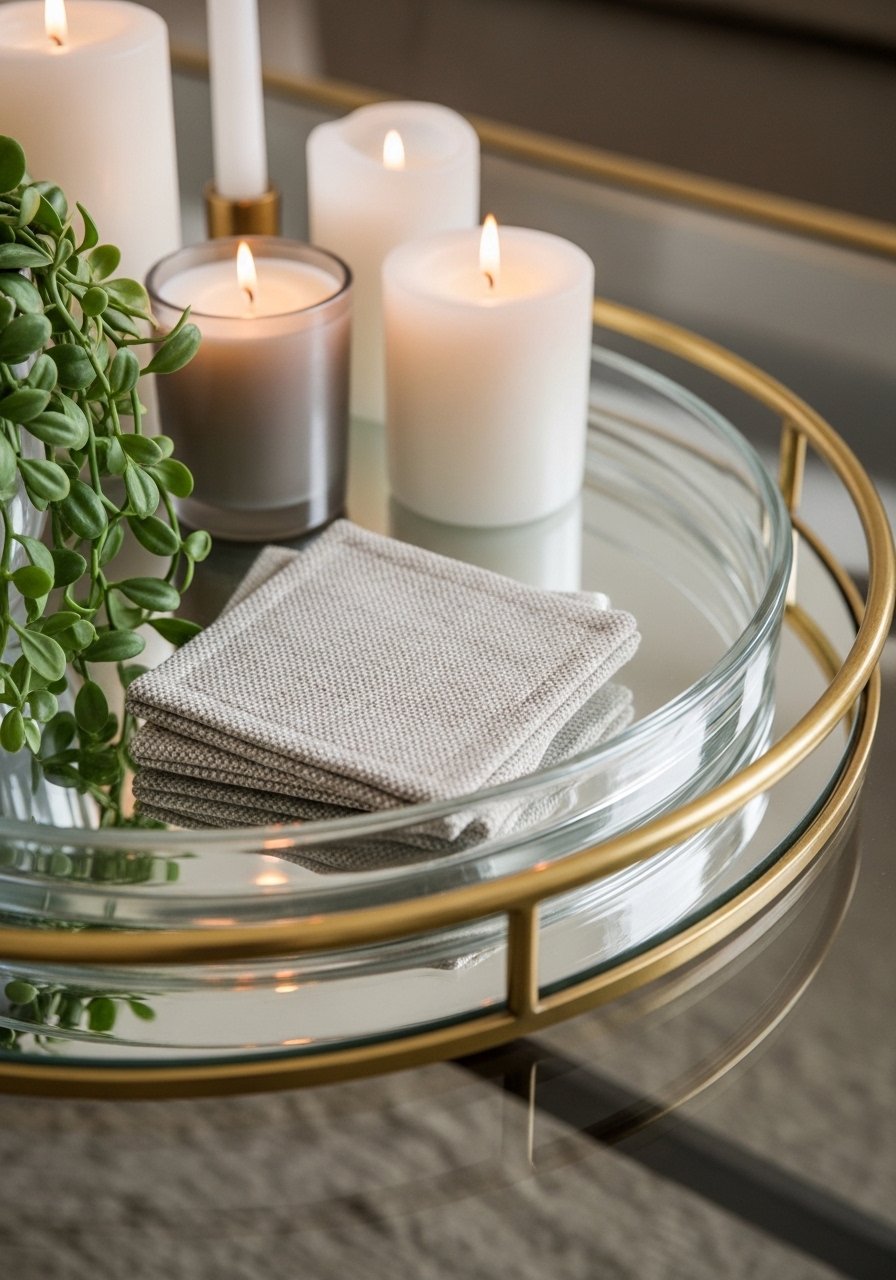
I used a small mirror to line the bottom of a tray and it made my coffee table look intentional and brighter. The reflection pops candlelight and keeps the table from reading flat. My first mirror was too heavy and shifted—use a glued liner.
It’s an easy swap when the seasons change and adds perceived space on tabletop vignettes. I prefer a slightly distressed rim to match my lived-in pieces. This trick makes tiny surfaces feel styled and airy.
What You’ll Need for This Look
11. Full-Length Leaning Mirror with Plant Shelf
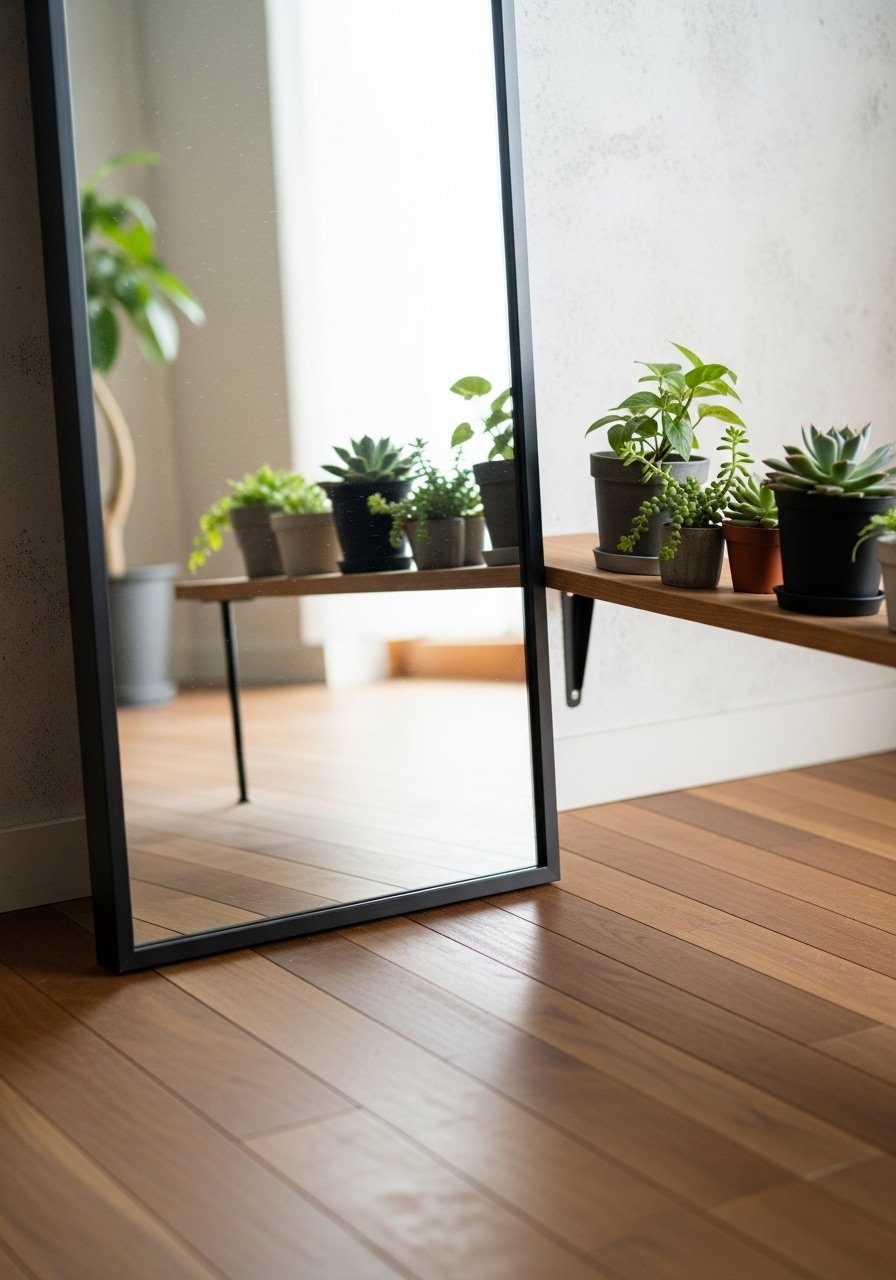
I leaned a tall mirror on the floor and added a narrow shelf in front for plants. The greenery reflected doubled the depth and felt fresh. I learned the hard way that the mirror needed anti-tip hardware—secure it even when leaning.
This setup brightens a bedroom corner and makes the room feel taller. The shelf keeps plants safe and frames the reflection. It’s an easy, low-commitment way to fill vertical space.
What You’ll Need for This Look
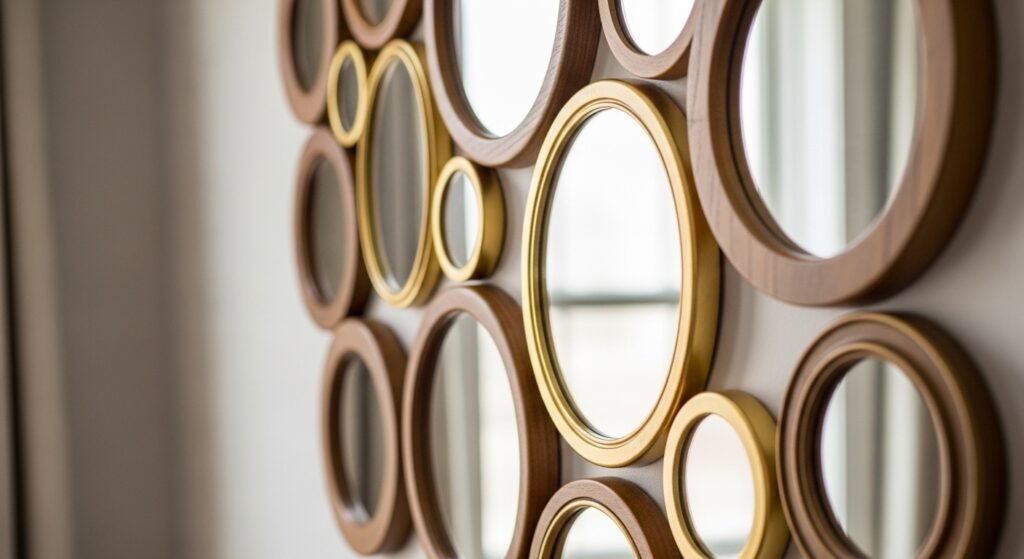
12. Cluster of Small Round Mirrors Above a Console
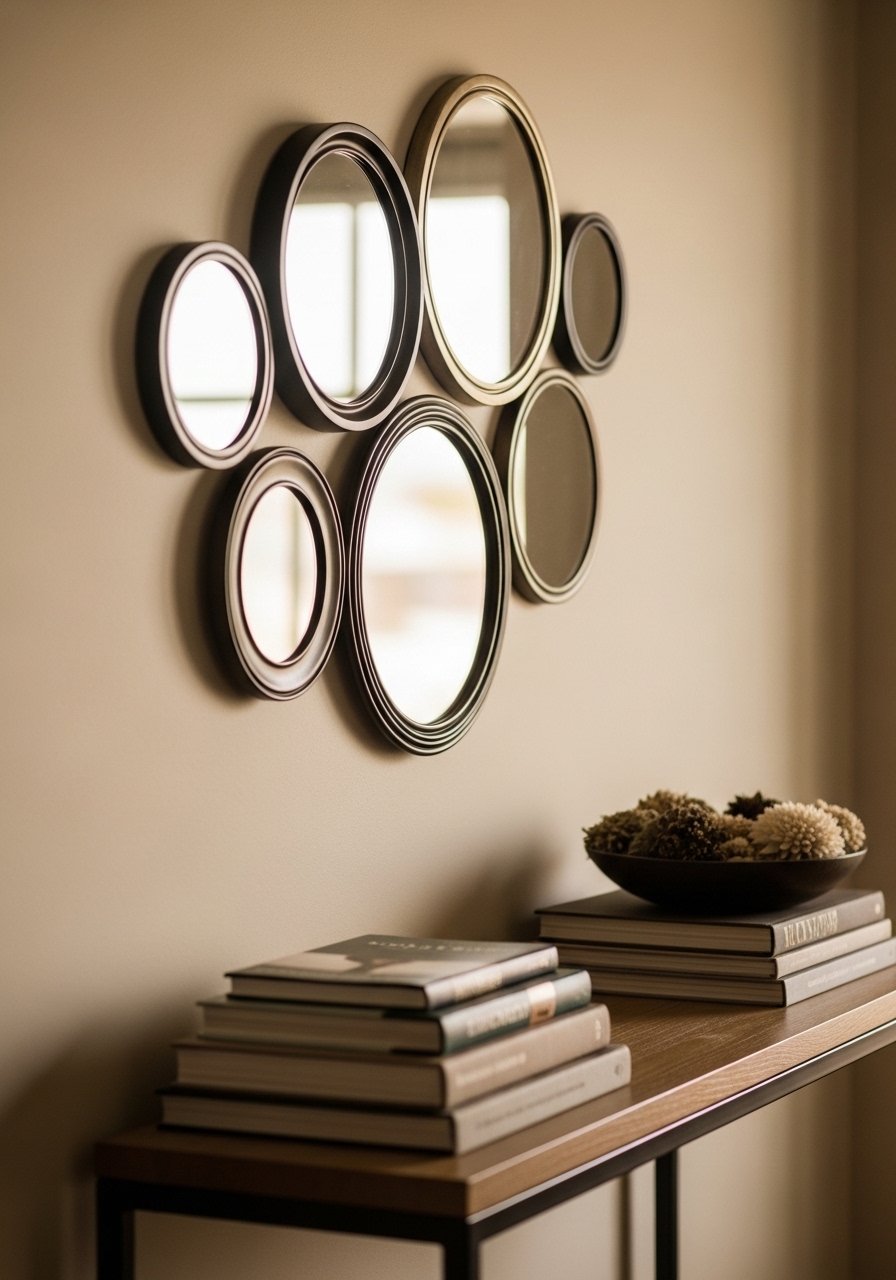
I grouped small round mirrors above a slim console and suddenly the narrow entry felt twice as bright. Early on I spaced them too far apart; tightening the cluster made it feel cohesive. Mirrors of slightly different sizes keep it casual, not contrived.
This arrangement plays well with a lamp and a bowl for keys. It feels intentionally layered, which is what my entry needed—some depth without bulk. I recommend mixing metals sparingly.
What You’ll Need for This Look
13. Mirror-Backed Bookshelf for Added Brightness
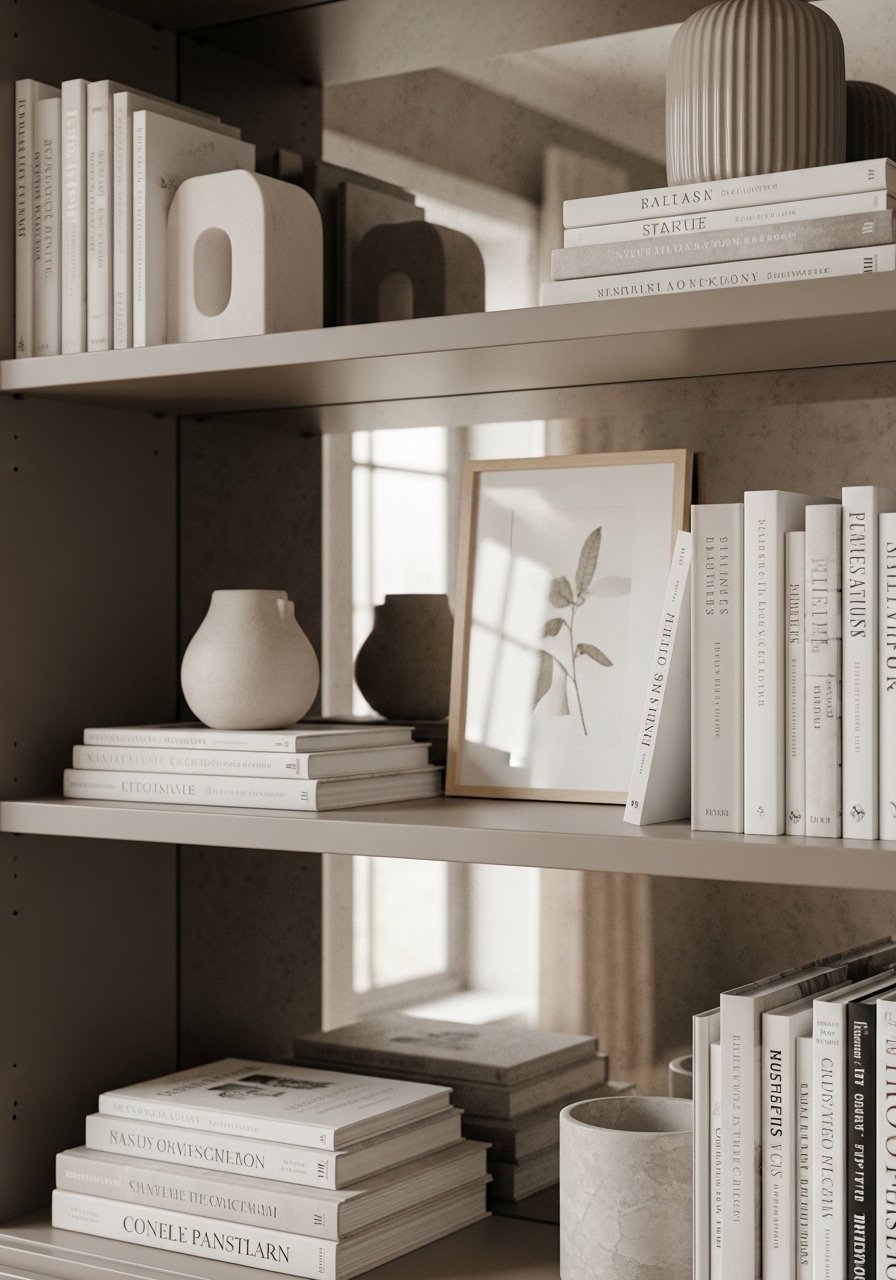
I added mirror panels to the back of a bookshelf and it opened the whole wall. The reflection adds light to the shelf contents and makes the room feel more layered. Cutting the mirror was scary at first—my edges were rough until I used a stable cutter.
This is especially good with open shelving in small rooms. It’s subtle but makes the books and objects read lighter. Keep heavy objects away from the mirror seam to avoid pressure cracks.
What You’ll Need for This Look
14. Bathroom Medicine-Cabinet Mirror Facelift
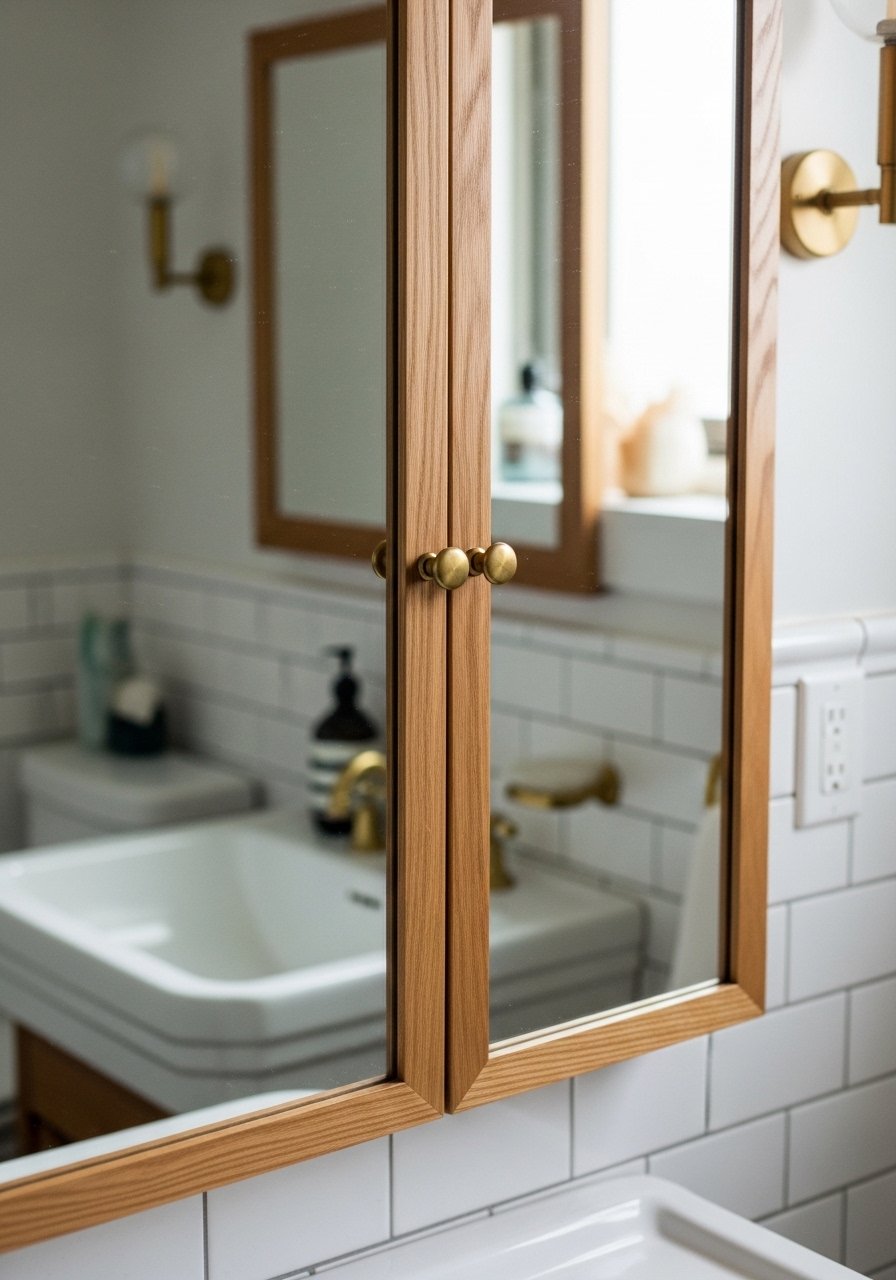
I upgraded a bland medicine-cabinet mirror with thin wood trim and tiny brass knobs. It made that utilitarian spot feel considered. I sanded too much on one side and had to repaint—careful with thin trim.
This small change makes the whole bathroom read more finished and opens the space by reflecting tile and light. It’s a good weekend tweak if you’re renting and want a quick improvement.
What You’ll Need for This Look
15. Tiny Mirror Cluster on a Nightstand
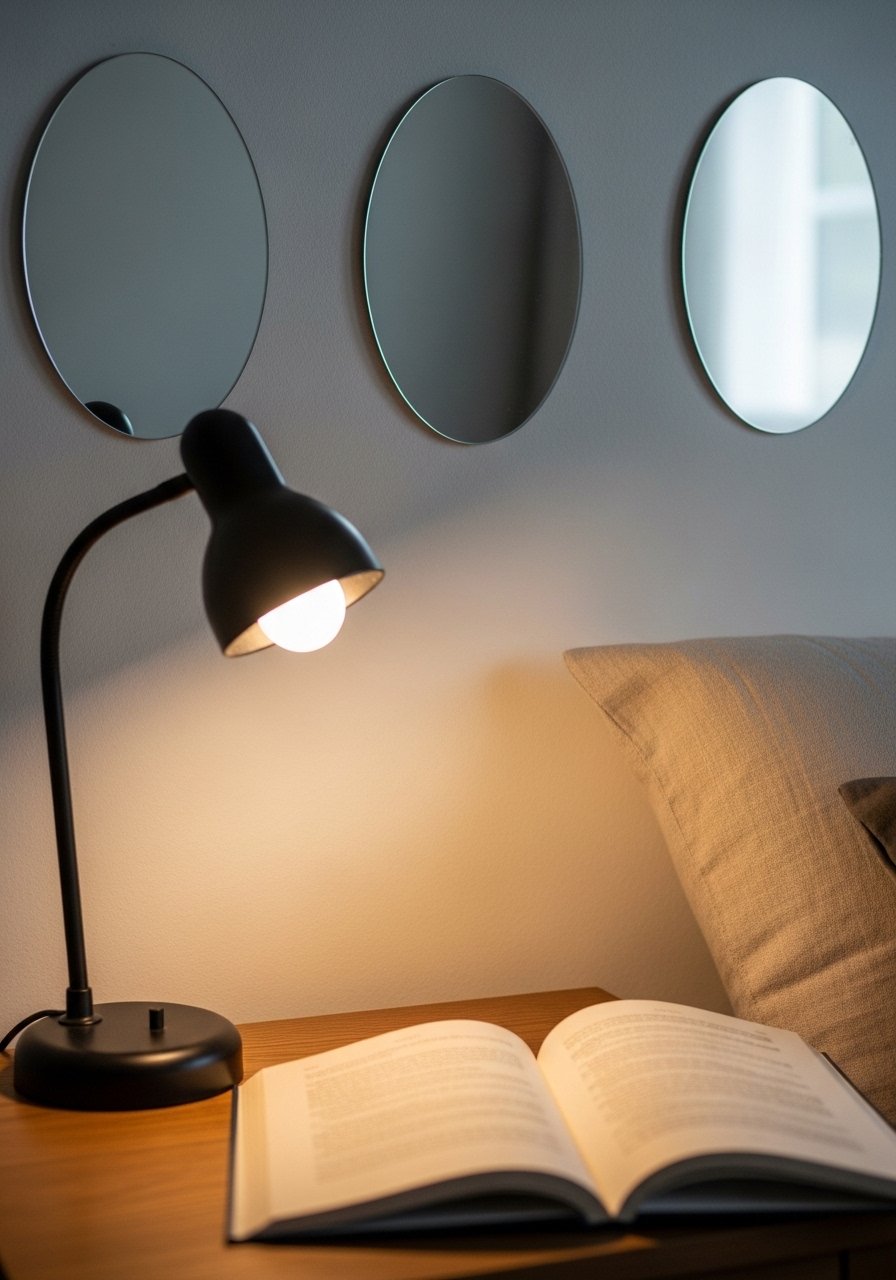
I grouped three tiny mirrors above my nightstand and it made the bedside vignette feel intentional. The reflection helps the lamp light spread and avoids the cramped look. Initially I picked mirrors that were too shiny—I swapped for slightly antiqued ones for softer light.
It’s an easy, low-cost way to finish a bedside wall. I move them seasonally with other small art and it never feels overdone. Keep the mirrors within arm’s reach so they read like part of the bedside styling.
What You’ll Need for This Look
16. Mirrored Closet Door Decals for Wider Feel
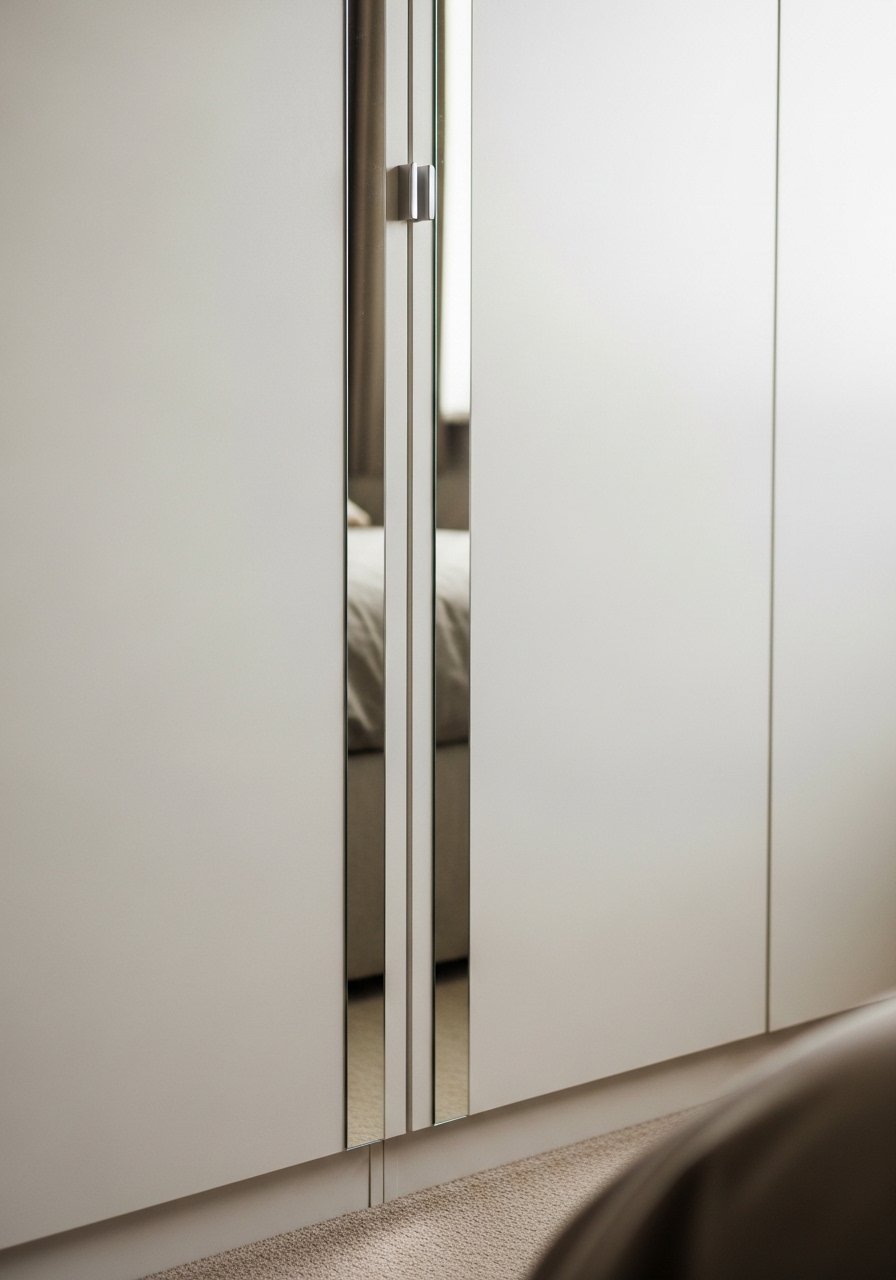
I used adhesive mirror strips on closet doors when a full-length mirror wasn’t possible. They add a long reflective line and the room reads taller. I learned to measure twice—one strip off-center looks obvious.
This renter-friendly trick avoids drilling and is reversible. It’s especially helpful in narrow bedrooms or hallways where you want a taller feeling without heavy frames.
What You’ll Need for This Look
17. Mirrored Wall Art with Plate Cutouts

I glued small mirror cutouts and decorative plate fragments around a center mirror to make a tactile art piece. It reads interesting and gallery-like. My first version used too many patterns and felt busy—simpler plates were the fix.
This is a great way to use thrifted plates and mirror bits for a personalized wall. It fills wall space without heavy frames and reflects light in a soft, sculptural way.
What You’ll Need for This Look
18. Oversized Frame with Punched Mirror Panel
I found a giant empty frame and installed a punched mirror panel in the center to create an oversized focal point. It made the room feel anchored without heavy art. I underestimated the weight of the mirror—two people are better for installation.
This reads dramatic but is reversible; I can swap in a print later. The scale makes the wall feel generous, which is the easiest way to make a room feel bigger.
What You’ll Need for This Look
19. Mirrored Headboard for Extra Light
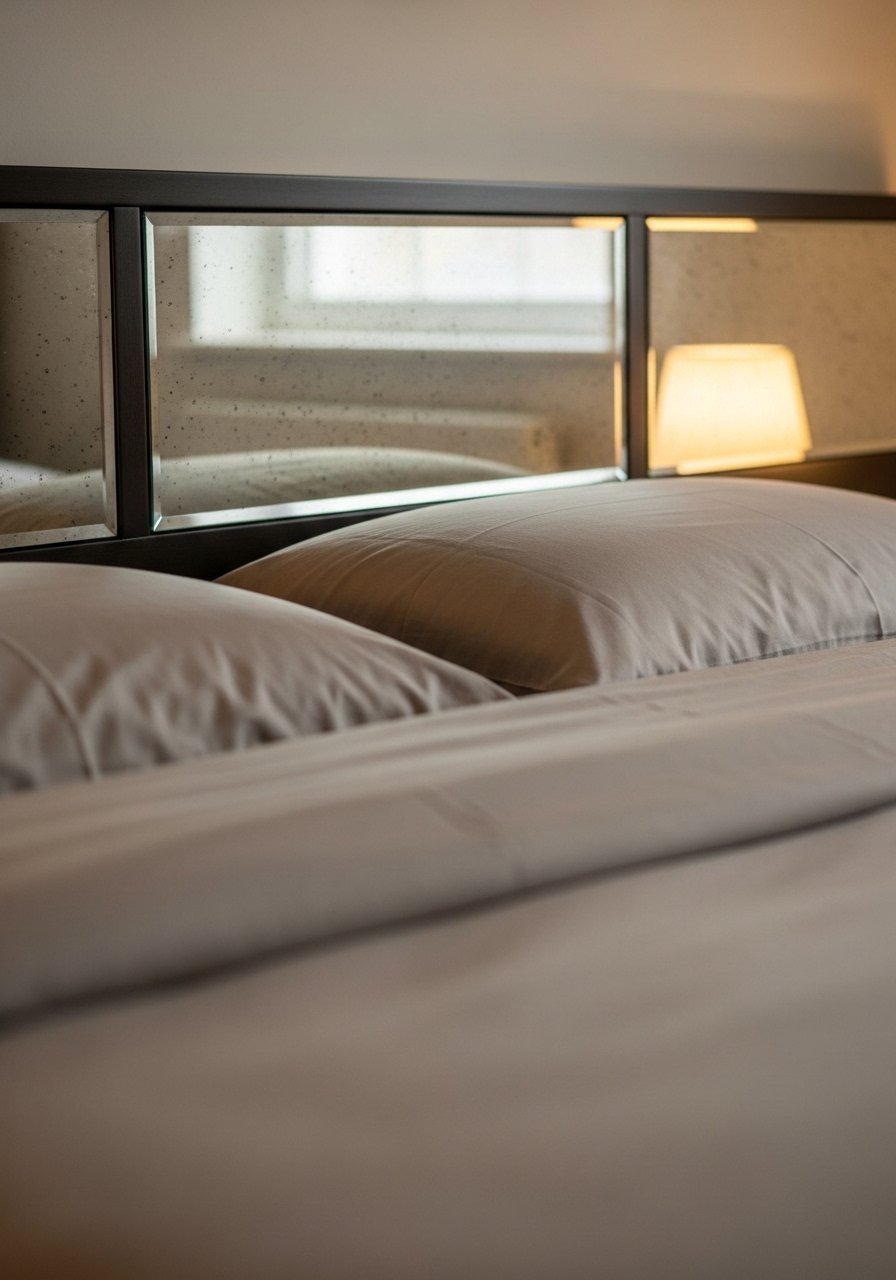
I made a low mirrored headboard from several mirrored panels. It brightened the bedroom and reflected natural light from the window. My first attempt had seams that shifted—adding trim hid the edges and stabilized the panels.
This trick makes a small bedroom feel airy and less boxed-in. Keep the headboard height modest so it doesn’t feel like a funhouse mirror; subtlety is key.
What You’ll Need for This Look
20. Antique-Look Distressed Mirror Frame
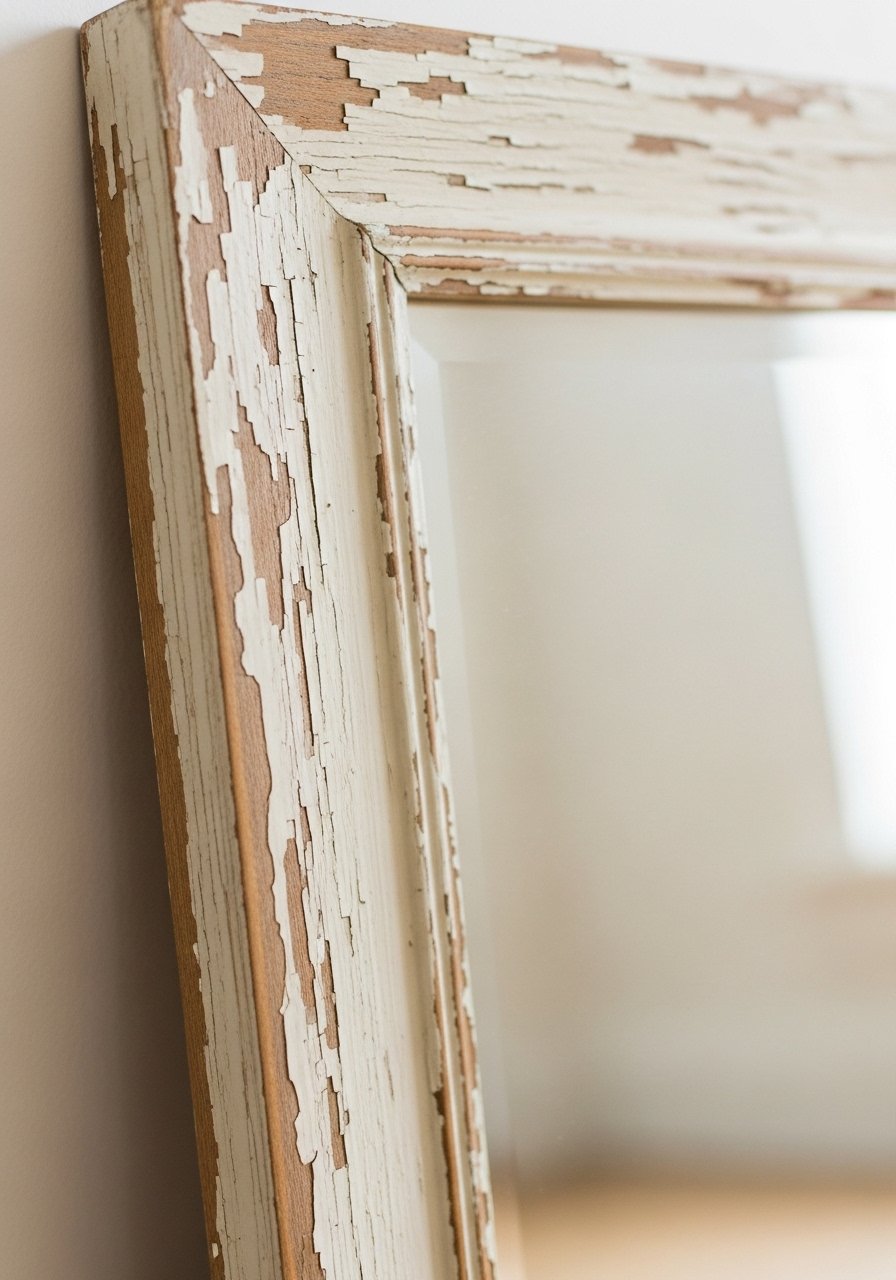
I gave a cheap mirror frame an antique look with layered paint and light sanding. It suddenly felt like a found piece in my home. I over-sanded one corner and exposed raw wood—an easy fix with a light glaze to blend the edge.
The distressed frame adds character and makes the reflection softer. It’s a small investment that blends with vintage and modern pieces alike. I use this whenever a mirror looks too new for my space.
What You’ll Need for This Look
21. Mirror-Trimmed Floating Shelf

I added mirrored trim to the front edge of a floating shelf and it reads custom. The reflection makes the shelf appear thinner and lighter. My trimming was uneven at first—use clamps to keep it straight.
It’s a small detail that quietly expands the wall and brightens objects on the shelf. Perfect for a vignette that needs a little lift without another picture.
What You’ll Need for This Look
22. Mirrored Accent Tiles in a Small Nook
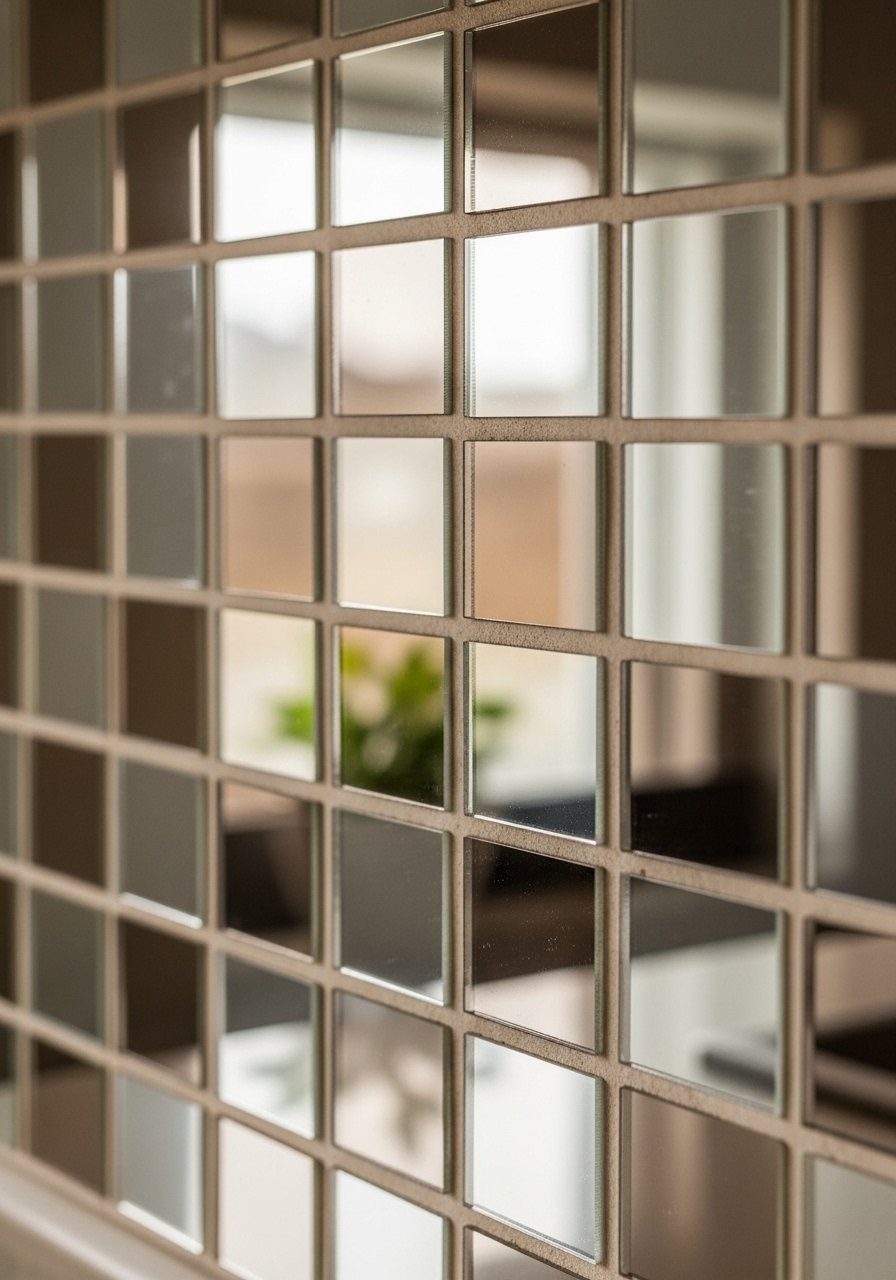
I used small mirrored tiles on a tiny kitchen nook backsplash to reflect under-cabinet light and make the nook feel like part of the kitchen, not a box. I mis-measured grout spacing the first time and had to re-lay a row—patience matters.
This works well in small cooking corners or behind a coffee station. The tiles pick up color and add depth without a dramatic overhaul.
What You’ll Need for This Look
23. Layered Mirrors Over the Mantel
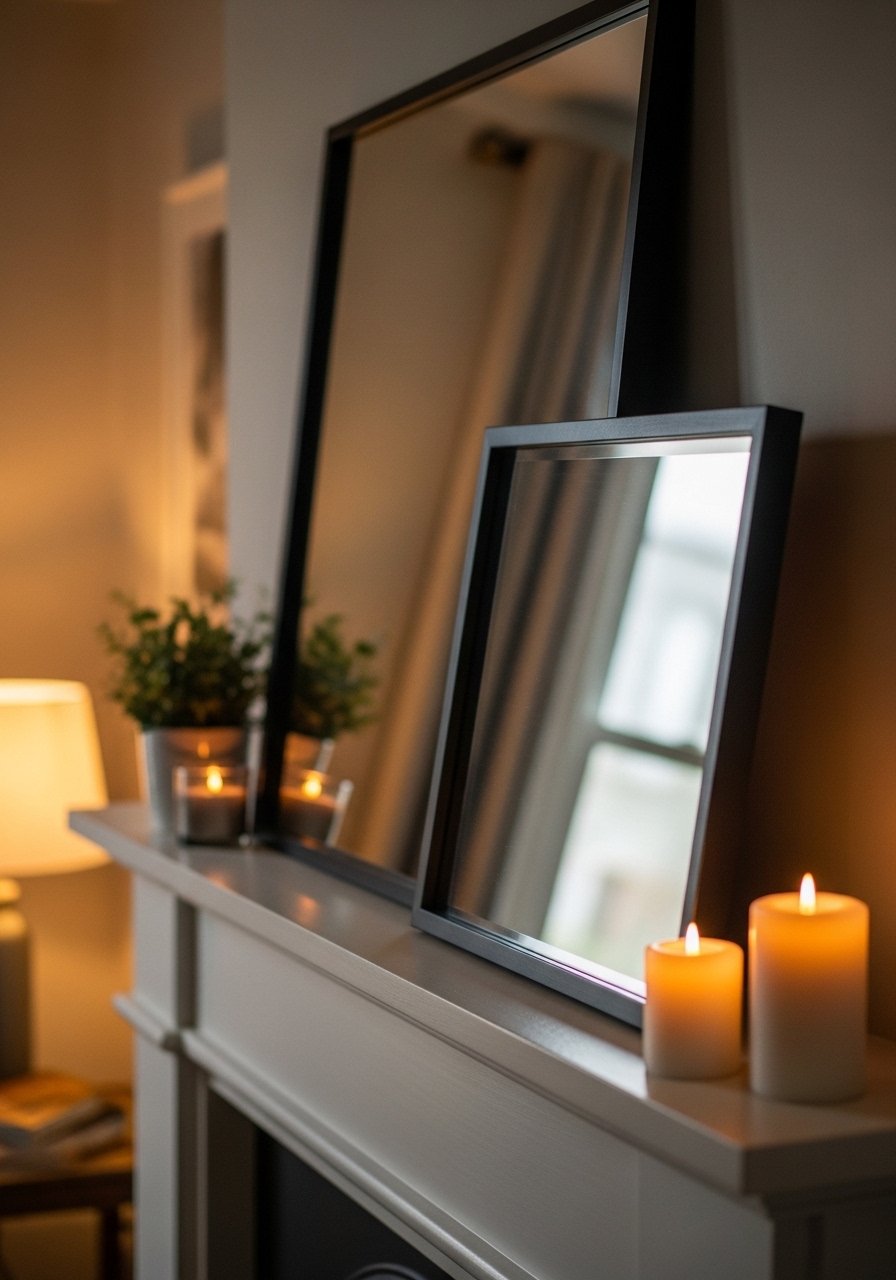
I layered a large mirror with a smaller framed mirror in front on my mantel. The stacking gave the fireplace depth and felt effortless. I learned that too many layers look cluttered—two did the trick.
This layered approach reflects the room and the firelight, adding life without being showy. It’s also easy to switch the front mirror seasonally for new texture.
What You’ll Need for This Look
24. Mirrored Console Drawer Fronts for Light
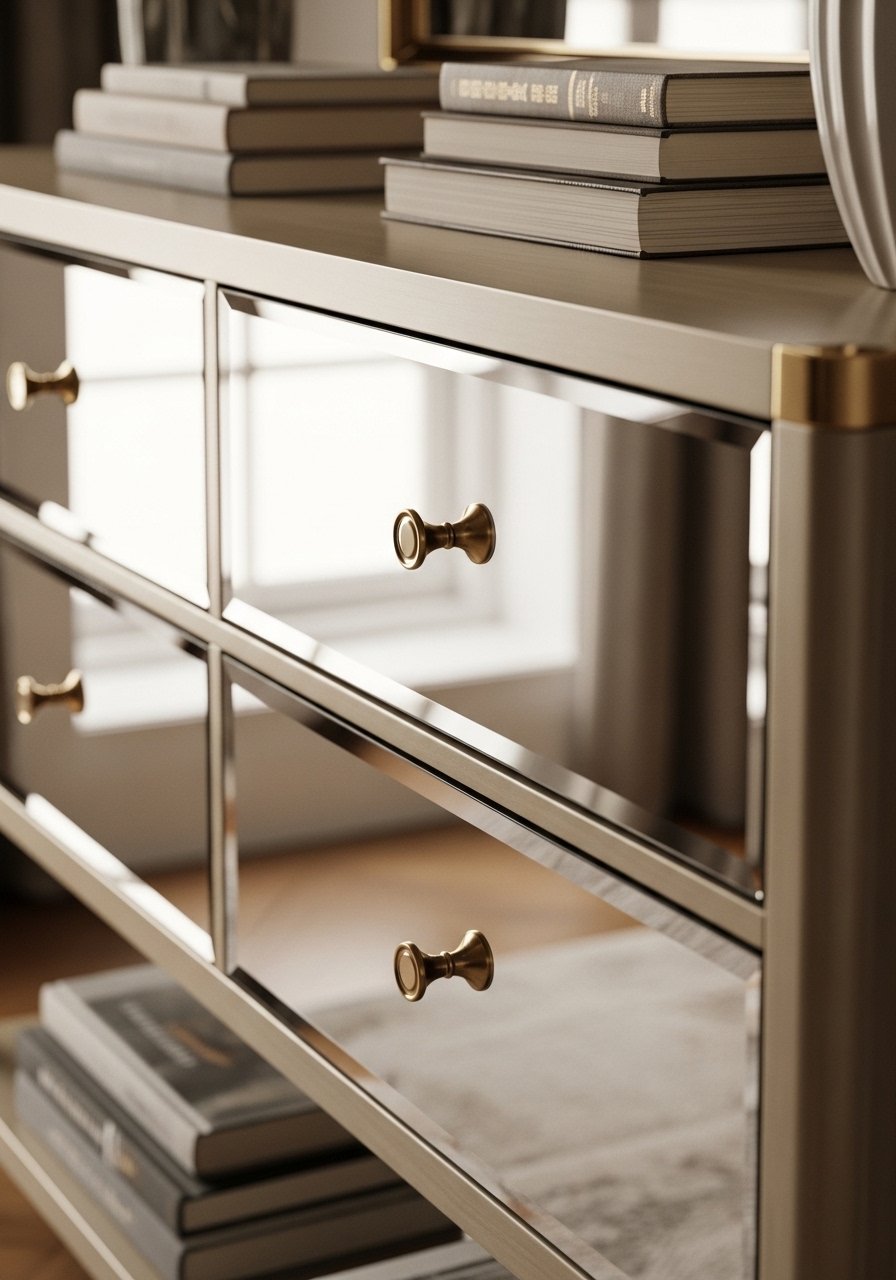
I replaced cheap drawer fronts with mirrored panels on a console and the small entry felt instantly brighter. One panel bubbled when I didn’t clean the surface—prep matters. Once smooth, it reads like a bespoke piece.
This is a small furniture update that makes the surface reflect light and feel less heavy. It’s a DIY that looks custom if you take your time.
What You’ll Need for This Look
25. Minimal Round Mirror Above a Sink for Quiet Space
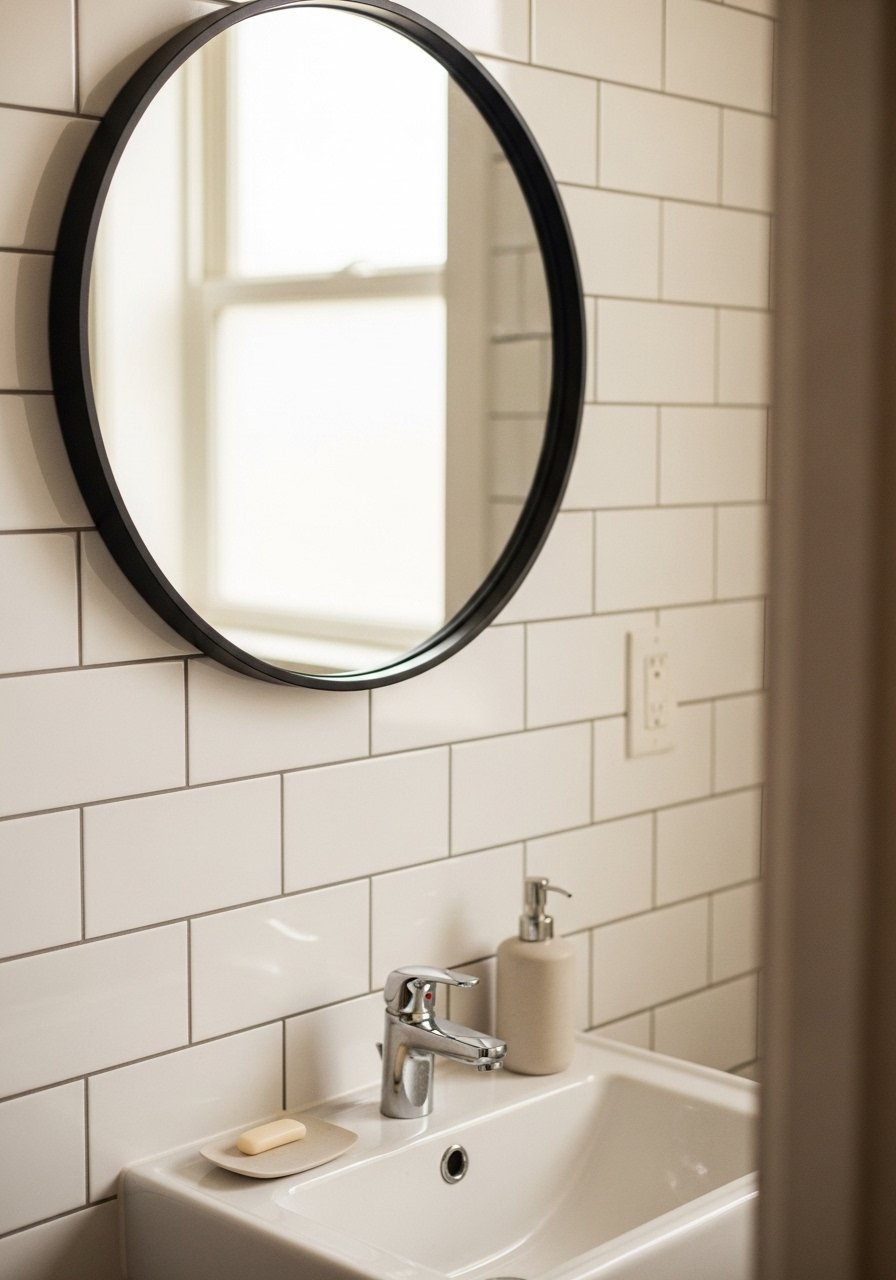
I swapped a dated mirror for a clean round one in my powder room and the small space finally felt calm. The simple shape made everything feel less cluttered. My first mirror was too large and made the sink look dwarfed—scale matters.
A single round mirror can make a tiny space feel proportionate and airier. It’s a quick swap that changes the mood and makes the room seem larger without fuss.
What You’ll Need for This Look
Final Thoughts
You don’t need every trick at once. Pick one mirror project and live with it for a month. You’ll notice how light and scale change the room.
I still return pieces and tweak finishes. That’s part of making a home feel like yours—slow and practical.
