


DIY furniture can transform a home without breaking the bank. Even simple projects can look store-bought when done with care. This guide shares 21 DIY furniture projects that are stylish, practical, and beginner-friendly. Each build is designed to use basic tools, affordable materials, and clear instructions, so you can create pieces that suit your space. From coffee tables to storage solutions, these projects are crafted for small spaces, apartments, and budget-conscious DIYers.
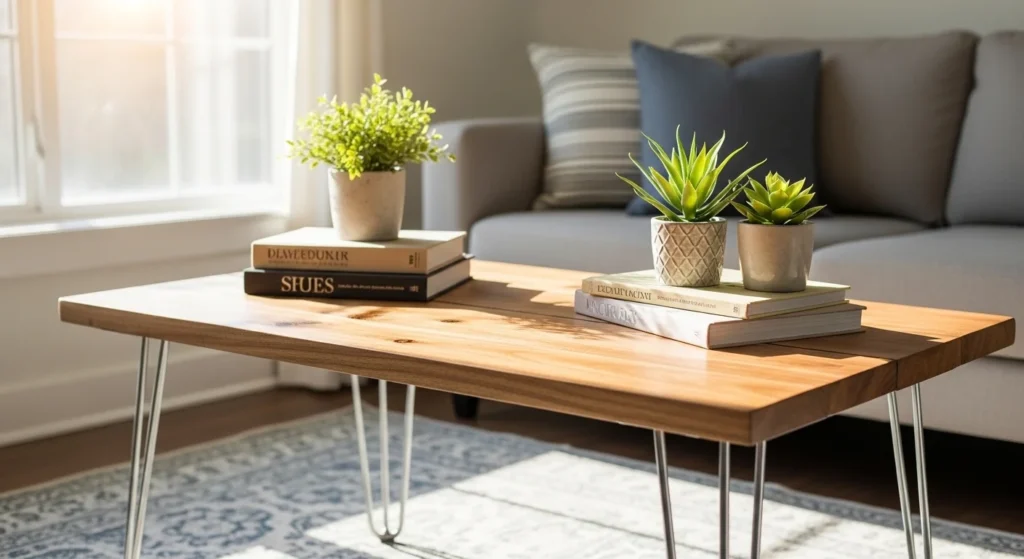
1. Minimalist Coffee Table with Hairpin Legs
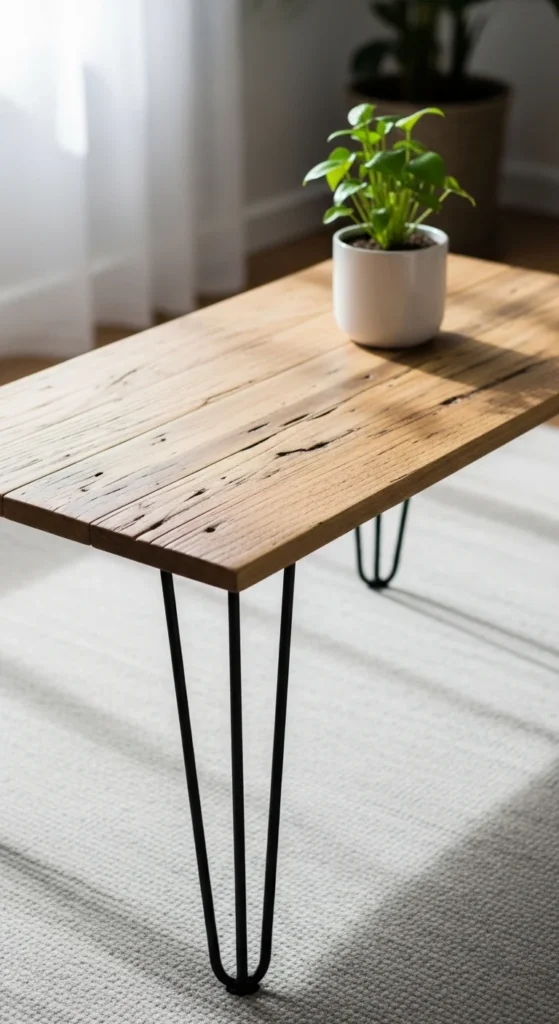
A simple coffee table can be the centerpiece of your living room. Using a single wood plank and affordable hairpin legs, you can make a minimalist table in a few hours. Sand the wood, apply a light stain, and attach the legs for a sleek finish. Look for reclaimed wood or Home Depot planks to keep costs low. Optional: add a clear coat for durability. The beauty of this table is its simplicity—it works in small apartments and larger living rooms alike. Pair it with a rug and a plant for a cozy vibe. No special tools required, just a drill, screws, and sandpaper.
2. Floating Wall Shelf with Hidden Brackets

Floating shelves are functional and stylish. You can make a floating wall shelf using a plank of wood and hidden brackets. This project is perfect for books, plants, or kitchen storage. Choose a wood finish that matches your décor—pine is cheap and easy to work with. Pre-drill holes and install the hidden brackets so the shelf seems to float. Budget tip: repurpose an old shelf or plank for a zero-cost build. This project is beginner-friendly, requires only a drill and level, and adds instant storage without cluttering floor space. Mount at eye level for maximum visual impact.
3. Rustic 2×4 Storage Bench

A 2×4 bench is a practical addition to any hallway or mudroom. Build the frame with 2×4 lumber, secure with screws, and sand the surfaces smooth. The top can be left natural or stained. The open space underneath is perfect for baskets, shoes, or bags. This bench is sturdy enough for daily use and can double as extra seating. For cost savings, check local hardware stores for scrap wood or use reclaimed planks. Tools needed are minimal: a saw, drill, and sander. This project teaches basic joinery while creating a piece that looks rustic but polished. Optional: add a cushion for comfort.
4. Mid-Century Inspired Nightstand

Give your bedroom a designer touch with a mid-century nightstand. Use a small wood box for the drawer and add tapered legs to create the classic style. Stain or paint the nightstand to match your room. This project is compact and works well in apartments or guest rooms. Use a simple drawer slide system and basic screws for assembly. Even beginners can achieve a store-bought look if you sand carefully and finish evenly. Budget tip: repurpose old dresser drawers or shop for scrap wood. This nightstand is practical, stylish, and takes just a few hours to complete.
5. Industrial Pipe Bookshelf
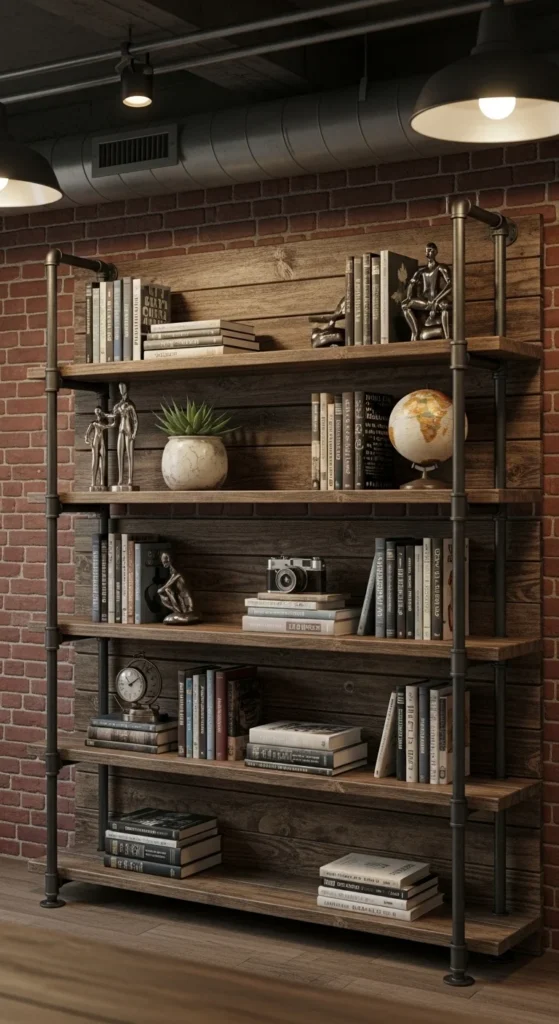
Industrial style is trendy and easy to DIY. Combine wood planks with metal pipes to build a sturdy bookshelf. Pipes act as legs and support, while the wood holds your books and décor. You can adjust height and width to fit your space. Pipes are available at hardware stores; planks can be new or reclaimed. Assembly is simple—just screw the pipes together and secure the shelves. This project creates a loft-inspired look with minimal tools. Optional: paint the pipes black and stain the wood for a professional finish. Great for living rooms, bedrooms, or offices.
6. Corner Ladder Shelf

Corner spaces are often underused. A ladder shelf fits snugly and offers vertical storage. Use inexpensive pine planks for the steps and 1x2s for the side rails. Paint or stain for a polished look. This project is easy to customize—make it taller or shorter to fit your corner. Perfect for plants, books, or knick-knacks, it keeps floor space open. Budget tip: scrap wood or leftover planks work well. Assembly only needs screws, a drill, and some sanding. The angled design adds visual interest while maximizing storage, making it feel like a store-bought piece.
7. DIY Storage Ottoman

A storage ottoman is functional and stylish. Start with a simple wooden box frame. Add a hinged top and foam cushion, then cover it with fabric or faux leather. The interior can hold blankets, toys, or magazines. You can make one in a weekend using plywood and inexpensive fabric. For a refined look, sand the wood and apply paint or stain. Budget tip: thrifted cushions or fabric remnants save money. No advanced tools are needed—just a drill, staple gun, and screws. This piece is perfect for small living rooms or apartments, combining seating and hidden storage elegantly.
8. Rustic Floating Desk
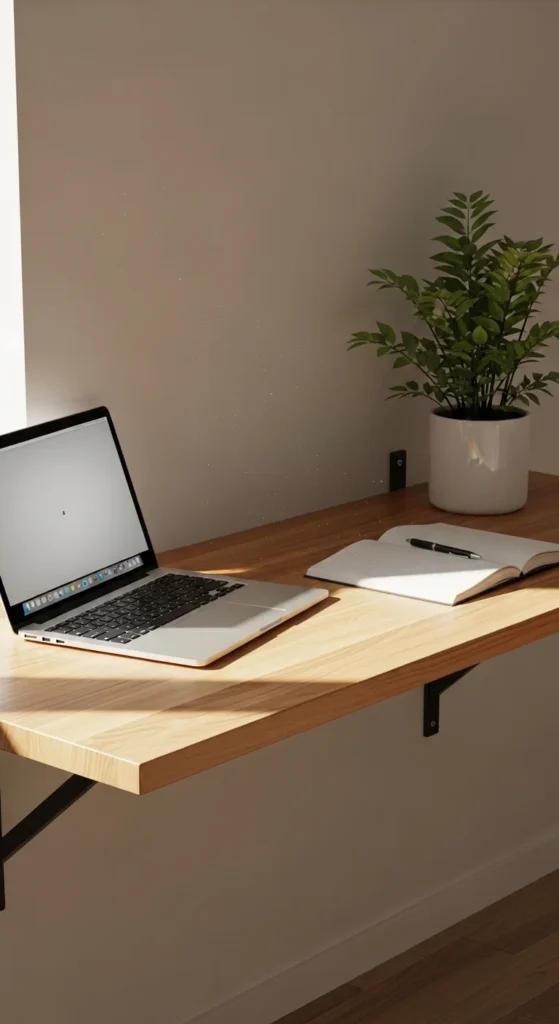
A floating desk keeps your workspace minimal and modern. Use a solid plank of wood and hidden wall brackets. This build frees up floor space and works perfectly in tight apartments. Choose a medium-sized plank for laptops and small office supplies. Sand, stain, or paint to match your décor. Budget tip: repurpose an old shelf or desk top to save costs. Tools needed are minimal: drill, level, and screws. This project is beginner-friendly and can be done in a few hours, giving your home office a sleek, store-bought look without the price tag.
9. Modular Cube Storage
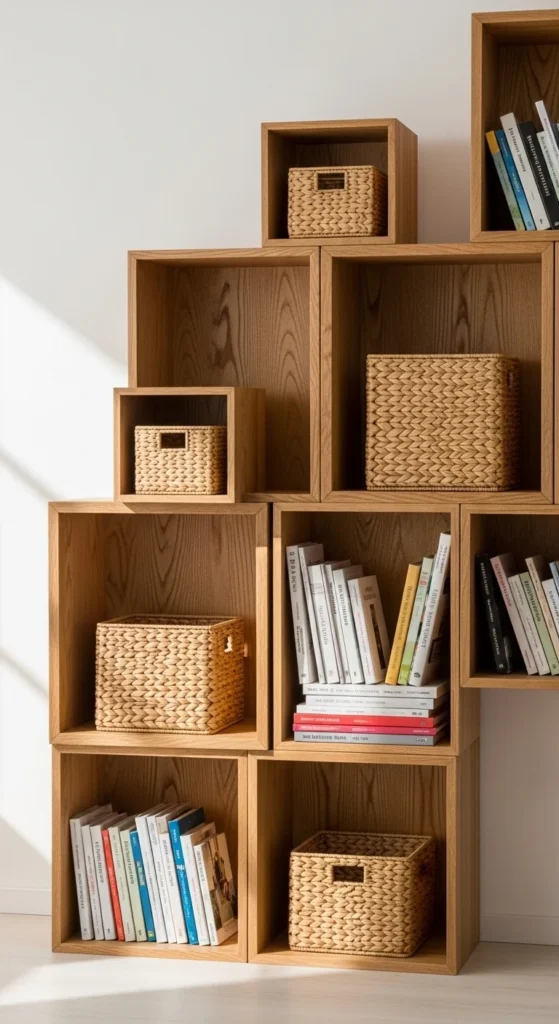
Modular cubes are versatile and adaptable for any room. Build small wooden boxes and stack them in different configurations—ideal for books, toys, or décor. Use ¾-inch plywood for strength, cut to uniform sizes. Budget tip: purchase wood panels from big-box stores or salvage scrap wood. Assembly requires only screws, wood glue, and clamps. You can leave the wood natural or paint for a pop of color. The beauty of this system is flexibility—you can expand as needed. With careful sanding and finishing, these cubes look professional and store-bought, while remaining completely DIY.
10. Wooden Shoe Rack Bench

Combine seating and storage with a shoe rack bench. Build a simple rectangular frame with 2x4s, add a top for sitting, and slatted shelves below for shoes. Stain or paint to match your entryway. This is perfect for apartments or small homes where space is limited. Budget tip: use leftover planks or reclaimed wood for the shelves. Tools required are basic: saw, drill, screws, and sandpaper. Assembly is simple and beginner-friendly. This functional piece doubles as a bench and storage, keeping your entryway organized while maintaining a polished, store-bought appearance.
11. Industrial Pipe Coffee Table

Give your living room an industrial vibe with a pipe coffee table. Use a solid wood plank for the top and black metal pipes for the base. Pipes are easy to assemble with threaded connectors. Sand and stain the wood for a polished finish. Budget tip: check hardware stores for scrap pipes or second-hand sections. This project requires only basic tools: drill, wrench, and screws. The table is sturdy and stylish, offering a loft-inspired look without paying designer prices. Optional: add a lower shelf using extra wood planks for extra storage.
12. Ladder-Style Towel Rack

A ladder towel rack is practical and decorative. Lean a simple ladder frame against the wall for towels or blankets. Use pine or oak planks for lightweight construction. Sand smooth and apply a clear finish for durability in bathrooms. Budget tip: repurpose old wood or cut down scrap boards. Assembly is minimal—just attach rungs securely with screws. This ladder adds vertical storage, keeping towels off the floor while looking like a boutique store display. Its angled design creates a casual, elegant aesthetic with minimal effort.
13. Foldable Dining Table
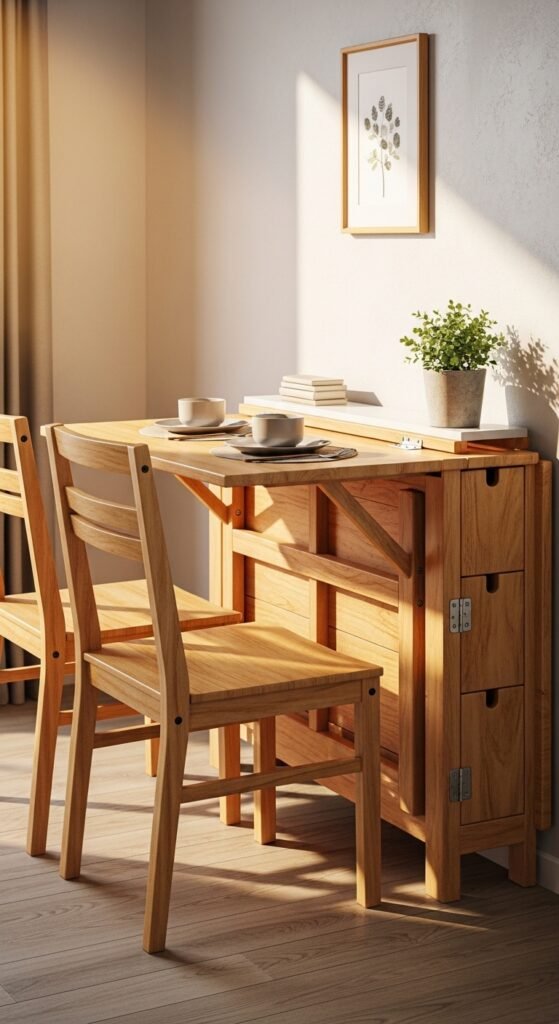
Small spaces benefit from a foldable dining table. Build a sturdy tabletop with folding legs using simple hinges. Stain or paint the surface for a polished look. Budget tip: use plywood for the tabletop and 2x4s for the legs. Tools needed: drill, screws, hinges, and sandpaper. When folded, it saves floor space; when opened, it seats 2–4 comfortably. Perfect for apartments or breakfast nooks. This project is beginner-friendly and combines practicality with a clean, store-bought aesthetic. Optional: add a drawer underneath for cutlery or placemats.
14. Rustic Wine Rack
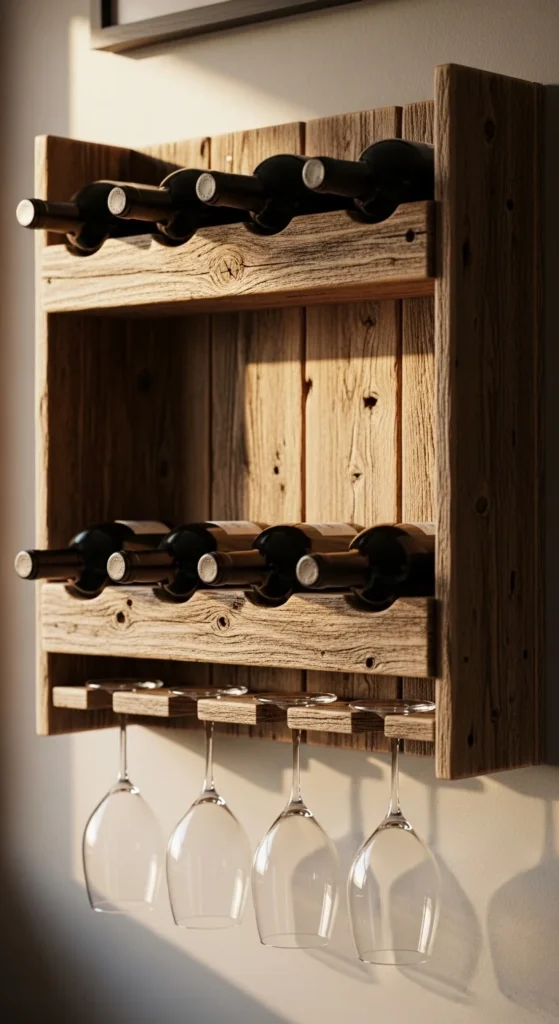
A rustic wine rack adds charm and storage. Use small wood planks to create horizontal slots for bottles, with a hanging section for glasses if desired. Stain or lightly sand for a rustic feel. Budget tip: repurpose old crates or planks for a zero-cost solution. Tools required are minimal: drill, screws, and clamps. Mount securely on a wall for safety. This DIY wine rack is perfect for kitchens or dining rooms and gives the appearance of a store-bought piece without the price tag. Optional: customize size to fit your bottle collection.
15. Open-Frame Bed with Storage

Create a platform bed with storage to maximize bedroom space. Use sturdy 2x4s or plywood for the frame and leave open areas underneath for baskets or boxes. Sand and stain the wood to create a polished finish. Budget tip: use reclaimed wood or scrap planks for a low-cost build. Tools needed are simple: drill, screws, and saw. This bed is beginner-friendly and functional, combining sleeping space with hidden storage. It looks clean and modern, similar to expensive platform beds in stores. Optional: add a headboard for extra style.
16. Compact Desk with Drawer

A compact desk with a drawer is perfect for small apartments or home offices. Use plywood or a solid plank for the tabletop and build a simple drawer with wood slides. Sand and stain or paint for a polished finish. Budget tip: repurpose an old drawer or scrap wood for the drawer box. Assembly requires only basic tools: drill, screws, and sandpaper. This desk keeps your workspace organized while looking like a store-bought piece. Optional: add metal handles or a small shelf above for extra storage.
17. Wall-Mounted Floating Nightstand

A floating nightstand is perfect for small bedrooms. Build a compact box and attach it to the wall using hidden brackets. This keeps floor space open while providing storage for essentials. Budget tip: use leftover planks or thin plywood for the box. Tools needed: drill, level, screws. Finish with stain or paint to match your décor. The floating design gives a clean, modern look, similar to high-end furniture. Optional: add a drawer for concealed storage.
18. Mid-Century Console Table

A mid-century console table can elevate a hallway or entryway. Build with a simple plank top and tapered legs. Sand and stain or paint for a polished finish. Budget tip: use pine or repurposed wood for an affordable option. Assembly is easy with basic screws and a drill. This table is perfect for keys, decor, or a small lamp. Even a beginner can achieve a professional look with careful sanding and finishing. Optional: add a small shelf underneath for extra storage.
19. Corner Plant Stand

A corner plant stand is functional and decorative. Build a tiered design with 2x2s or plywood for the shelves. Sand and stain or paint to match your décor. Budget tip: use scrap wood or old crates. Assembly is simple—just screws, glue, and a drill. Perfect for apartments or small rooms, it maximizes vertical space for plants without crowding the floor. The clean, simple design makes it look like a professional store-bought piece. Optional: add small brackets for extra stability for heavier pots.
20. Rolling Storage Cart

A rolling storage cart adds mobility and versatility. Use plywood or planks for the shelves and attach caster wheels for easy movement. Perfect for kitchens, living rooms, or craft areas. Budget tip: find affordable casters online or repurpose old ones. Tools needed: drill, screws, and sandpaper. You can stain, paint, or leave the wood natural. The cart is functional, beginner-friendly, and looks like a store-bought piece. Optional: add side handles for easier pushing and pulling.
21. Floating Bookshelf with Hidden Brackets

A floating bookshelf gives any room a modern, clean look. Build a simple plank shelf and mount it using hidden brackets or cleats, so it appears to “float” on the wall. Sand and finish with stain or paint to match your décor. Budget tip: use a single sturdy plank or repurpose old shelving boards. Tools required are basic: drill, level, screws, and brackets. This project is beginner-friendly, adds storage without taking up floor space, and looks just like a high-end store-bought piece. Optional: create multiple shelves at different heights for a custom library effect.
